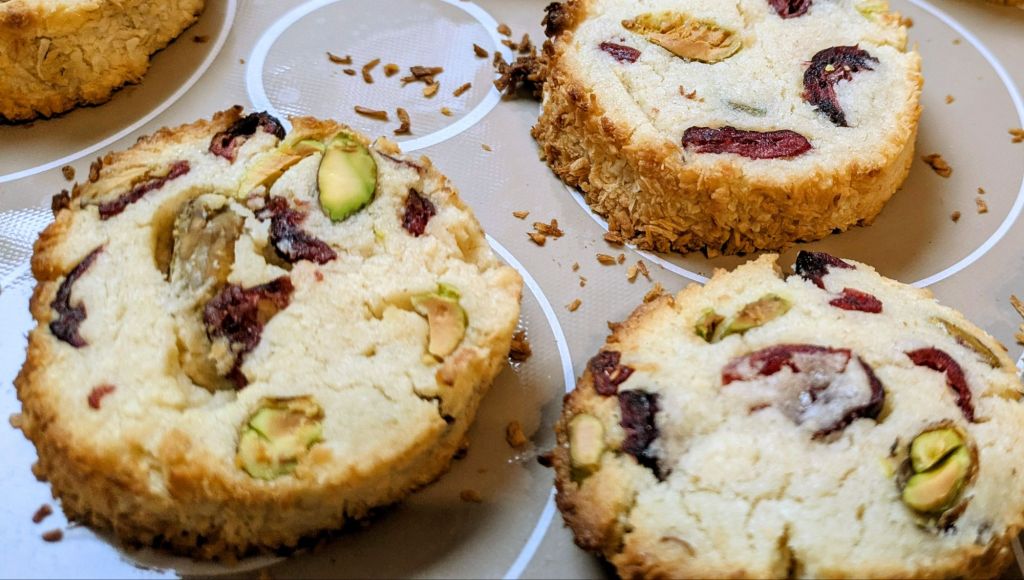
A bit late with this Christmas recipe, but I love these buttery cookies, dotted with festive red and green from pistachios and dried cranberries. The traditional recipe uses glace cherries, but I think this makes the cookies just too sweet. So it depends how much of a sweet tooth you have.
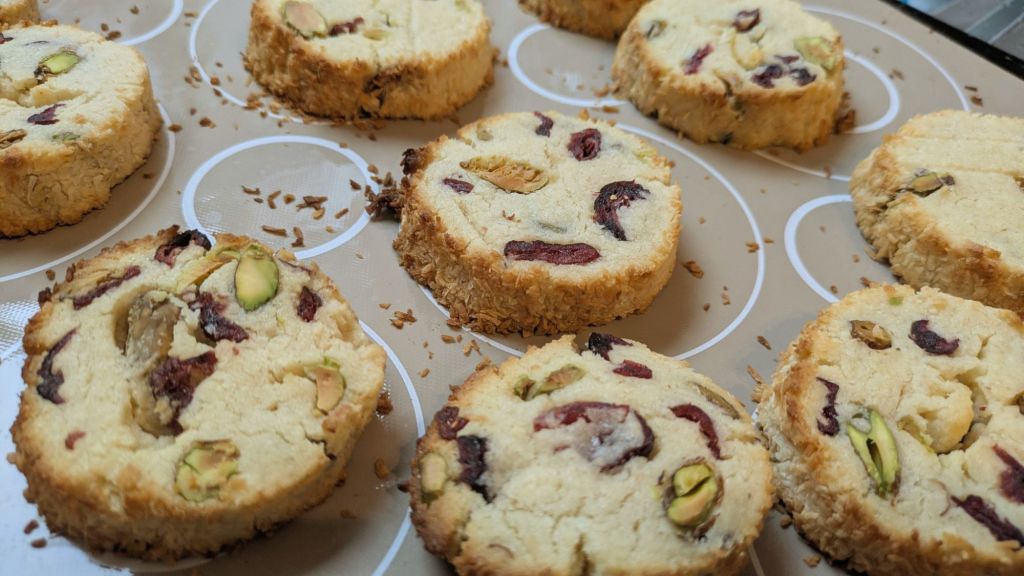
The whiskers part is from the shredded coconut on the edge of the cookies that is meant to resemble Santa’s whiskers. You can easily scale up this recipe if you want to give these as gifts. If you’re having visitors over Christmas you can keep the prepared dough in your fridge for a day or two and just bake before people arrive.
Makes 8-10
110 Grams Butter (softened)
Ingredients
75 Grams Sugar
1 Tablespoon Milk
1/2 Teaspoon Vanilla extract
175 Grams Plain flour
30 Grams Dried cranberries
30 Grams Pistachios (shelled)
50 Grams Desiccated coconut
Method
- Cream the butter and sugar together with an electric whisk
- Add the milk and vanilla extract
- Stir in the flour and mix until well combined, add the cranberries and pistachios and then get your hands into the bowl and gently shape press the dough together
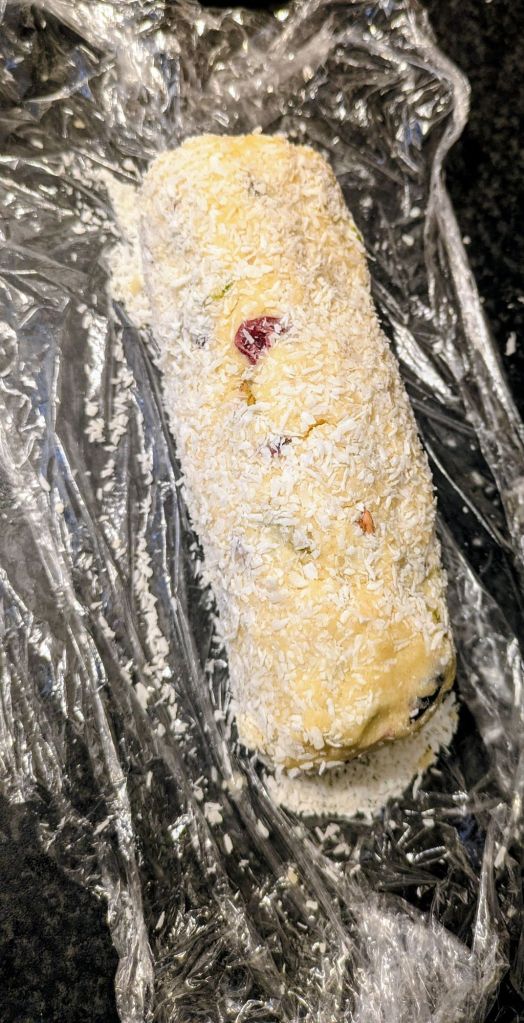
- Place a sheet cling film on your counter top, and sprinkle it with the coconut
- Shape the cookie dough into a sausage shape, about 3-4 cm in diameter and set on top of the coconut and gently press the coconut into the sides of the cookie dough sausage until it is thoroughly coated
- Wrap the cling film tightly around the cookie dough and refrigerate for at least one hour
- When you are ready to bake the cookie, preheat the oven to 180 degrees (Celsius)
- Line a baking try with a silicon liner or baking parchment,
- Slice the cookies into 1 cm rounds and place on the baking sheet. Bake for 10-12 minutes and remove from the over. Allow them to firm up on the baking sheet when you remove them from the oven before moving to a wire try to cool down