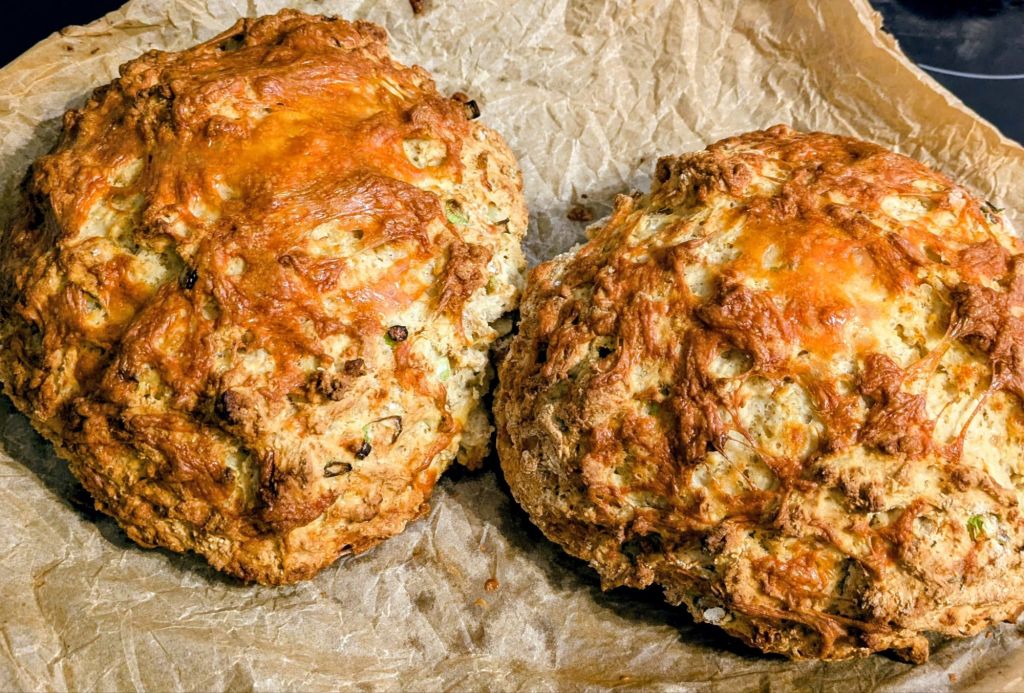
Happy Saint Patrick’s day. To celebrate I decided to make what is one of the quickest, easiest and most delicious breads you can make.
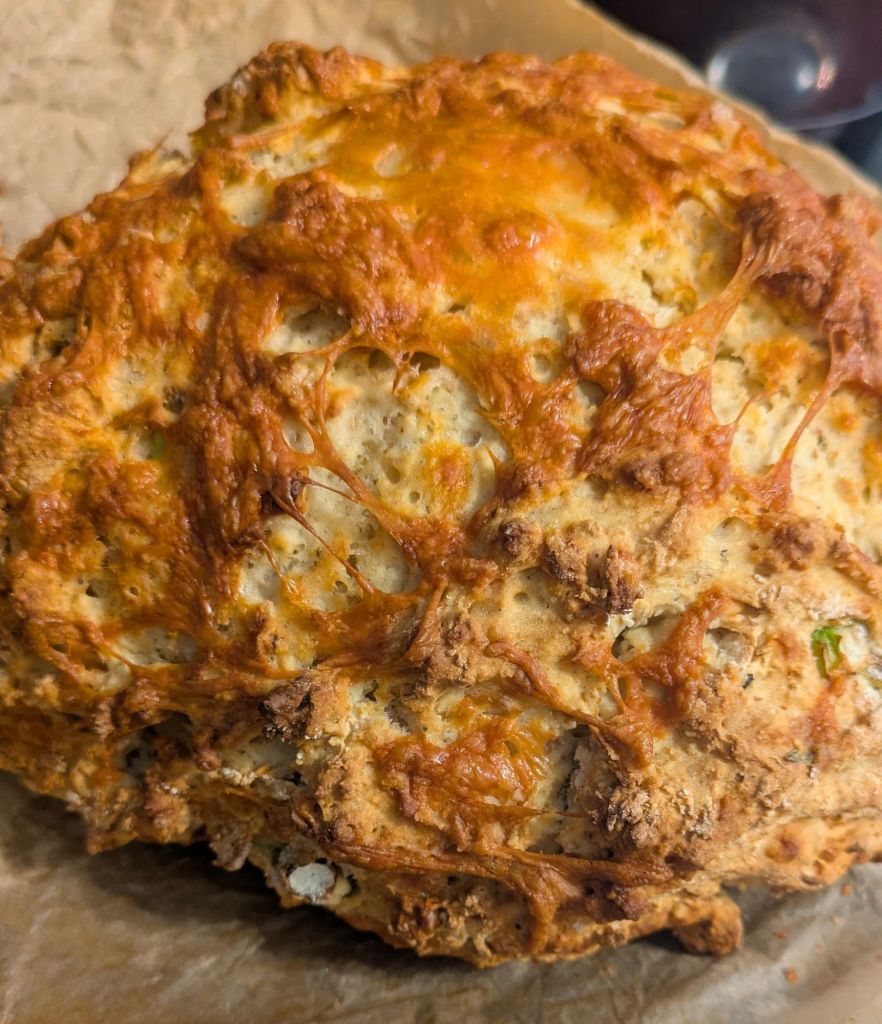
This bread has no yeast and doesn’t need to prove or be kneaded. You can make it and have it in the oven in 5 minutes. I’ve fancied this up with scallions (spring onions) and sharp cheddar cheese but it can still be tasty without these.
Soda bread needs to be made with butter milk (the acid causes a chemical reaction needed to make it rise). If you don’t have this add a tablespoon of lemon juice to normal milk and leave for 10 minutes before using.
This recipe makes enough for 2 loaves (I’m getting into batch cooking as it saves time and money), and I’ll freeze one to use another time. You halve this recipe if you prefer.
Ingredients
700 Grams Plain white flour
4-5 Scallions/Spring onions (finely chopped)
400-500ml Butter milk
100 Grams Cheddar cheese (grated)
2 Tsps Bicarbonate of soda
1 Tsp Salt
1 Tsp Thyme (optional, I had some growing in a window box and used it, but can use other herbs if you prefer)
Method
Preheat your oven to 220 Degrees (Celsius)
Line a baking sheet with grease proof paper
Add all the dry ingredients into a large bowl.
Stir in the butter milk until you start to get a soft ball, easier to use your hands for this (it shouldn’t be dry)
Turn the dough onto a floured counter and devide in to two halves
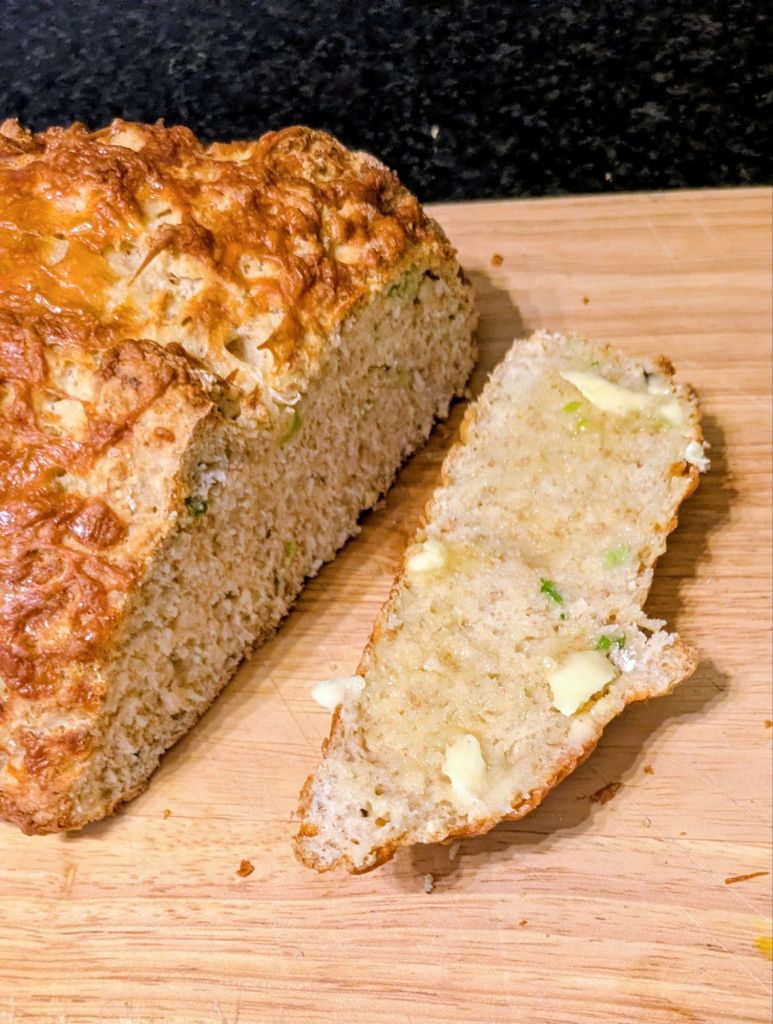
Form each half into a ball, transfer to the lined baking sheet. With a large knife, cut a cross into each ball (cut about one third of the depth of the dough, don’t go too deep)
Bake for 20-25 minutes or until the bread sounds hollow when you tap the base
Like everyone else I’m trying to improve how I eat by eating more protein and fibre and less ultra processed foods.
I buy protein bars occasionally if I’m on the go and am always shocked at how expensive they are and how many unhealthy ingredients they actually have.
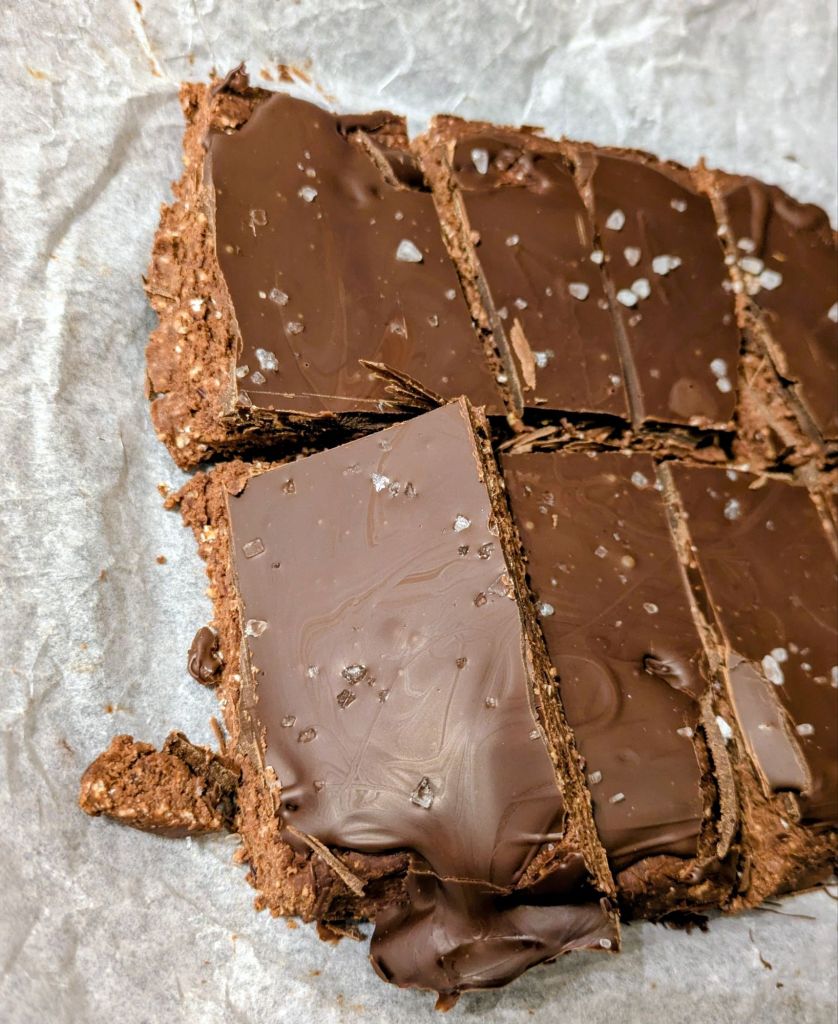
These cost a fraction of the price and are a lot healthier. Yes there is sugar in these but it’s natural sugar in the form of honey/maple syrup and not something cooked up in a lab that none of us can pronounce.
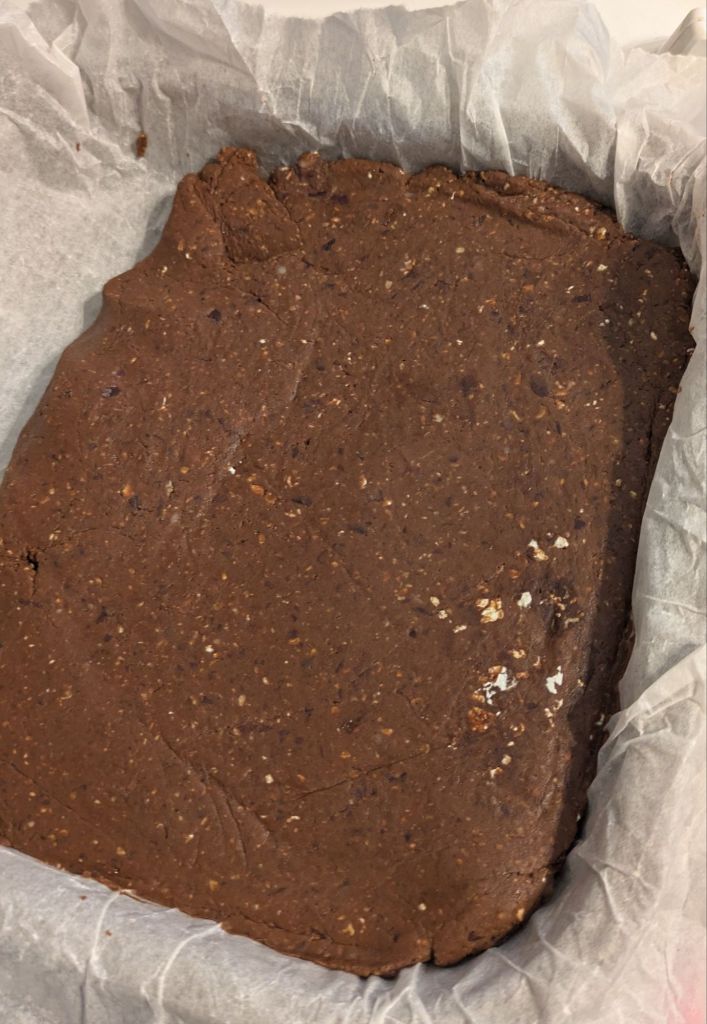
I have made these into bars but you could also make these into protein balls and dip them in chocolate or roll then cocoa powder or crushed nuts if you prefer.
Makes 8
1 Can of Black beans (400ml), drained
80 Grams Rolled oats
3 Tbsp Peanut butter
30 Grams Cocoa powder
1 Tsp Cinnamon (optional)
2-3 Tbsp Maple syrup (I didn’t have this, so I used honey instead, add more or less depending on how sweet you like things)
Tor the topping
100 Grams Dark chocolate (melted)
Sprinkle of sea salt (optional)
Method
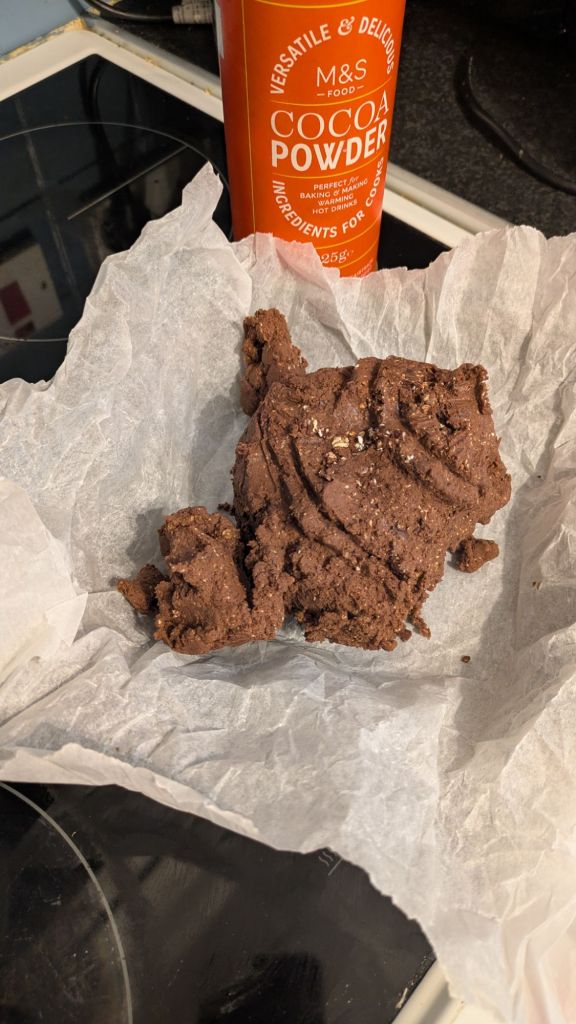
Add the beans to a food processor and whiz for 1-2 minutes until the beans have broken down.
Place the rest of the ingredients in the blender and whiz again for another minute. Check if you want to adjust the taste by adding more cinnamon or maple syrup.
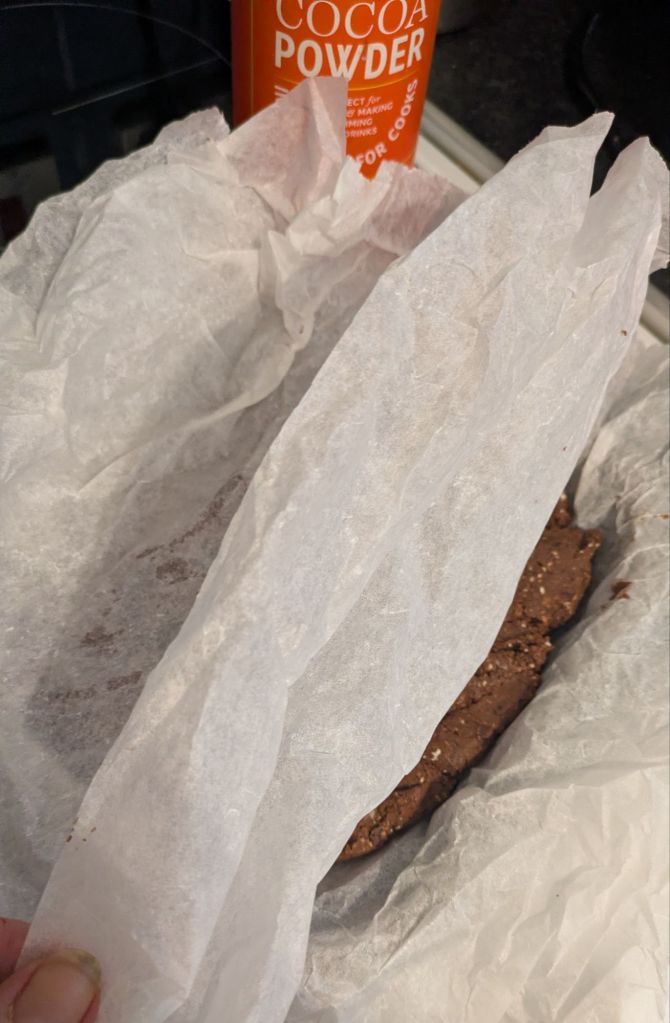
The mix should start to form a ball in the food processor. Transfer it to a shallow dish lined with baking paper and place another sheet on top. Gently press down on the top sheet of paper (I used a cup to roll across the mix and smooth it until the mix was 2-3cm deep.
Cover a place in a fridge to set for at least 1 hour
When the bars come out of the fridge, melt your chocolate in a bowl in the microwave (give blasts of 30-40 seconds at a time to make sure it doesn’t burn). Spread evenly across the bar mix and sprinkle with salt or nuts.
Allow the chocolate to set before cutting into bars. Keep in an airtight container for up to 4-5 days.
I had a lot of expenses this month, so until I get paid I want to use up stuff I have in my cupboards and fridge/freezer to avoid over spending. Most of us are at least a little bit of food hoarding. So make the most of what’s already in your house and you’ll have a delicious, healthy, budget friendly one pot meal.
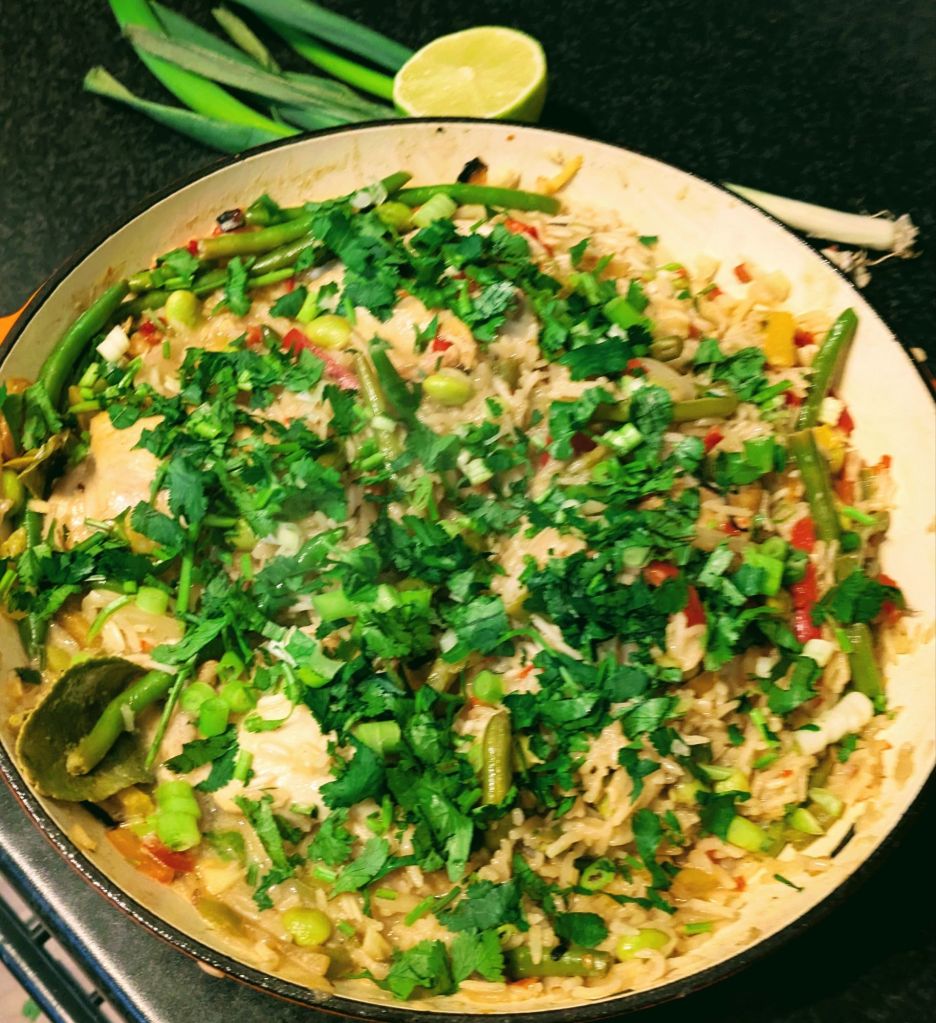
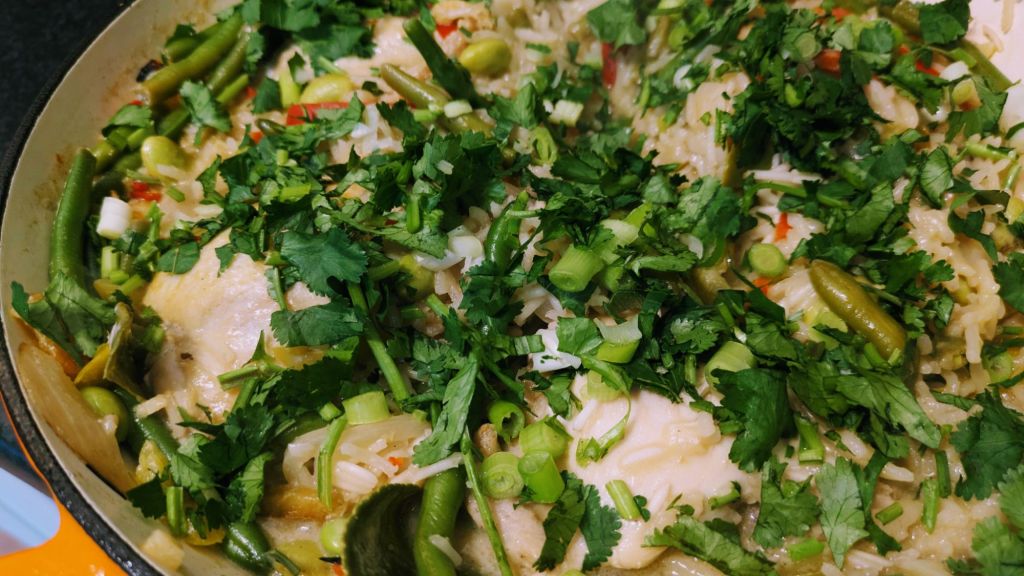
This recipe could be adapted to whatever you have, but the basics were some defrosted chicken thighs, dried rice, frozen vegetables and a tin of coconut milk.
I know I go on sometimes about having a good store cupboard but it can take humble ingredients to the next level. This tastes even better the next day.
Serves 4
Ingredients
4 Large chicken thighs or 8 small (bone in)
1.5 Cups of rice
1 x 400ml Can of Coconut milk
1 Tbsp Oil
3-4 Large handfuls of frozen vegetables, I used a mixture of green beans, peppers and edamame beans, but you can use whatever is in your freezer
1 x Chicken stock cube
1 x Onion (finely sliced)
1 x Red chili (finely chopped), or 1-2 teaspoons of chilli powder
1 x Thumb sized piece of ginger (peeled and finely chopped), or 1 heaped teaspoon of dried ginger)
3 Cloves of garlic (finely chopped), or 1-2 teaspoons of garlic granules
2 Tablespoons of chopped coriander (I had a little pot of this on my window sill that I have somehow been able to keep alive but you can use whichever herbs you might have
2 Spring onions/Scallions (optional, I had some hanging about the fridge)
Juice of half a lime or lemon
Salt to taste
Method
Heat the oil in a high sided pan with a lid
Add the chicken to the pan and seal on both sides over a medium/high heat
Remove the chicken from the pan and fry the onion until it starts to brown before adding frozen vegetables
Cook for a couple of minutes until the vegetables soften, then add the ginger, garlic and chilli
Add the rice to the vegetables and stir well
Crumble the stock cube in the pan and add the can of coconut milk, fill up the empty can with water and pour into the pan
Place the chicken back in the pan, just before it comes to the boil, cover with the lid and reduce the heat
Cook for 15 minutes (or until the chicken is cooked through and the rice is soft). Squeeze the lime juice over the rice and stir well. Sprinkle with scallions and coriander
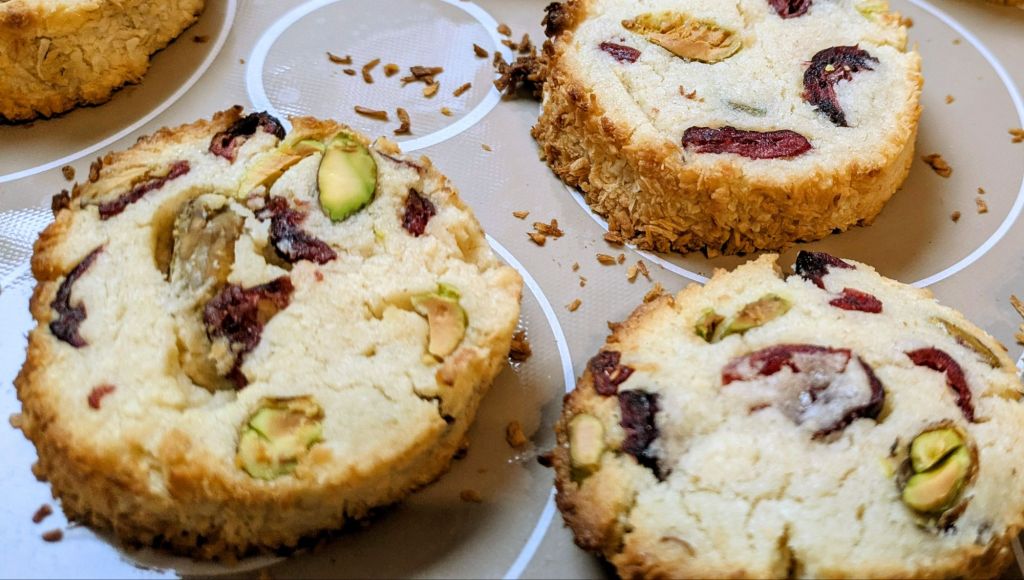
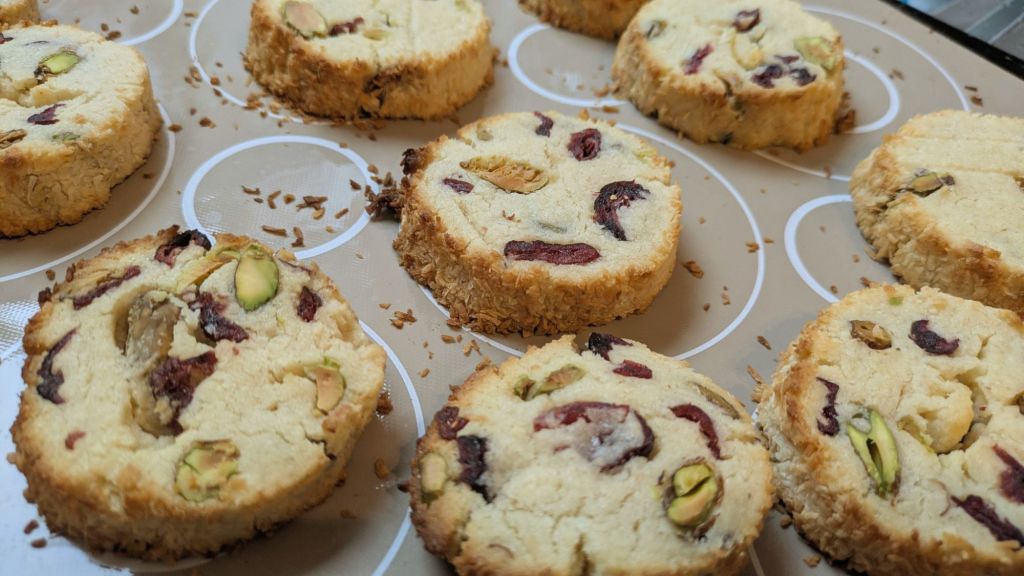
A bit late with this Christmas recipe, but I love these buttery cookies, dotted with festive red and green from pistachios and dried cranberries. The traditional recipe uses glace cherries, but I think this makes the cookies just too sweet. So it depends how much of a sweet tooth you have.
The whiskers part is from the shredded coconut on the edge of the cookies that is meant to resemble Santa’s whiskers. You can easily scale up this recipe if you want to give these as gifts. If you’re having visitors over Christmas you can keep the prepared dough in your fridge for a day or two and just bake before people arrive.
Makes 8-10
110 Grams Butter (softened)
Ingredients
75 Grams Sugar
1 Tablespoon Milk
1/2 Teaspoon Vanilla extract
175 Grams Plain flour
30 Grams Dried cranberries
30 Grams Pistachios (shelled)
50 Grams Desiccated coconut
Method
Cream the butter and sugar together with an electric whisk
Add the milk and vanilla extract
Stir in the flour and mix until well combined, add the cranberries and pistachios and then get your hands into the bowl and gently shape press the dough together
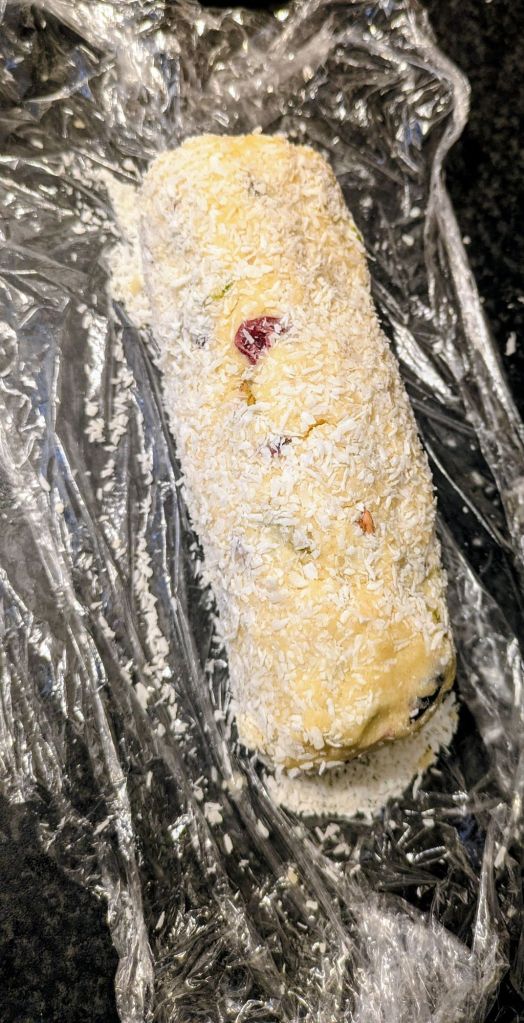
Place a sheet cling film on your counter top, and sprinkle it with the coconut
Shape the cookie dough into a sausage shape, about 3-4 cm in diameter and set on top of the coconut and gently press the coconut into the sides of the cookie dough sausage until it is thoroughly coated
Wrap the cling film tightly around the cookie dough and refrigerate for at least one hour
When you are ready to bake the cookie, preheat the oven to 180 degrees (Celsius)
Line a baking try with a silicon liner or baking parchment,
Slice the cookies into 1 cm rounds and place on the baking sheet. Bake for 10-12 minutes and remove from the over. Allow them to firm up on the baking sheet when you remove them from the oven before moving to a wire try to cool down
For my fellow scone lovers, these are super easy to make and a good way to use up any pears that refuse to ripen.
I got the inspiration for these from one I had in the Avoca cafe a couple of years ago. Their versions are cut into individual scones, but I like making these big break apart versions, and honestly just wasn’t a*sed faffing about with a cutter. I didn’t have any but next time I’m going to try a white chocolate drizzle, as I think it would be yummy.
Makes 8
Ingredients
350 Grams Self Raising Flour
100 Grams Butter (chilled and cut into small squares)
50 Grams Sugar
150 Grams Firm Pear (peel, core and cut the pear into 1.5cm chunks)
1 Tsp Baking powder
2 Tsp Ground Ginger
1 Tsp Vanilla extract
Method
Pre heat the oven to 220 degrees (Celsius), line a large baking tray with baking parchment (I had a solid sheet which also works well)
Combine your flour and butter, if you have a food processor pulse until the mix looks like bread crumbs. If you don’t, you can use the rubbing in method.
Add the baking powder and ginger and mix through, before adding the diced pear, gently mix into the flour mix to coat the chunks (it will stop them clumping)
Combine the milk and vanilla and gradually add to the flour mix stirring gently (I think you’re better using your hand for this, but this gives some people the ick, so use a spatula if you don’t like using your hands). The mix should be fairly moist and bring it together into a ball.
The secret of good scones is to handle the mix as little as possible. When you have formed the mix into a ball turn onto the baking parchment, and with a floured rolling pin, roll into a circle that is about 5cm thick.
With a sharp knife score the top of the scone marking it in half, then a quarter then into 8ths. Place in the oven and bake for 15-20mins. Allow to on a wire wrack
Best served whilst still warm, but they’ll keep fresh if stored an airtight box for 2-3 days
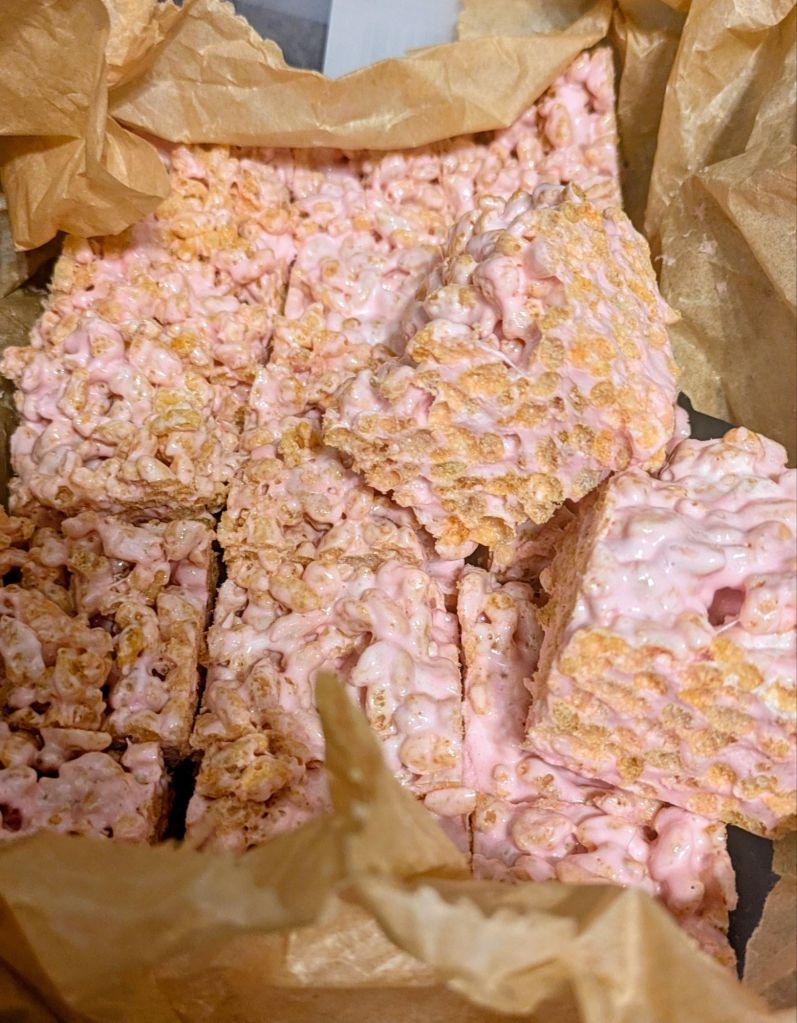
A work mate’s birthday was coming up. I promised to bring in something nice and these popped into my head for some reason. I hadn’t made them in years and I forgot just how nice they were.
Only 3 ingredients and no baking, you can even use a microwave to melt the butter and marshmallows. These were an all round crowd pleaser, and they’re also great for anyone who can’t have gluten. This is also a good recipe to make with kids, as they can get involved with lots of stirring (the only problem is getting to wait until the squares set).
Ingredients
40 Grams Butter
150 Grams Rice Krispies (or other generic puffed rice cereal)
200 Grams Marshmallows (if you can get the mini marshmallows even better as they melt faster)
Method
Line a 6in x 6in dish with grease proof paper/baking parchment (if you don’t have a dish this size, don’t stress, use what you have, but the thickness might be different)
Add the butter and marshmallows to a large microwave safe bowl and microwave for 30 seconds at a time stirring well each time to make sure everything melts evenly (if you don’t want to use the micro wave you can go old school and melt the butter and marshmallows in a large heat proof dish over a pan of simmering water)
When the marshmallows have completely melted, mix in the puffed rice and mix until its thoroughly coated
Transfer to the lined dish and spread out evenly with the back of a spoon or spatula. Allow to set in the fridge for at least an hour. If your feeling especially bougie, you could top the rice krispie treats with 150 grams of melted chocolate (it makes the top of the squares nice and smooth, but honestly I prefer them as they are)
Once the mix has set cut into 4-5 cm squares. Store in an air tight box until ready to eat
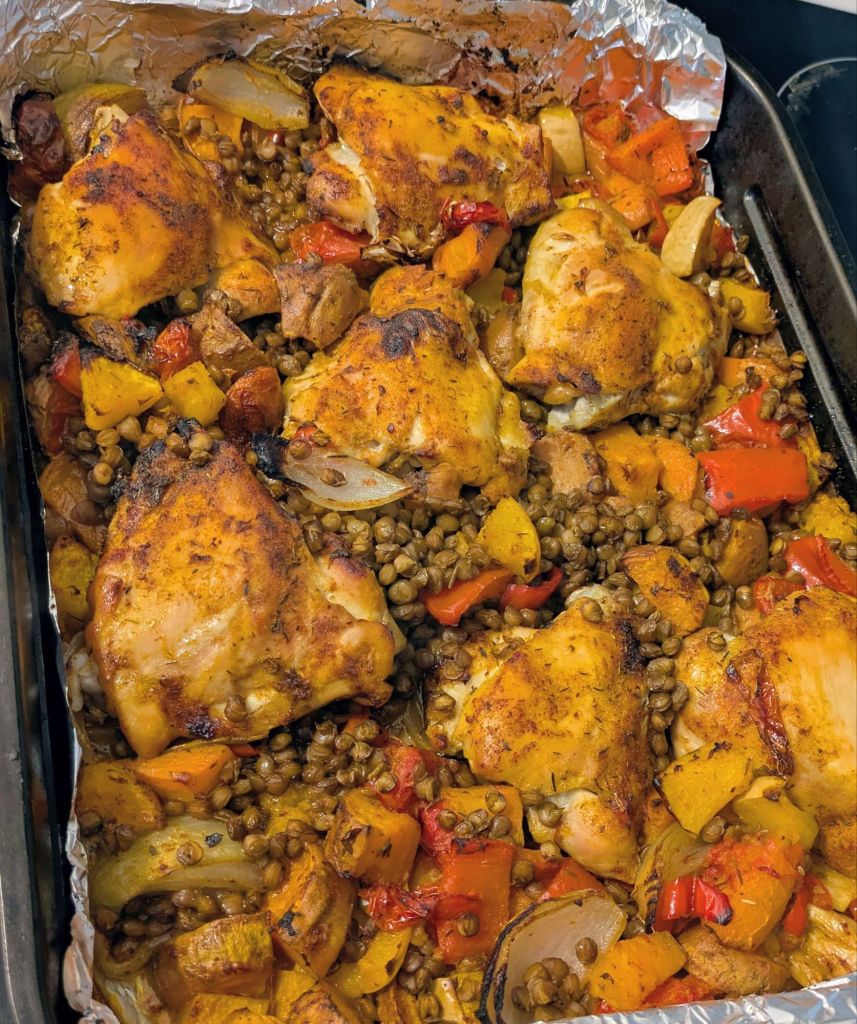
After a morning walk and seeing the leaves changing colours, I was inspired to make this because the colours looked so good together (it also tastes fantastic).
With the days getting colder and shorter this is proper comfort food but still pretty healthy with all your brightly coloured vegetables and plenty of protein from the chicken and lentils. What makes it even better is that it’s a one pan dish meal.
I used tinned lentils but you could boil your own if that’s what you have. Mop up all the yummy juices with some crusty bread or spoon this over some buttery mashed potatoes and greens for the perfect Autumn comfort meal.
Serves 4
1kg Chicken thigh (bone in, I removed the skin but you can keep it on if you prefer)
3 Smallish sweet potatoes (washed, but skin left on, cut into 2cm cubes)
4 Carrots (washed but skin left on, cut into 2cm cubes)
150 Grams Butternut squash (cut into 2cm cubes)
1 Onion (peeled and cut into 6)
100 Grams Cherry tomatoes (cut in half)
1 Large red pepper (cut into 2cm cubes)
1 Tsp Salt
1 Tsp Smoked paprika
1 Tsp Dried Thyme
1 Tsp Garlic powder
1 Tsp Chilli powder
2 Tbsp Oil
1 Tbsp Balsamic or cider vinegar
1 x 400 Gram Tin of Green lentils
Method
Preheat the oven to 180 degrees
In a large oven proof dish add the oil sweet potatoes, carrots, and butternut squash and bake for 20 minutes
Add everything else to the tray except the balsamic vinegar and lentils. Mix well and bake for 30 minutes
Add the lentils and balsamic vinegar to the baking tray, mix again and bake for a further 10 minutes (check the chicken is full cooked), and serve with crusty bread
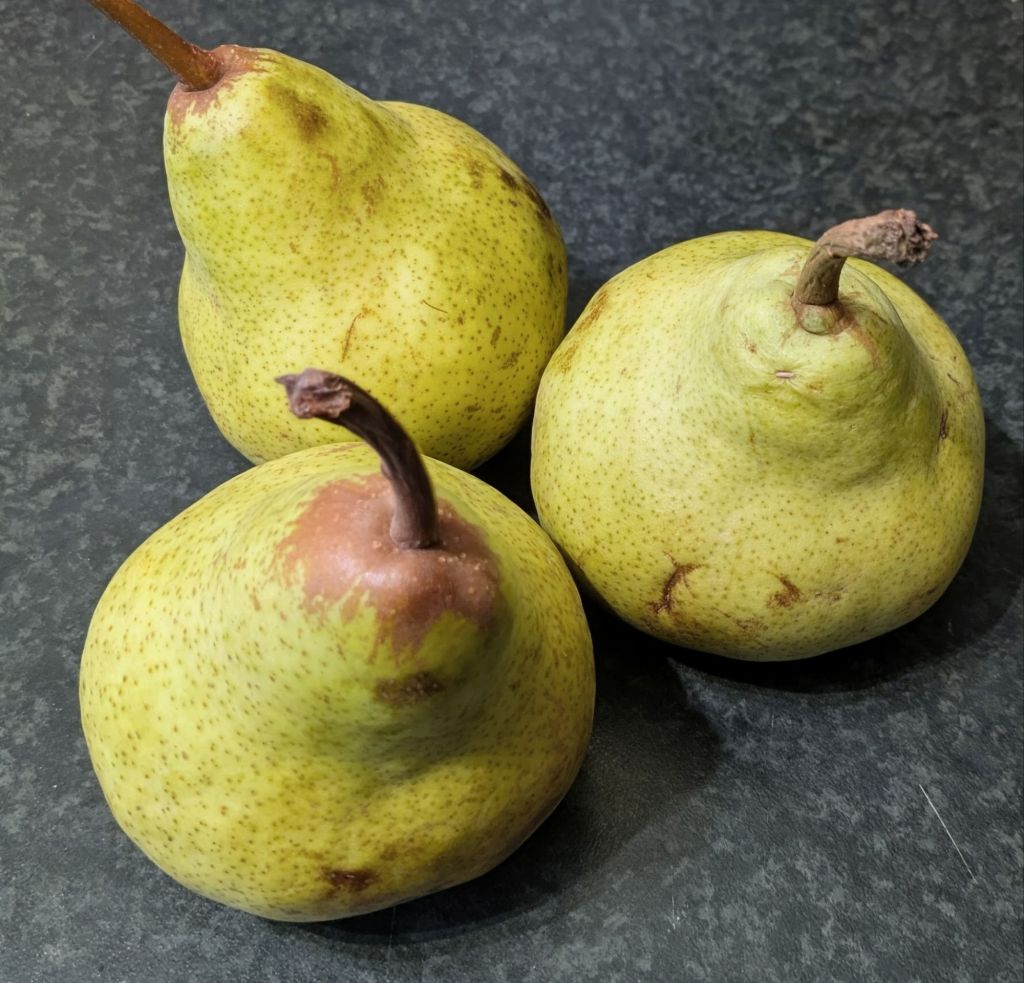
Autumn is the best time for most pears and I love them. But they can be spiteful little sh*ts, staying like granite for weeks before turning into mush in about 20 minutes.
This classic french recipe is perfect if you have really hard pears and can’t be bothered waiting on them softening. I mean, soft poached pears, vanilla ice cream and hot chocolate sauce, OMG Yum.
It’s also a great dessert if you’re cooking for people, as you can poach the pears the day before and then just add a scoop of shop bought vanilla ice cream and it takes 2 minutes to make a super simple chocolate sauce.
It’s the ideal dessert if you’re making a heavy main course as it’s pretty light but still tastes indulgent. If you’re catering for anyone who needs a gluten free dessert this is a great go to (just check the ingredients on the ice cream when you’re buying it).
Serves 4
(for the poached pears)
4 Pears (variety isn’t important as long as they’re not soft)
125 Grams Sugar (you can add more sugar if you like to the poaching liquid, but I prefer desserts that aren’t super sweet)
1 Tsp Vanilla extract (optional)
750 Mil Water
For the chocolate sauce
150 Grams Dark chocolate
150 Mil Double cream
4 Scoops of vanilla ice cream
50 Grams Toasted almonds (optional)
Method
Add the sugar, water, and vanilla extract to a pot and heat until the sugar has dissolved into the water
Peel the pears (leave the stem on if possible), and try to remove the bottom spiky bit and some of the core of the pear, don’t scoop out too much or the pear might fall apart once poached
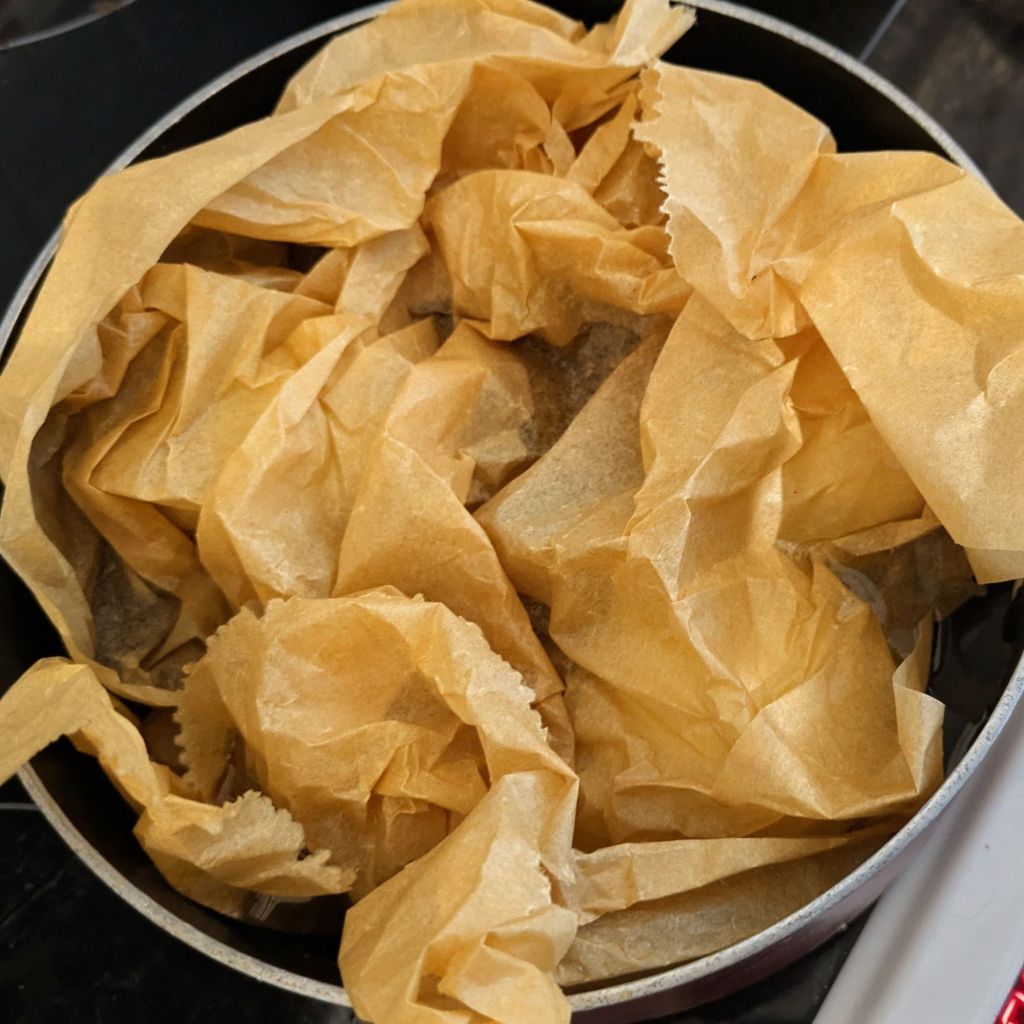
Add the pears to the poaching liquid and simmer on a low heat for about 15-20 minutes depending on how big or firm the ears are. I top this with some scrunched up grease proof paper that sits directly if the pears and poaching liquid. This isn’t essential but it helps stop too much evaporation and keepy things in place.
Test the pears with a fork to make sure they are soft and lift them out onto a plate with a slotted spoon and allow to cool. If you’re making them to eat the next day, then chill in the refrigerator
When you’re ready to serve transfer the pears to individual bowls or plates.
Break your chocolate into small pieces and put in a microwave safe dish. Heat the chocolate for 30 seconds at a time (stirring each time) in the microwave to make sure it melts but doesn’t burn.
When the chocolate is melted whisk in the double cream until you get a glossy creamy chocolate sauce. If I’m being fancy I like to pour it into little jugs so people can pour it over themselves, otherwise just spoon it over
Add a scoop of ice-cream onto the plate with the poached pear and then spoon over the chocolate sauce and sprinkle with toasted almonds (if you’re eating this on your own or with a trusted loved one, there is no judgement here if you want to lick the plate, and you will)
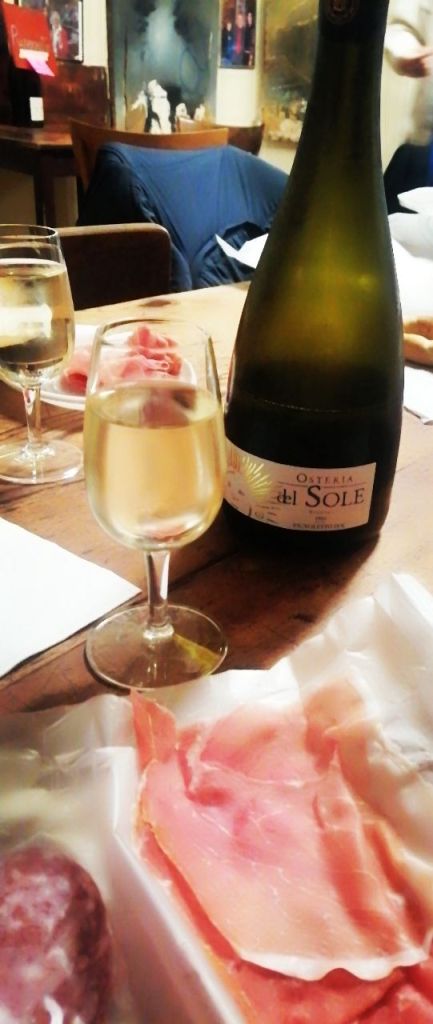
With the summer ending I decided to throw caution and all fiscal responsibility to the wind and slip in a quick 48 hour visit to Palma.
The only thing disappointing about it was that I couldn’t stay longer. The climate was perfect, hot at the start of September, but with a nice sea breeze coming from the beautiful but quite bougie marina.
The old town has some spectacular honey coloured sandstone buildings, the most impressive of which is the cathedral. (Quick traveler tip, check opening times as the latest entry on the Saturday afternoon we visited was 2.30pm). You can also buy tickets online to avoid the queue at busy times. The ticket also gives access to the bishop’s house beside the cathedral.
Why not squeeze in a little bit of culture, you can visit several Joan Miro exhibitions, he lived in Palma for several decades. I visited one the free exhibitions of sculptures (all the signs up saying don’t touch the sculptures just triggered my impulse control issues and made me want to do it more). The building itself was like a work of art. Situated in shaded square, lined with bars/restaurant were you can enjoy a glass of wine and some tapas. It was a very pleasant way to slip from afternoon to evening.
Palma is more of a working town than resort and you’ll see fewer tourists than in resorts along the coast, but English is widely spoken, which was useful as my rudimentary Spanish escaped me whenever anyone asked me a question.
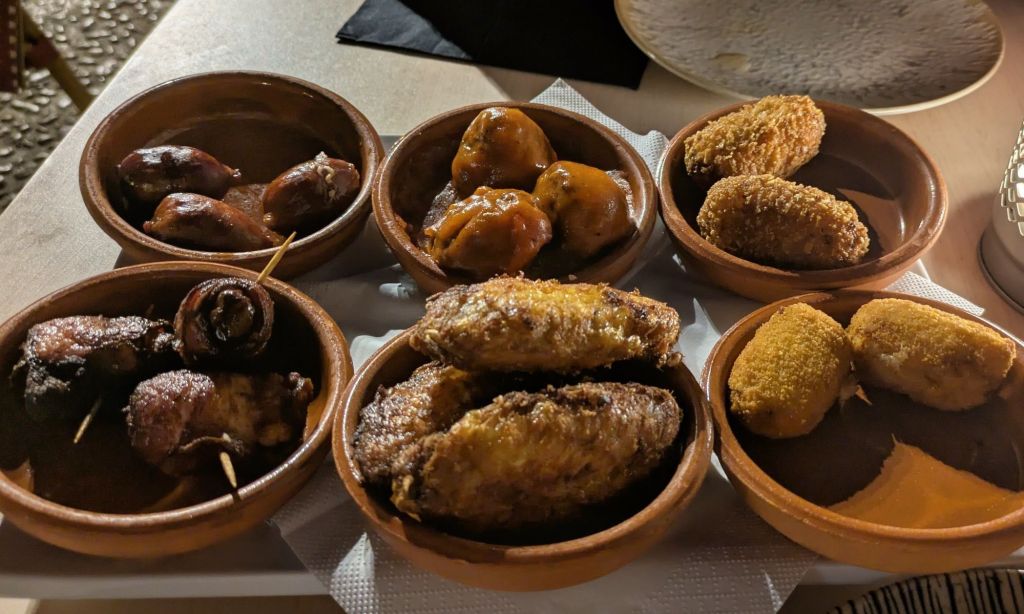
Traditional Mallorcan food is hearty and they are very fond of meat and of different pastries, the most recognisable is the Mallorcan ensaimada. This is a super light spiral of pastry topped with icing sugar and can also come filled. A word of warning if you’re vegetarian, most pastries are made with pig lard, so it might be worth checking before you buy.
Good food and drink are easy to find, although prices are probably on a par with the UK. Its definitely more expensive than mainland Spain, but most islands are a bit more expensive due to the cost of having to import everything. Palma has a high-end feel. If you look at the price of real estate in the town, you’ll see why.
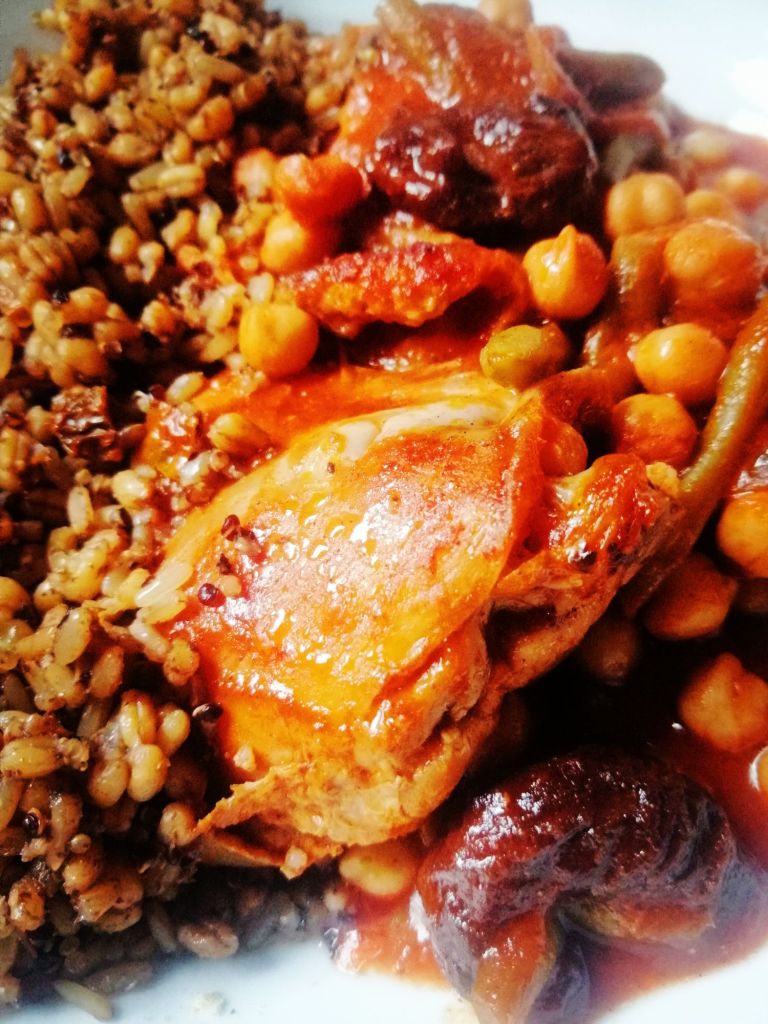
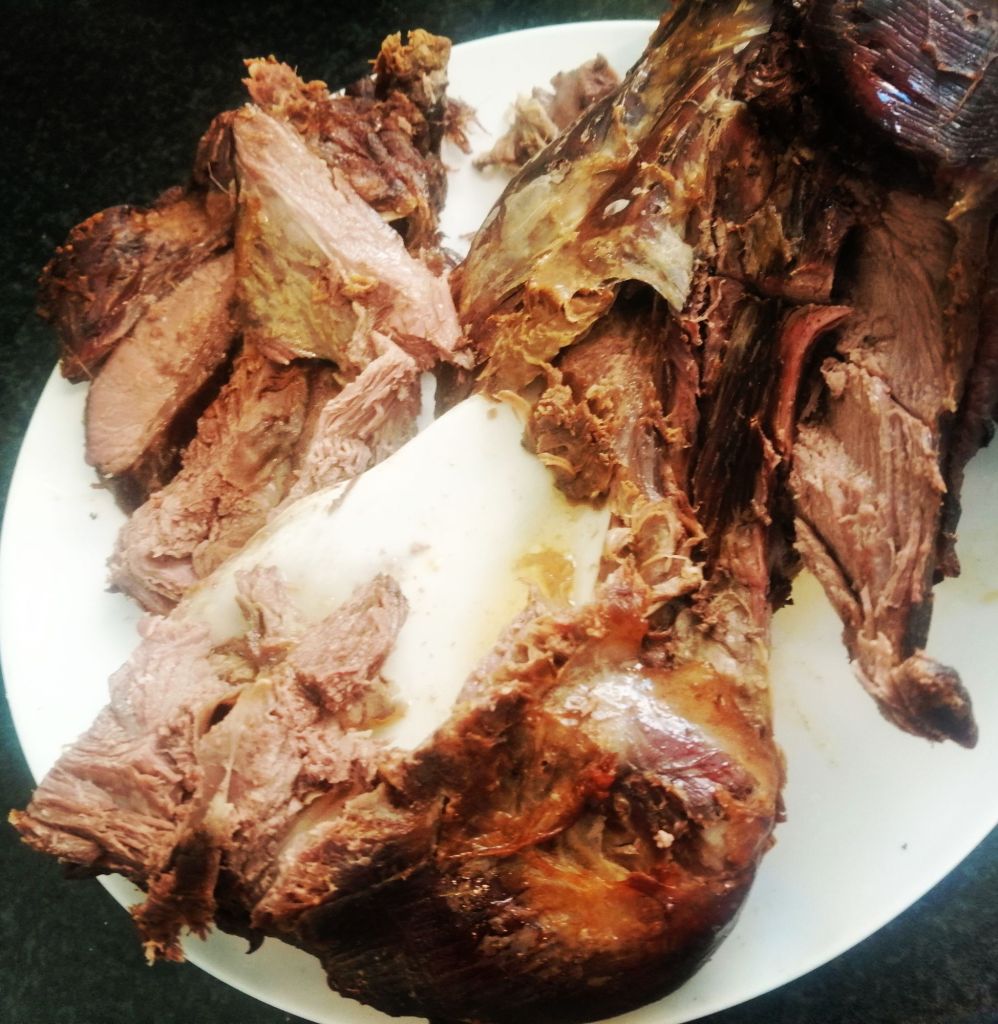
Local rabbit with a delicious but super pungent garlic and herb sauce.
The train journey takes about an hour from Palma to Soller. It takes you overland past lemon and olive groves. The return fare costs 40 Euro. Soller is very quaint with a laid back Boho vibe with lots of cool artisan shops and surrounded by lovely countryside.
From the town square you can take a wooden tram out to Port de Soller which takes about 20 minutes. This is a gorgeous crescent shaped bay with a light house, marina and plenty of places to eat, drink and shoP. There is a good beach where you can hire a spot under thatched parasols with 2 sun loungers for about 18 Euro. Unfortunately I had a brain fart that day and didn’t charge my phone enough, so can’t post photos, but check the link attached and the pictures they use are accurate. I would definitely visit both Palma and Soller again and allow more time to enjoy them properly.
If you haven’t been buying ginger shots already, you’ve probably spotted these little shots of goodness in many shops.
Both turmeric and ginger have powerful anti inflammatory and anti oxidant qualities, and can boost your immune system. So these are great if you are feeling a little bit under the weather, fighting of a colds or flu, and also help if you’re suffering with a hangover.
The little shots you buy cost at least £2 each. I made 4 shots, enough for 4 days in 5 minutes and about a quarter of the cost of buying them in a shop.
You’ll also see some odd ingredients like black pepper. Peperine found in black pepper helps activate some off the anti oxidant chemicals in the turmeric. I promise you won’t taste it, and you can swap it out for cayenne pepper if you prefer this.
A little oil is added as well. The fat helps your body absorb all the good stuff in the ginger and turmeric. You can substitute it for coconut oil if you prefer. Finally, honey is there for a little sweetness, but to be honest I’ll maybe leave it out next time as the oranges I had were really sweet, so maybe check on the sweetness of your oranges before adding. You can also swap the honey for agave or maple syrup if you are vegan.
Most importantly, these taste really good. Next time I make them, I might even go a little heavier on the ginger. I quite enjoy the heat, but it’s purely up to personal preference. The shots are healthy and delicious. They are quick and easy to make if you have a blender. They also cost a fraction of what you’ll pay outside.
Make 4-5 shots (this can live in your refrigerator for 5-6 days)
Ingredients
2 Oranges (peeled and roughly chopped
Thumb sized pieces of ginger (scrape the skin off with a spoon and then roughly chop)
3-4 cm Piece of Turmeric root (scrape the skin off with a spoon and then roughly chop. If you can’t find turmeric root, then replace this with 1 teaspoon of turmeric powder)
1 Teaspoon Honey or maple syrup
2-3 Grinds of black pepper if using a pepper mill or quarter teaspoon of ground black pepper
1 Teaspoon Olive oil
250 Ml Water
Method
Add all the ingredients to a blender or food processor and whiz for 1-2 minutes, or until there are no more lumps
Pour the mixture in to a mesh sieve with container below and strain (you can also use muslin or clean tea towel if you don’t have a sieve, the turmeric will stain it yellow)
When you have strained the liquid you can transfer the liquid to a bottle/s and chill, or enjoy a little shot of sunshine right away
Cabbage is a much maligned vegetable, with many of us having unpleasant memories of watery over cooked soggy cabbage. Cooked with a little care, cabbage is yummy and very good for you. According to nutritionists, we should all be eating more of it. Its nutrient dense, packed with fibre, and generally good for your gut health.
This is really tasty, and fairly easy to prepare with the oven doing the work. The cabbage goes sweet and slightly charred at the edges and the miso butter adds a salty richness to it. I had this along with some chicken I roasted in the oven at the same time. (I’m such a cheapskate I never turn the oven on just to cook one thing). If you don’t eat meat this is also delicious served on a bed of rich creamy hummus.
What’s even better it has only 3 ingredients, and is almost too good to be described as just a side dish. I used a sweetheart cabbage, and because of its shape, it made more sense to cut it into wedges. You can make this with other types of cabbage. Cut them into steaks if you prefer.
Serve 4 (but if using a large cabbage, up the ratio of butter and miso paste)
Ingredients
1 Sweetheart cabbage (tough/damaged outer leaves removed if necessary and cut into quarters with the core parred back but not removed completely as this with help the wedges stay in one piece)
40 Grams Butter (melted)
1 Tbsp Miso Paste
Method
Preheat your oven to 180 degrees (Celsius), and prepare a baking sheet (I usually line mine with foil because I’m lazy and it cuts down on washing up)
Melt the butter in a bowl in the microwave (or in a pot if you don’t have one), and then stir in the miso paste until thoroughly combined
Lay your cabbage wedges on the tray and brush evenly with the miso butter, before baking for 15-20 minutes (depending on the size of the wedges) until the cabbage has softened
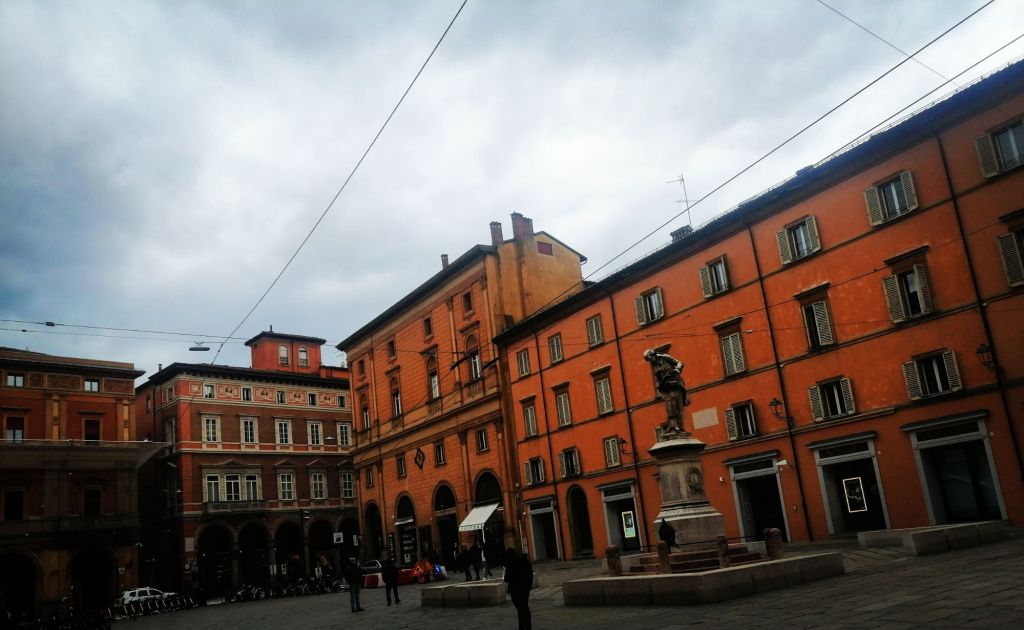
Porto had been on my list of places to visit for quite a while, and it didn’t disappoint. Filled with history, beautiful architecture, friendly locals and great food.
I knew very little about Portugal’s rich history and was surprised to find out that it endured Europe’s longest fascist regime in the 20th century (basically further education for all but the selected few and women’s rights were actively suppressed to keep the Salazar regime in power). Rumour has it that this is where JK Rowling got the name of her baddie in the Harry Potter books from, as she lived in Porto for a short while, but more about that later.
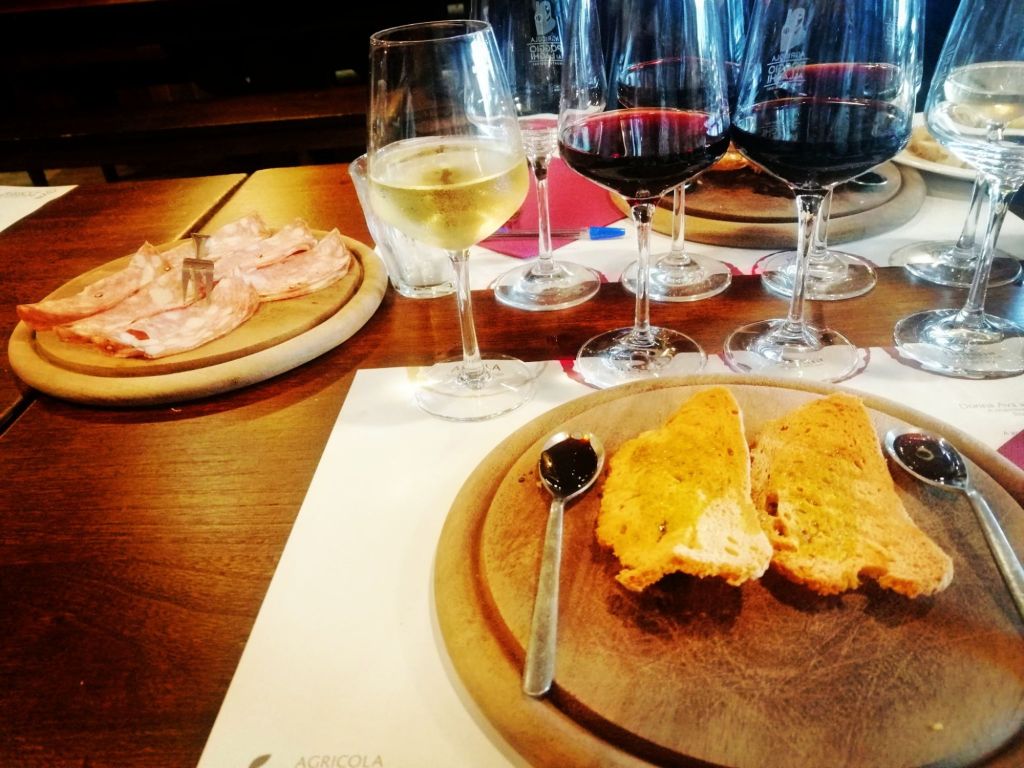
Porto gives its name to port wine, and along the port side you’ll see the historic warehouses that supplied port to the world for centuries. If port is your thing there are plenty of bars and restaurants that have options for tastings. I’m not a huge fan of it personally, but the other wines we had were tasty and inexpensive.
The city is fairly walkable, yes there are some hills, but if you’re ambling along at a relaxed pace they’re fine. I’d recommend going on a walking tour on your first day to find out more about the place and get your bearings.guides are also a great source of ideas for good places to eat and local attractions. These tours often free and you tip the guide what you feel it was worth and I honestly have not been on a bad one. I have to say that I was actually embarrassed this time when at the end of our tour a woman handed the guide pocket change. These people work hard and bring the city alive for you, you don’t need to empty your bank account when tipping but think of a fair hourly rate if you hired an expert and pay it.
There is plenty to learn for history buffs, and Harry Potter fans can visit https://www.livrarialello.pt/ Livrariar Lello bookshop that was said to have inspired some of the imagery in the books (the author has said it didn’t, but people feel she might just be annoyed at people making money off this). To get inside you’ll be charged 10 euros, and anytime I passed there were always massive queues of people to get in. You can buy a skip the queue ticket online which gives you a time slot to visit for 15 euro. In cooler weather you’ll also see some school kids in black cloaks with symbols embroidered on them, and it is clear to see that this is inspired the Hogwarts uniform.
You’ll see the popular blue and white tiles on many of the older buildings and quirky houses and the place is just incredibly pretty. Food and drink is relatively inexpensive and excellent and Porto is home to some fantastic bakeries (top travel tip, hit these after walking up all the hills, not before like I did).
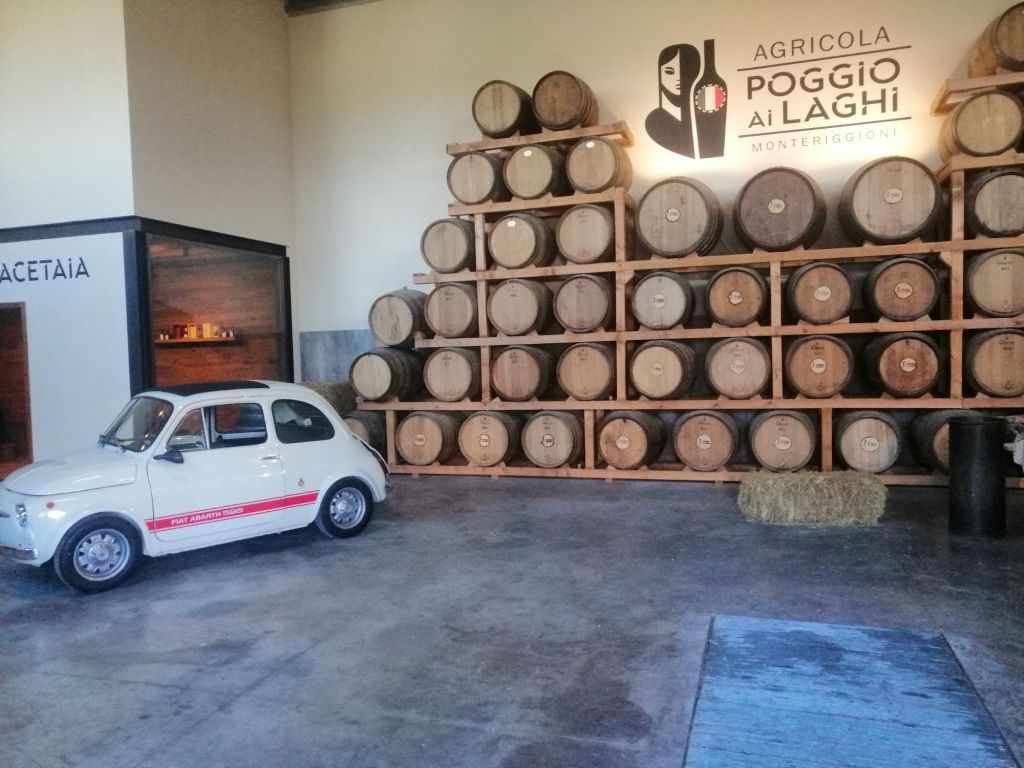
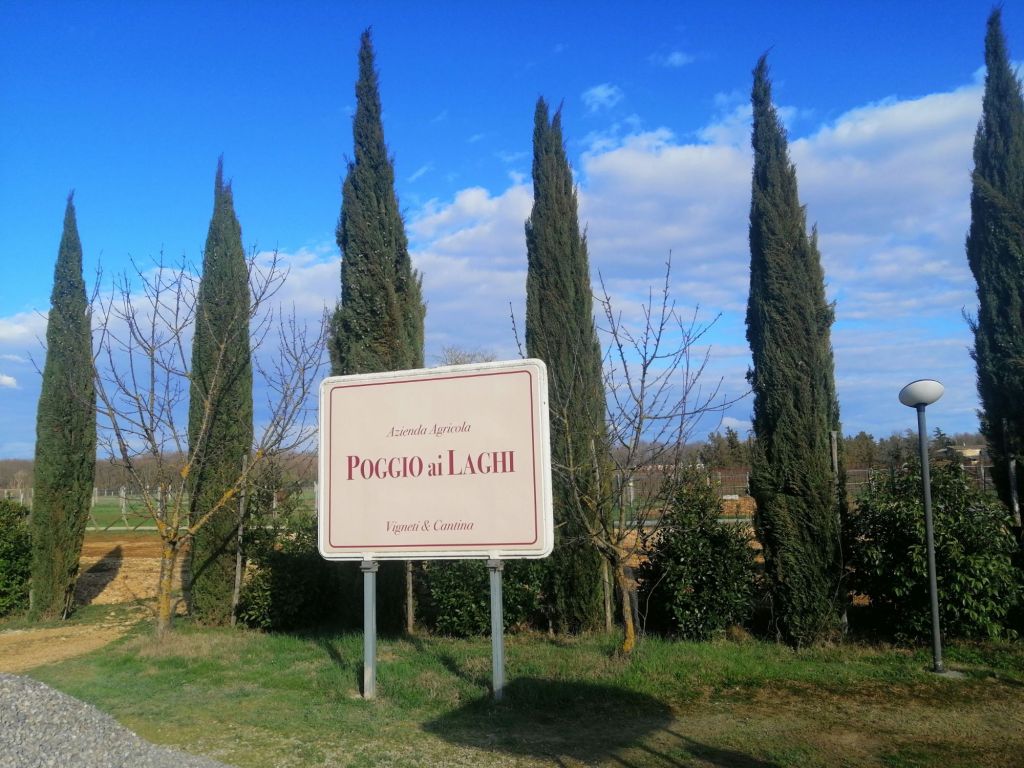
We also decided to take a day trip out to the local wine producing region, the Douro valley. Booking a tour cost 100 euros but included an air-conditioned coach, a boat tour, visits to two port vineyards and a 3 course lunch, so all in not bad value. I would definitely return and visit the Douro valley and you can take trains from Porto to some of the larger towns.
It’s a beautiful area, but the locals warn that it’s 9 months of winter and 3 months of hell, this is because the unique micro climate that gives port it’s distinct flavor runs from -15 degrees in winter to 48 degrees in Summer. I actually got sun burned for the first time in years because you’re up in the mountains or beside the river it didn’t feel that hot, so beware and slap on that SPF.
Porto and the surrounding area is definitely worth visiting. The city has quite a laid back vibe, it’s beautiful, locals were lovely and English was widely spoken (as always, try to at least few words of the local language up your to sleeve).
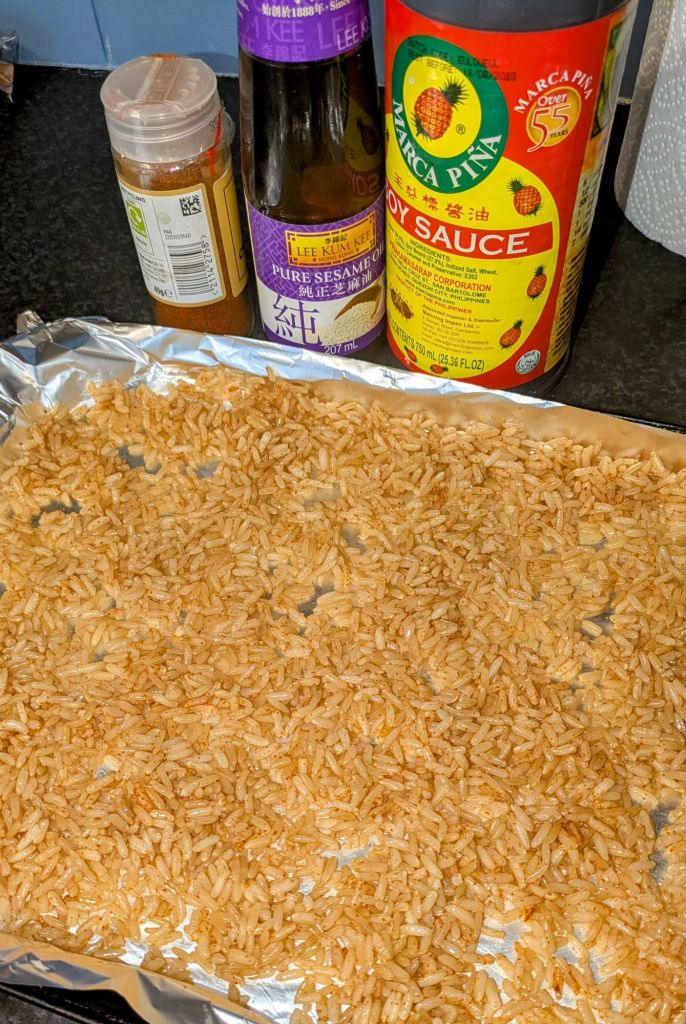
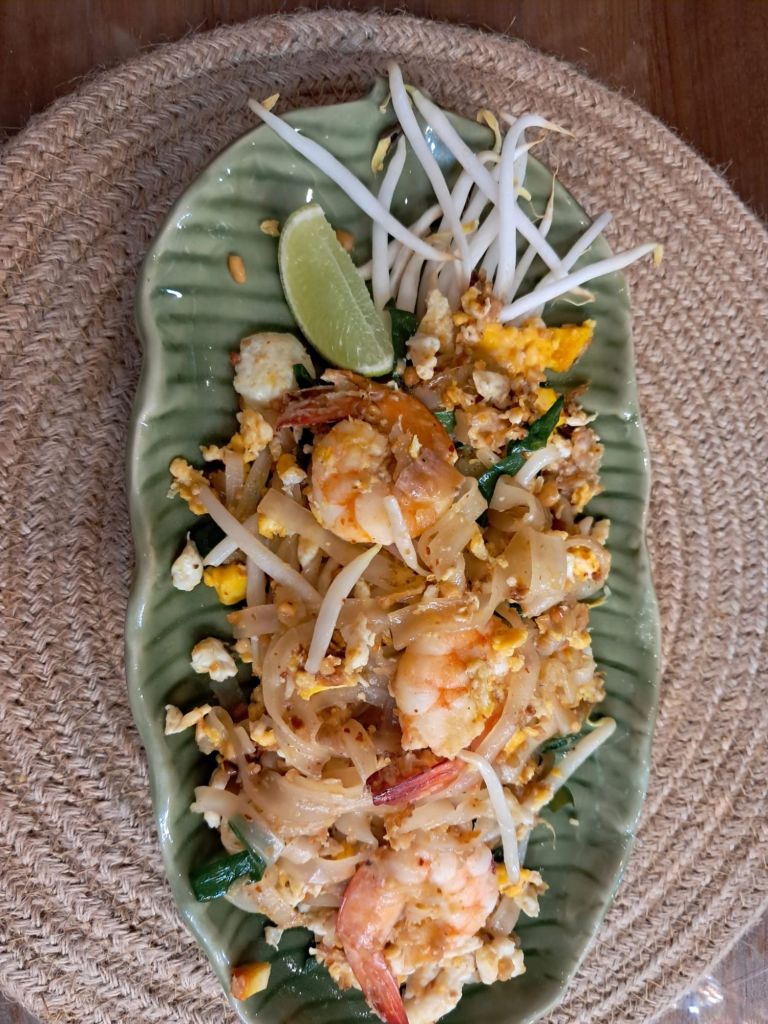
One of my many faults is a total inability to judge the amount of rice I need to cook, which usually results in making enough rice to feed a small island nation.
As I hate food waste I was left with some leftover brown rice and decided to try a version of a dish I had once when travelling in Asia. The results were yummy and I keep making this as it’s really versatile and you can swap around the veggies/herbs and protein to stop yourself getting bored with this.
If you’re vegetarian/vegan you can swap animal protein for tempeh, nuts or tofu. I used a tahini dressing but again you swap this for a yoghurt dressing or just a plain vinaigrette if you prefer.
Serves 2-3
Ingredients
For the crispy rice
200 Grams Cooked brown rice
1/2 Tbsp Soy sauce
1 Tsp Sesame oil
1 Tsp Chilli powder (less if you prefer it less spicy)
Large pinch of garlic or onion powder
For the salad
150 Grams Edamame (soy) beans (I buy these frozen from the supermarket and just defrost them as I need them)
100 Grams Red Cabbage (shredded)
250 Grams Prawns (I used pre cooked frozen ones that I defrosted)
Spinach
1-2 Carrots (grated)
For the dressing
1-2 Tbsp Tahini
1 Clove of garlic (minced)
1/2 Lemon
Method
Pre heat your oven to 180 degrees (Celsius)
Line a baking sheet with foil (I do this to save on washing up)
Add the ingredients for the crispy rice to a bowl and stir well to make sure all the grains are coated.
Transfer the rice to the baking sheet and smooth out evenly and bake for 20 mins. Stir once or twice (the rice at edges of the sheet will crisp up faster). The texture should be crispy but with a bit of chew to it (it shouldn’t be so crisp you feel like you’re eating uncooked rice). Once cooked, allow to cool before adding to the salad
To make the dressing, combine all the ingredients in a small bowl. I usually add a couple of tablespoons of warm water to loosen the dressing, but it’s up to you, how thick you want the dressing
Add all the ingredients to a large bowl, and toss the dressing through and serve immediately
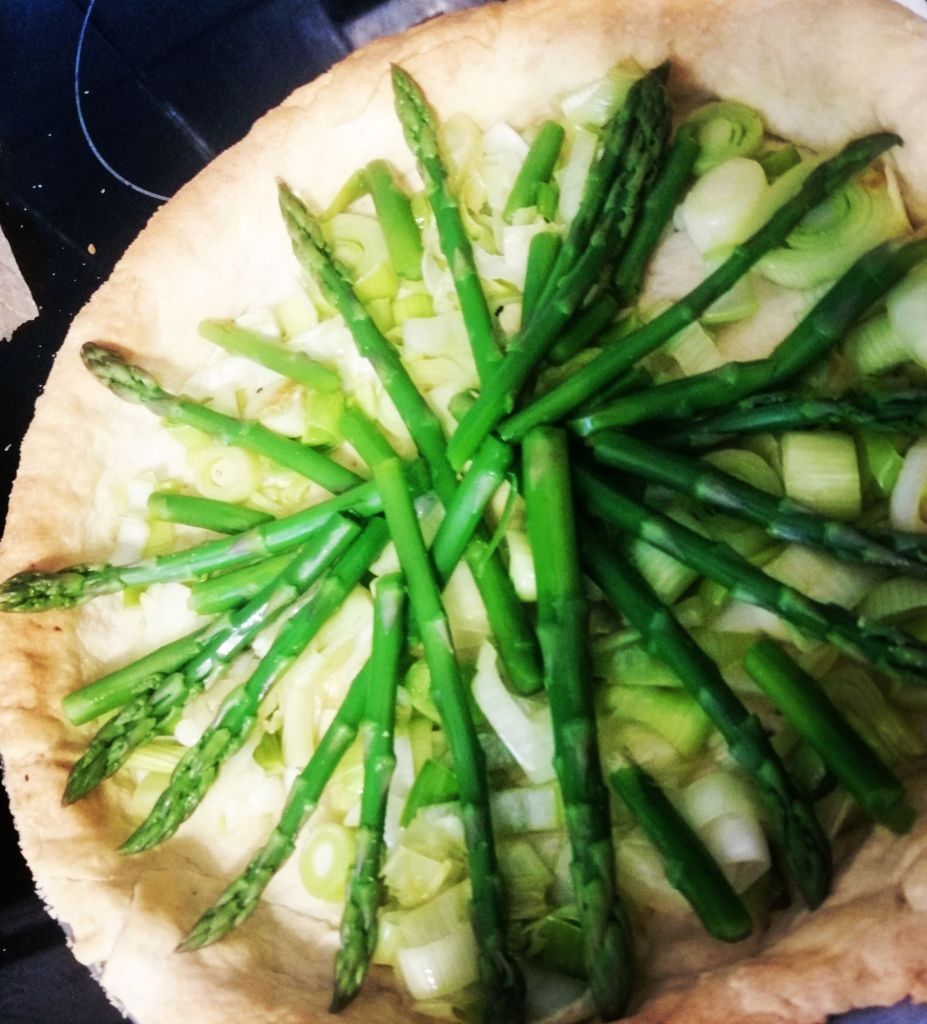
This traditional Spanish tart is usually presented with a cross on top which is meant to represent the cross of St James. My attempt at this wasn’t very symmetrical, and I’m not religious, but I thought I’d at least try to follow up the tradition.
The smell of almonds and orange that will float through your home is amazing (better than any air freshener, and forget coffee if I was in the market for a house, I’d definitely buy somewhere if it smells like this cake)
Using an electric whisk makes this pretty quick to knock together and is a yummy treat for anyone who is gluten or dairy intolerant.
Ingredients
6 Eggs (separated on to yolks and whites)
250 grams Caster Sugar
250 grams Ground Almonds
Zest of an orange
1 Tsp Orange flower water (don’t be tempted to add more, it’s very strong)
Method
Pre heat the oven to 170 degrees (Celsius) and line an 8 inch baking tin with baking parchment
In a large bowl whisk the sugar and egg yolks tomorrow with an electric whisk until light and creamy and increased in volume
With a spatula, fold in the orange zest, orange flower water and ground almonds and 1 tablespoon of water
Wash the beaters of the electric whisk thoroughly (otherwise your egg whites won’t whisk up properly) before starting to whisk the egg whites in a separate bowl until they form stiff peaks
Carefully fold the egg whites into the almond mixture trying to knock out too much air, but making sure the egg whites are thoroughly combined
Transfer the mix to your pre-prepared cake tin and bake for 50 minutes
Allow the cake to cool in the tin for 15 minutes before turning out on to a wire wrack to cool. Then when totally cool, dust with icing sugar
Everyone loves a dumpling and these are quick and easy. They are a little fiddly to make at first, but once you’ve made a couple you’ll get the hang of it.
I used pork mince these but you can swap this for crumbled tofu if you’re vegetarian or vegan. I also used shop bought stir fry vegetable mix, which makes this even quicker and easier. The filling can also be used for rice bowls, and wraps
Ingredients
For the filling
250 Grammes Pork Mince
250 Grammes Stir fry vegetable mix
1 Red chilli (finely chopped)
2 Cloves of garlic (finely chopped
2 Teaspoons Grated ginger
2 Teaspoons Soy sauce
2 Teaspoons Rice wine vinegar (white wine vinegar will do if you don’t have this)
2 Teaspoons Sesame oil
For the dipping sauce
2 Tablespoons peanut butter
1 Teaspoon Honey or maple syrup
1 Tablespoon Soy Sauce
1 Tablespoon Siraccha
For the dumplings
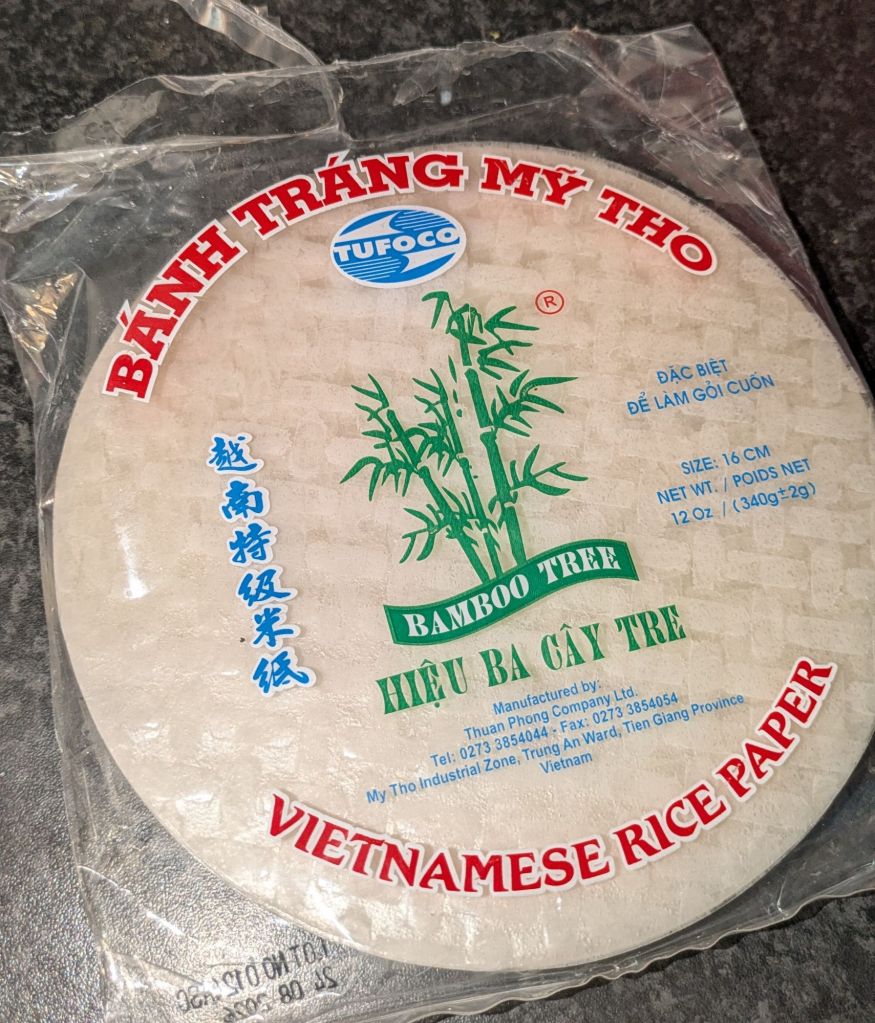
Rice paper sheets
Method
Heat a large wok or non stick frying pan and add the pork to the pan, use a spatula to break down and crumble the pork, stirring until its brown
Add the pre chopped vegetables and cook for 2-3 minutes, before adding the rest of the ingredients (except to the sesame oil, add this at the very end), cook for another 2-3 minutes. Remove from the heat and allow to cool
To make the dipping sauce, add the peanut butter and honey/ syrup to a bowl and pour in 2-3 tablespoons of boiling water and stir until you have a smooth sauce. Add the other ingredients a little at a time (taste as you go to check you’re happy with the flavour)
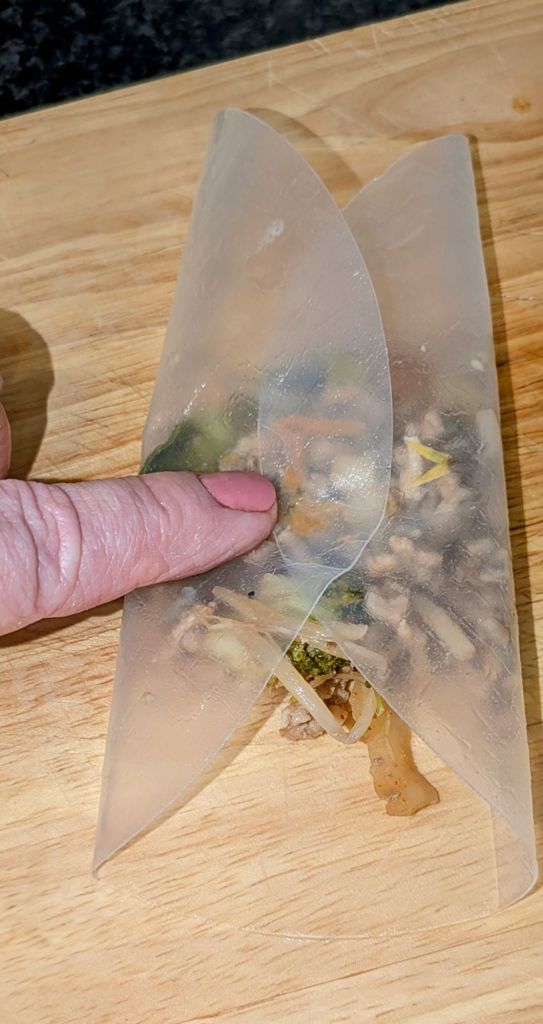
To make the dumplings soak rice paper sheets in water. I soak them one at a time in a flat wide dish and as I lift out one sheet to fill, I add another sheet to the water so it can soften while you’re making the dumpling.
Soak the sheet for about a minute, I think it works best when it’s the consistency of cellophane. If you soak the rice paper for too long it will get too soft and be difficult to use.
When you lift out the sheet, put a dessert spoon of the cooled filling in the centre of the rice paper. Fold the two sides of rice paper together and then fold the top and bottom of the rice paper towards the centre (the rice paper should stick to itself). This will create a little square dumpling
Heat a light drizzle of oil in a large frying pan. Cook the dumplings in batches, being careful to leave space between them or else will be assholes and stick to each other
Fry for 2-3 minutes each side, and serve immediately along with dipping sauce
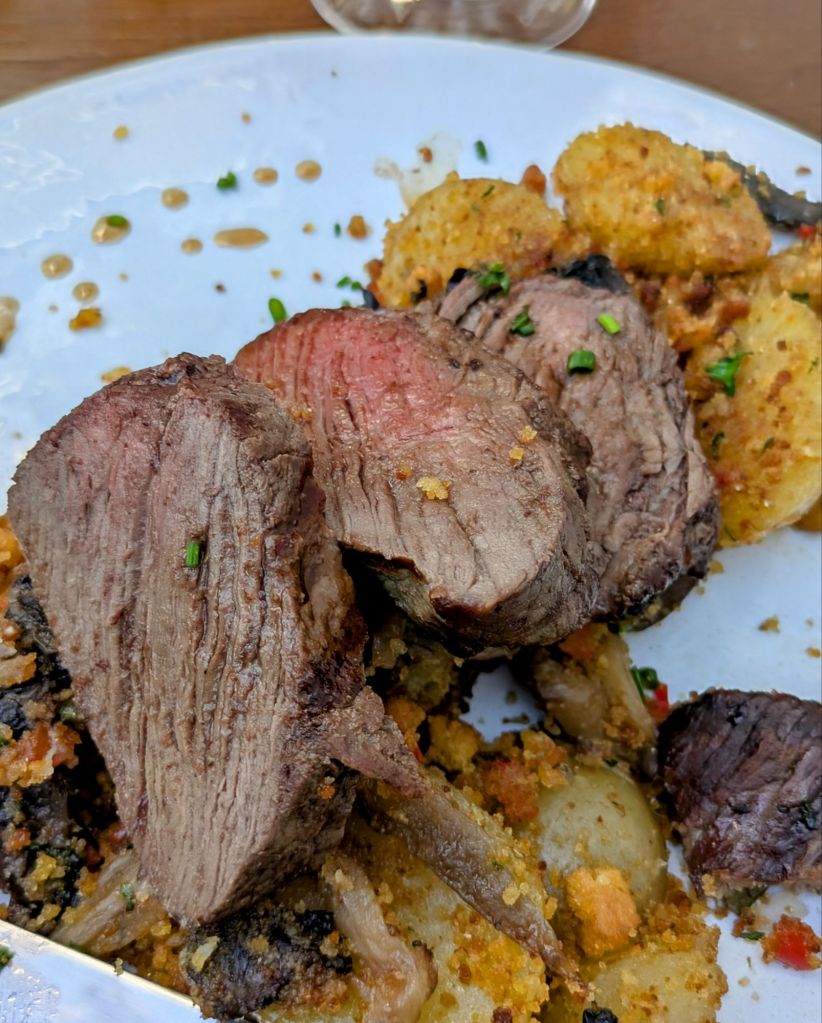
Every once and a while it’s nice to have a splurge and armed with some vouchers gifted by very sweet former coworkers the Muddlers club was the chosen venue.
The restaurant has a Michelin star and is hidden in a quiet side in the city’s Cathedral Quarter, and is named after a secret society of United Irishmen dedicated to overthrowing British rule who used to meet on the site 200 years ago.
As expected the Muddlers club is not cheap. When trying to book for lunch the only option we could choose was for the tasting menu at £95 per head (which I thought was quite cheeky) plus an additional £70 if you wanted to par wines with each course. We decided against this, but the cheapest bottle of wine is still over £50, lunch can turn into quite an expensive affair.
The food and service however were both excellent.
Like most tasting menus portions are tiny but extremely rich and unfortunately I didn’t take photos of each of the 6 courss. The trio of amuse bouches were probably the best I’ve ever tasted and nothing disappointed.
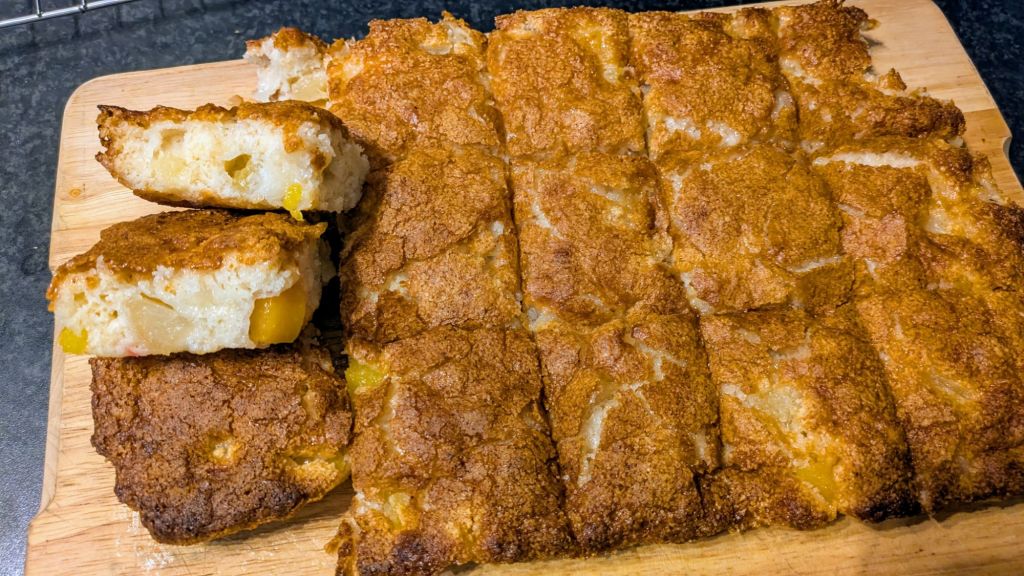
I made this as a cake a while back, and had to bring something to a family thing and didn’t have a cake tin so tried these as cake bars because they’d be easier to move.
The recipe couldn’t be simpler and you don’t even need scales to measure the ingredients. It’s based on a recipe the blessed Dolly Parton’s character calls out to someone in the movie Steel Magnolias. The name comes from the recipe needing a cup of each ingredient.
There are equal quantities of the ingredients and you can use the can to measure the ingredients. It’s also handy to make from store cupboard staples and literally takes 5 minutes to knock together before baking
Ingredients
400ml Can of fruit salad (make sure to buy the one with syrup, not saved in juice)
Sugar
Self raising flour
Method
Pre-heat the oven to 180 degrees Celsius, line a 6in x 9in baking tin with baking parchment
Pour the can of fruit salad into a large bowl.
Rinse out the can and dry it well. Fill the can with flour, empty the flour into the bowl (you can sift it if you have time)
Fill the can with sugar and add it into the other ingredients. Mix with a spatula until well combined and there are no floury patches
Empty the cake mix into the baking tin and spread evenly. Bake for 25-30 minutes
Apparently most of us don’t eat enough protein and it can be hard to squeeze enough into your diet (especially if you’re not a meat eater).
This soup is rich and filling and the protein comes from cottage cheese. I know a lot of people don’t like it, due to its texture. In this soup it’s blended until smooth and adds a nice creaminess to the soup
Ingredients
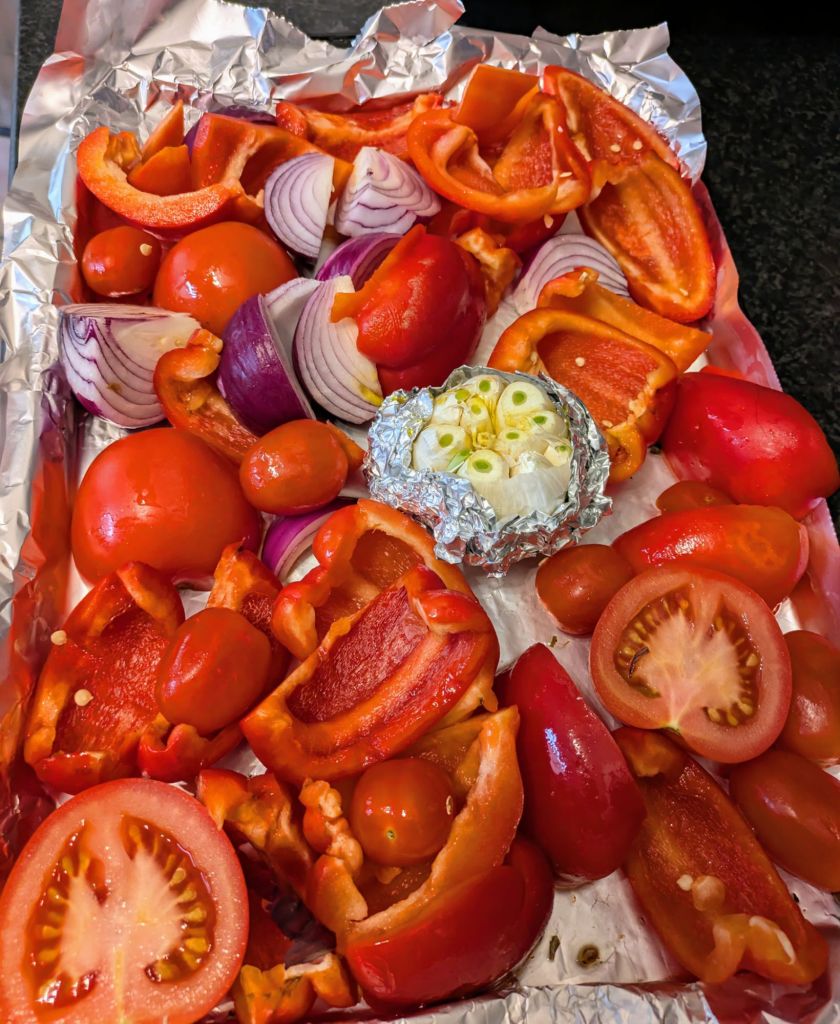
500 Grams Tomatoes (I used some cherry tomatoes and chopped a couple of large tomatoes that were getting past their best)
2 Red Peppers (cut into chunks)
2 Red onions (cut into quarters)
1 Bulb of Garlic
2 Tbsp Oil
300 Gram Tub of cottage cheese
500ml Vegetable stock
2 Tbsp Basil
Salt and pepper
Method
Pre-heat the oven to 180 degrees (Celsius)
Add 1 tablespoon of oil to an oven proof dish, add the vegetable to the dish. Wrap the garlic bulb with aluminum foil. Leave a little opening at the top and drizzle in a little oil . Bake for 25-30 minutes until the edges of the peppers start to blacken a little
Transfer the roasted vegetables to a large pot. When the aluminum is cool enough to handle, squeeze out the softened garlic, and add to the pot
Add the vegetable stock and begin to heat. Add the cottage cheese and basil (be careful not to let the soup come to the boil). Using a stick blender (or transfer to a regular blender) and whizz up until the soup is smooth and creamy. Check and add salt and pepper if you think it needs it
Desperate to escape the leaden skies and constant drizzle of Belfast, I decided to take a quick well priced visit to the city of Seville in Southern Spain.
It was exactly what I needed, with a very pleasant 17 degrees (Celsius) and almost constant sunshine.
The first thing you’ll notice about the city is the orange trees you’ll see everywhere, adding to the general sunny feeling of the city. Don’t be tempted to try one of the oranges, it’s illegal, but they’re also extremely bitter as they’re the type used to make marmalade.
Seville is the 4th largest city in Spain and was made rich through Spain’s colonies in the Americas and Indies.
I’d highly recommend booking one of the walking tours around the city. Our tour guide Miguel was a fountain of knowledge and showed the historic sites and explained how the city had been formed by multiple influences by the many invaders from the Moors of north Africa through to the vikings (who by all accounts found the place too hot and after a few weeks pillaging decided to go home). In Summer the city regularly sees temperatures of up to 45 degrees, and the locals struggle with this and often head to the coast.
We had planned to visit the historic coastal town of Cadiz which was around 90 minutes away by train. Unfortunately there was a massive festival in the town and every bus and train was booked out (so worth checking in advance if you’re planning a visit and don’t just rock up at a train station like we did).
One of the best known places to visit is the Real Alcazar (Royal Palace), which is still one the official royal residences of the Spanish royal family. A mixture of Spanish and Moorish architecture it also has stunning gardens that are cool and serene. (If you are buying a ticket on the day, you’ll need to show photo ID).
If you want a free activity and a bit of people watching the Plaza de Espania is also worth a visit. The large plaza is lined on one side with beautiful colonnaded walkways and elaborate tiled benches (and were used as a back drop in one of the Star Wars films, I’m not a fan so I don’t know which one). There’s also a little lake where you can rent small boats to glide around on. You’ll probably also see flamenco dancers performing (or sometimes other street performances).
Flamenco is a massive thing in Seville and there are multiple different shows in different venues every night, but these also sell out quickly so if you’d like to see one book in advance (it is very impressive).
The city is extremely walkable and feels very safe. You will probably find everything you’re interested in seeing in the old town, so best to locate yourself there when booking accommodation. You will definitely encounter women walking up to you trying to give sprigs of rosemary for luck and they may ask for a couple of coins (locals warn these women will never have change, so don’t give a note and expect money back, it’s also fine to politely say no, gracias and they will take no offence).
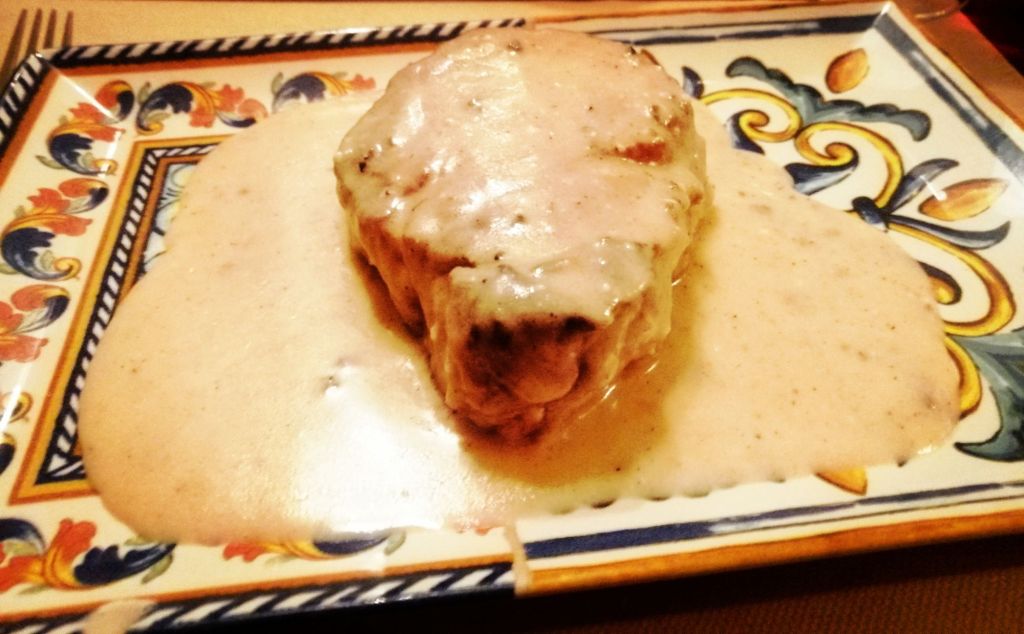
Iberian pork cheeks in a brandy, was the post delicious in thing I ate during the trip.
Another must see is Seville cathedral. Richly decorated with a mixture of recoco chapels and Moorish carvings (it had previously been a mosque, but was taken over as a church when the Moors were driven out of Spain, and the large tower was used to call the faithful to prayer). You can climb the tower if that’s your thing and you’ll be using ramps rather than steps (the Imams used to ride donkeys up the ramps to the top of the tower so they didn’t have to climb hundreds of steps five times a day). If you want a relatively well priced cocktail with a rooftop view of the cathedral the hotel Donna Maria is a good spot.
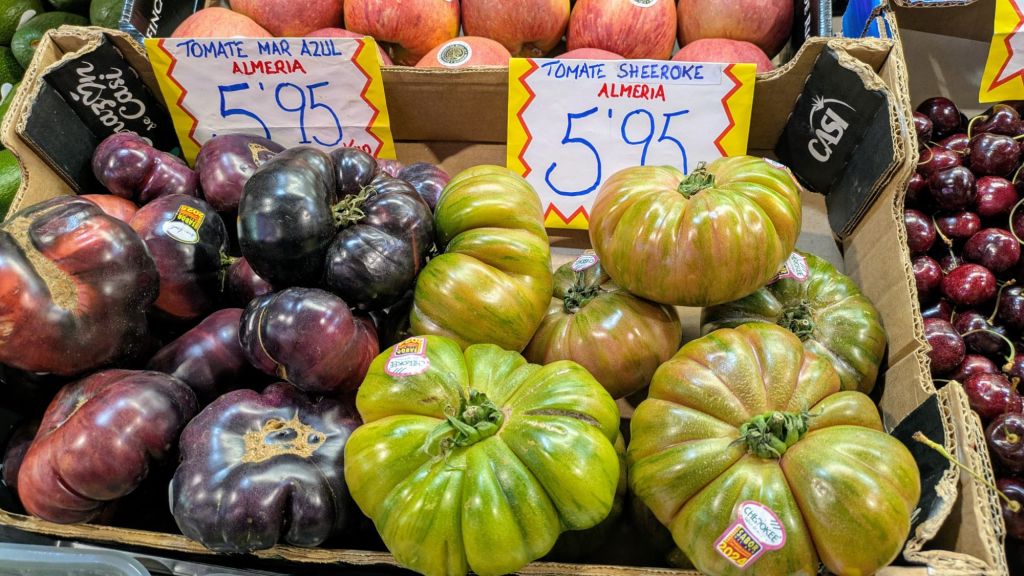
If you prefer more modern architecture the Metropole Parasol is also worth seeing. With a viewing gallery offering great views of the city and a buzzing food market below selling fresh fruit and vegetables (beef tomatoes the size of a child’s head), as well as meat, fish and local delicacies.
Food and wine in Seville was excellent as I expected, with great selections of tapas in most places. I had visited Madrid before and a small complimentary tapas was served when you ordered a drink. In Seville post places expect these to be ordered separately, and prices are from 4 euro for a small portion or you can size up if sharing.
Seville is gorgeous with lots of history, beautiful little squares lined with orange trees to sit down and watch the world go by.
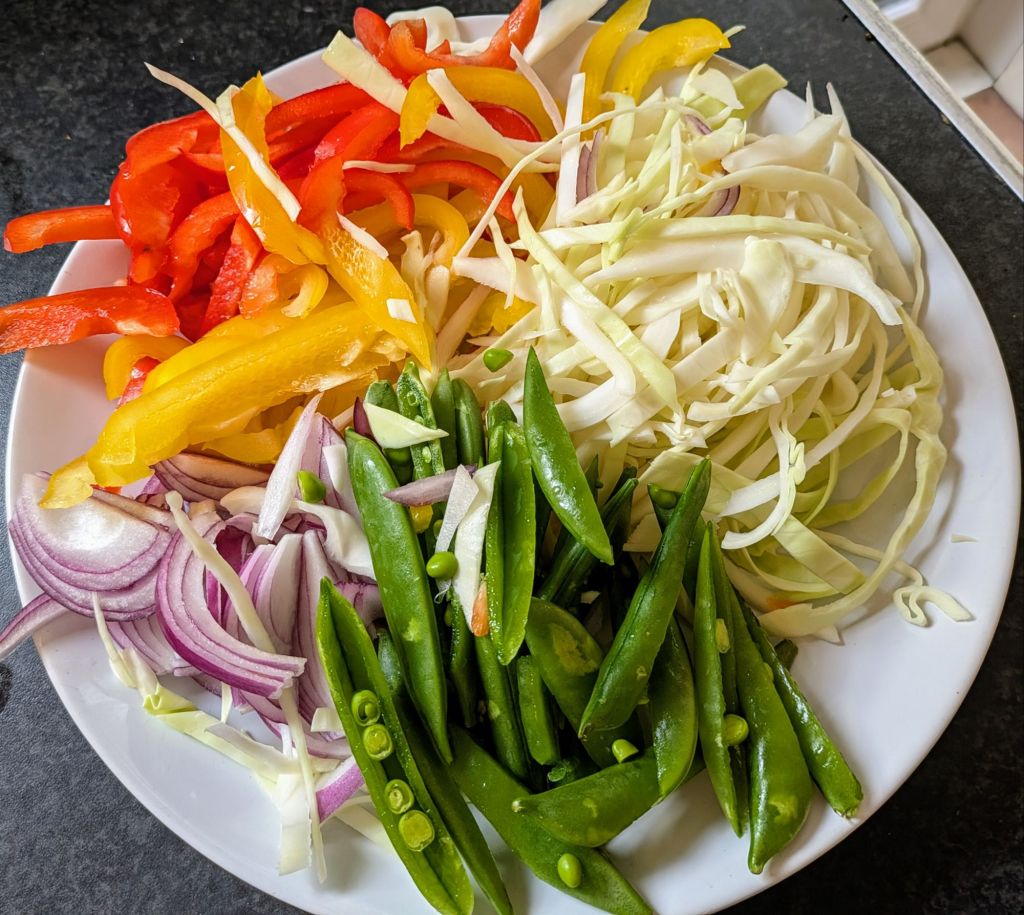
Quick, tasty and easy weeknight night dinners are the best and this is ready in 15 minutes. It’s also pretty healthy and is packed with vegetables (especially if you’re trying to “eat the rainbow” which is essential for good nutrition).
Pork sometimes gets a bad reputation, but lean pork mince is full of protein and has a good amount of iron.
Serves 4
500 Grams Lean pork mince
1 Red pepper (finely sliced)
1 yellow pepper (finely sliced)
1 Red onion (finely sliced)
Half a small white cabbage (finely sliced)
Handful of sugar snap peas or mange tout
2-3 Cloves of garlic (finely sliced)
4-5 Tbsp Hoi Sin Sauce
Method
Heat a large wok or high sided frying pan over a high heat
Add the pork mince to the pan (there should be enough fat in the meant to stop it sticking even though it’s lean, but you can add a tablespoon of oil if you think you need to). Stir the meat quick to break it up until it’s mainly brown
Add all the veggies to the pan and stir often for 2-3 minutes
Stir in the garlic, and Hoi Sin sauce and half a cup of boiling water. Stir well and let the sauce thicken for another minute until everything is well coated
It’s comfort food weather, and if like most of us you’re trying to increase the amount of protein you’re eating these are perfect.
I can eat a big bowl of these on their own with some crusty bread, but they also make a tasty side dish.
This is quick and easy to make, using tinned beans but you can use dried beans but these usually need soaked overnight and should be cooked according to the instructions on the packaging.
Ingredients
2 x 400ml Cannelloni beans (drained)
1 Tbsp Tomato puree
125ml Vegetable stock
2 x Cloves of garlic (finely chopped
1 Large sprig of rosemary or 1 teaspoon of dried rosemary
1 Tbsp Oil
1 Onion (finely chopped)
4-5 Sun dried tomatoes
Salt and pepper
Method
Heat the oil in a large pan and fry onion gently until it starts to caramelise, stirring occasionally.
Stir the tomato puree into the pan and cook for another 2 minutes before adding the beans and vegetable stock. Stir well and simmer for 10 minutes.
With a fork or potato masher gently mash about a third of the beans. This will release the starch in the beans that will help thicken the beans and give the beans a creamy texture.
Stir in the sundried tomatoes and rosemary, and simmer for 5 minutes. Check the seasoning and add salt and pepper if you think it needs it.
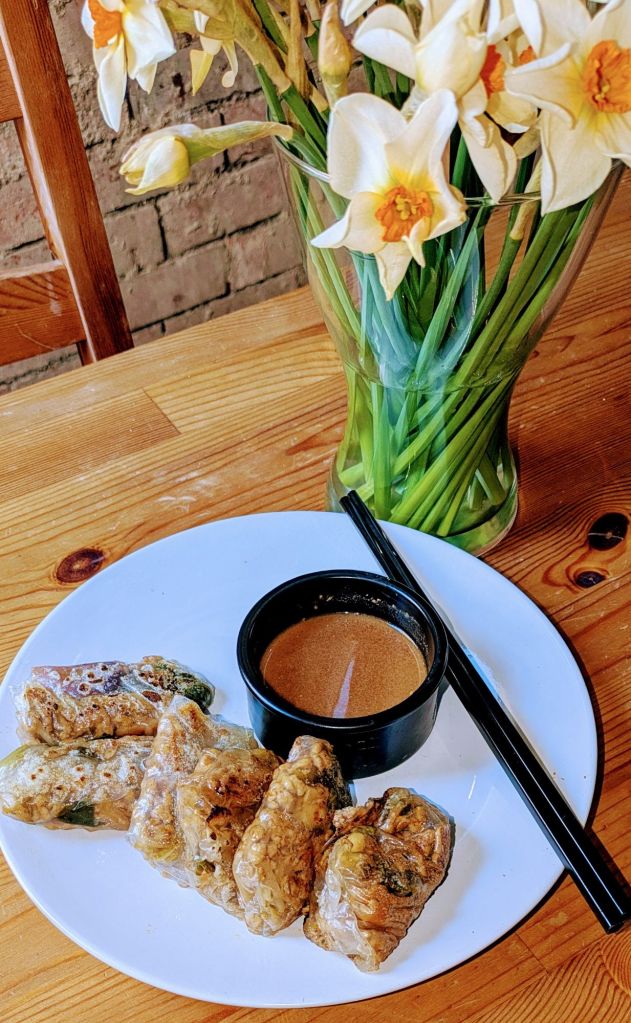
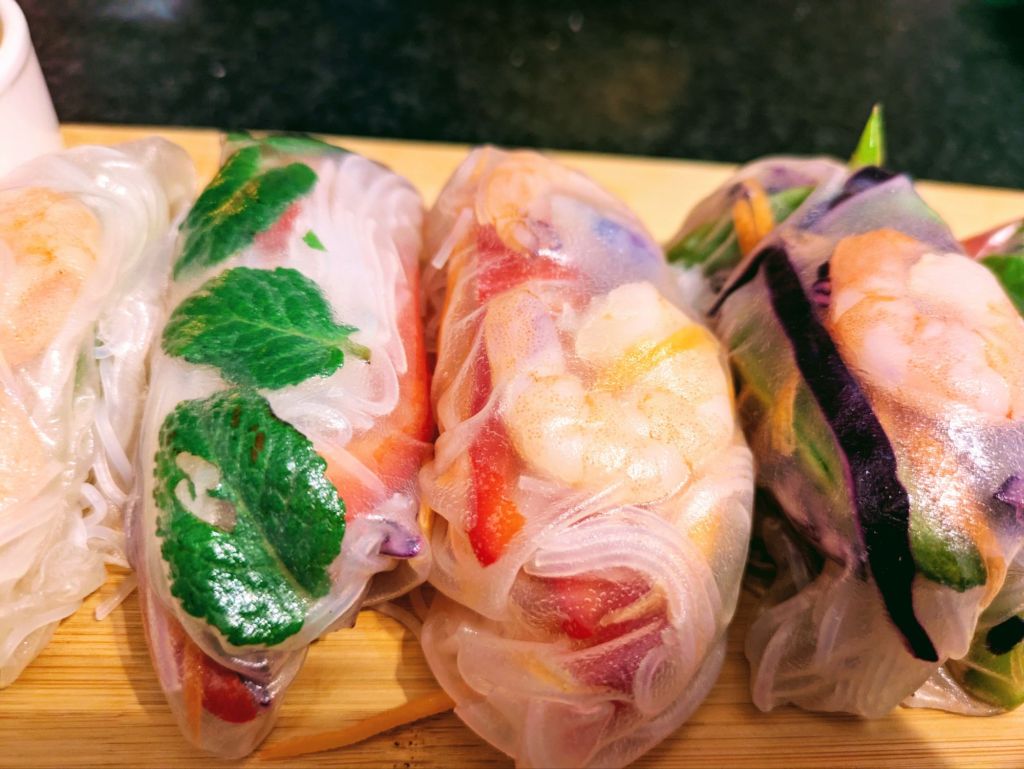
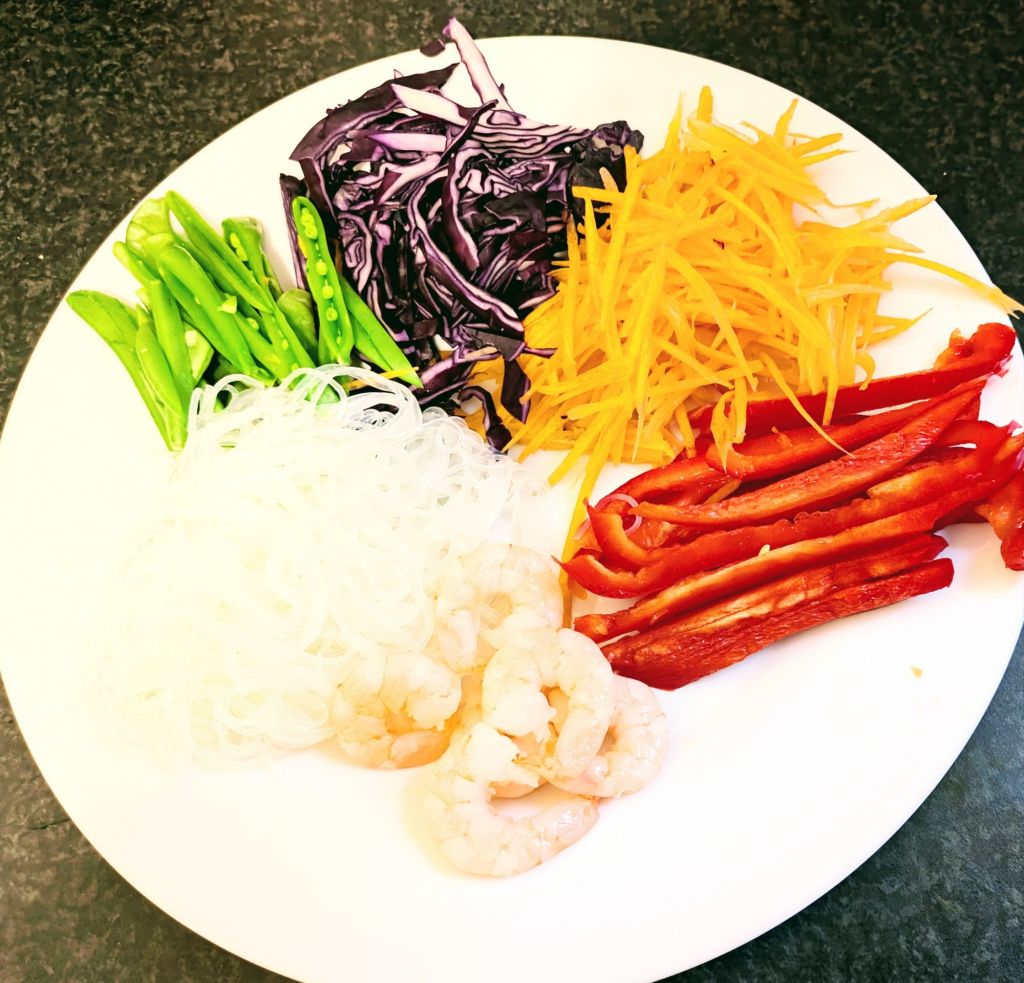
It’s not quite Summer, but after all the over indulgence of Christmas I wanted something lighter. These are packed with fresh veggies and herbs, and you can add whatever protein you like. I used prawns because I had some left in the freezer, but left over cooked chicken or pork can be used and vegetarians can use firm tofu or tempeh.
You can find rice paper in Asian supermarkets and I’ll be honest it can be fiddly when you start working with it. The one I used needed to be soaked in a bowl of water for a minute and I made a mess of the few I tried. But you’ll get into a rhythm where you have a leaf of rice paper soaking while you assemble a roll and you be a total machine at making these in no time.
You can spend time making designs etc, that can be seen through the rice paper to make them pretty ( I was hungry so decided not to faff about). You can also use any variety of vegetables you enjoy.
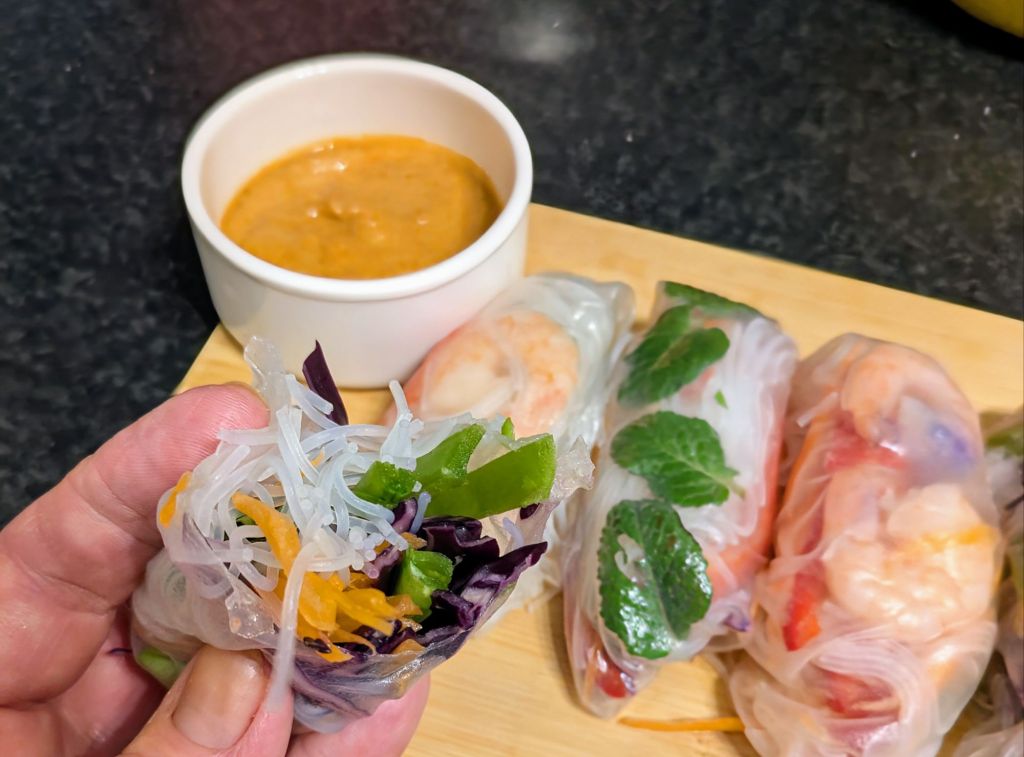
I served this with a peanut (sort of stay sauce), which is quick and easy.
Serves 2
Sheets of rice paper (you’ll probably struggle with the first couple so consider these practice ones, but you’ll get into the way of doing it in no time)
Half a red pepper (thinly sliced)
Quarter head of red cabbage (thinly sliced)
Handful of sugar snap peas or mange tout (thinly sliced)
1 Carrot (thinly sliced)
50 Grams Thin rice noodles (cook according to instructions on the packet)
Herbs – I used mint and coriander
100 Grams Tiger prawns (use whichever cooked protein you have.
For the dipping sauce
2 Tbsp Peanut butter
Juice of half a lime
1 Tsp fish sauce
Pinch of sugar
1/2 Tsp Chilli power (or 1/2 fresh chili)
Method
Assemble all your ingredients
Check the instructions on the rice paper, mine told me to soak for 1 minute. I used a large flat bowl and topped it up with warmish water.
Soak one sheet at a time, adding a new sheet to soak when you lift one out. The paper should be soft enough to be pliable but not mushy
Lift the soaked rice paper onto a board and fill with a selection of your fillings in the centre leaving a 2cm edge. Don’t over pack or it will split.
Fold in the edge closest to you and then tuck in the sides and fold into a roll (a bit like a smaller version of a burrito). Set to one side and then start the next roll
For the dipping sauce, adf all the ingredients to a bowl and stir in a couple of tablespoons of boiling water to loosen up the mixture and stir well before checking the seasoning
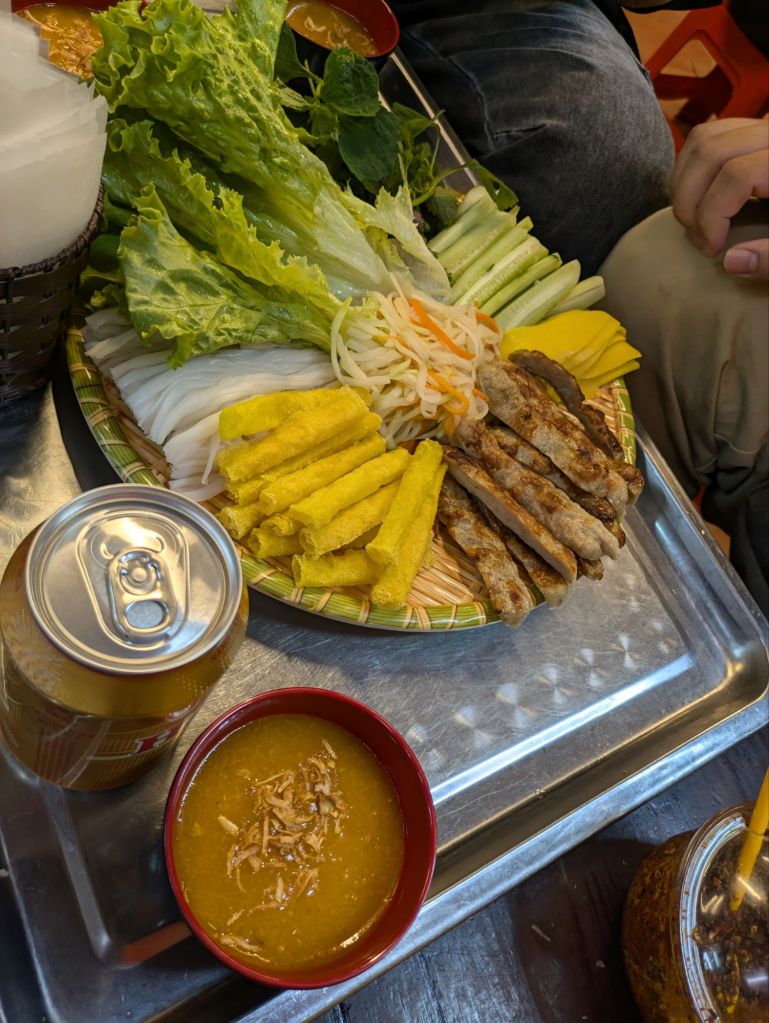
I’m not going to be coy, I absolutely loved Hanoi.
I didn’t know a huge amount about Hanoi or Vietnam so wasn’t sure what to expect (which is probably the best way to visit a place).
That being said Hanoi has a serious smog problem, so if you have serious respiratory issues, definitely wear a mask and keep an inhaler handy. The city is home to more than 8 million people and has at least 6 million mopeds. The country is working on building their own electric vehicles but the cost makes these inaccessible to most people.
If you want to learn more about the food or culture of the city I would definitely recommend getting in touch with Hanoi Kids, http://www.hanoikidsorg This is a non profit organization where college students meet up with you and can show you around based on what your interests are (and also gives the students a chance to practice their already excellent English). We met up with 2 fantastic students Tom and Noonn who were great company. I wanted to know more about the city’s food scene and they took us to places we would never have ventured (I’m talking up back alleys to eat delicious Pho at the back of someone’s house). There is no formal charge for this, but you should tip your guides well as they do an excellent job and this goes back into the club.
They also introduced me to Vietnamese egg coffee. The thought of egg and coffee in the same cup didn’t sound too appealing, but it’s definitely worth trying (and doesn’t taste eggy). It was invented after the war when dairy was scarce. The coffee is almost a mousse and would remind you of tiramisu and the cup is served in a bowl of hot water to keep it warm. Coffee with condensed milk is also popular and Vietnam grows and produces excellent coffee.
The city is full of history, and the Hao Lo prison should definitely be on your itinerary. The prison was formally known as the Maison Centrale, and was a large foreboding prison expanded by French colonial forces when they invaded the country in the late 19th century. Needless to say the French did some very bad shit and the Vietnamese people were treated appallingly while fighting for independence. Being able to stand in the cells, see the guillotine used and hearing first hand accounts from prisoners brings a very dark period to light and shows the bravery and resilience of the people. The prison was also known as the Hanoi Hilton and was home to captured US military pilots in the 1960s and early 1970s. The exhibition showed some of the military personnel from both countries working together since the war to help identify and repatriate those who died in an attempt to reconcile the past. This was a very moving place to visit and gave a good background on Vietnam ‘s more recent history.
If you feel like a slightly lighter visit, the Thang Long Imperial Citadel is also worth a visit. Located in central Hanoi, the citadel dates back to the 10th century and was home to different dynastic royal families and imperial administration. Historically, doctorates and laureates were awarded at the citadel, so when we visited a lot of high school kids were graduating and it’s traditional to visit the site. There were also several school field trips with younger kids visiting who were exceptionally sweet and well behaved, shouting hello and waving to us. Education and literacy are extremely important to the Vietnamese and you will see book shops everywhere.
While the city is large, if you base yourself in either the old or French quarter you will probably be within walking distance of most of the sites worth visiting. The area around the Thang Long lake is pedestrianised at the weekends and you’ll find families out with young kids enjoying street entertainment and night markets and it is a great way to kick back and enjoy the city.
If you’ve had enough walking but aren’t going to far, you can also take one of the bicycle rickshaws you’ll see across to the city. I’m still going to recommend using the ride service GRAB (not sponsored by them, but open to it). You can use this to book a taxi, or hop on the back of a moped at a cheaper rate (no amount of money would pay me to do this, as traffic signals seem to be little more than a suggestion).
No visit to Hanoi would be complete without a visit to Train Street. It is literally a narrow street lined with bars and cafes where you can watch a train cut right through the middle of the street. It’s great fun and worth dropping by when a train is due and the surrounding streets also have great places to eat and drink. Small low seats and tables right on the street are normal, but you can also find higher seats easily enough.
Hanoi is excellent value for money if you’re on a budget and you’ll enjoyed meeting the people who were warm, funny and friendly.
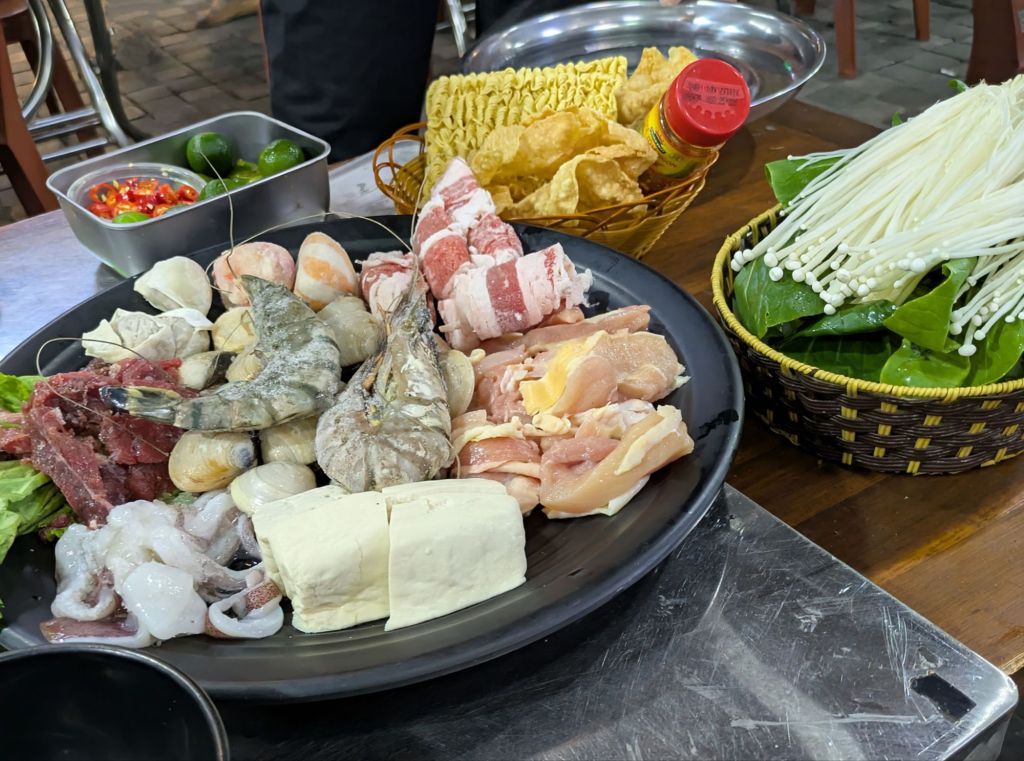
I had never been to Bangkok before and the adjectives for it are enormous, crazy and scorching hot.
It’s a city of massive contradictions. The traffic is like nowhere I’ve ever seen. Apparently it has the second most congested traffic in the world, with more than 4.5 million people living in the city. We spent over 2 hours trying to go 4 kms in rush hour.
There is public transport including an MRT train line, buses and the ever present tuktuks. If you haven’t been on one before they are great fun on a night out, with bright neon bands and music pumping. They are also slightly terrifying as the drivers also have a blatant disregard for the rules of the road, and I swear one went up on two wheels when we were going around a corner. Like with taxis, a good tip is to agree a price before you set off.
You can also get to where you need to go along the water, with ferries and river taxis being cheap and frequent.
You’ll be surrounded by food wherever you go, and you can’t walk more than a couple of metres without finding a food stall providing cheap and tasty food of every description or cold drinks that you will definitely need. The food from the food stalls was great and cheap, as always look for stalls where the locals are eating and have a good turnover, and don’t get cocky with the chillies they are wickedly hot. I guarantee you’ll become addicted to the mango and coconut sticky rice sold everywhere.
I was staying near the ICON SIAM Mall and if you want to enjoy a variety of Thai food with some air con it has one of the best and prettiest food courts I have ever seen, with sections offering food from each region of Thailand, as well as food from other Asian countries. You can also pick up pretty cool food related gifts here too.
As a keen cook I treated myself to a morning learning to cook Thai dishes and included a visit to a local food market and tuktuk ride back to the cookery school. Ping, at the Sabeing cookery school was our guide/instructor and gave lots of really is interesting information about Thai cuisine and ingredients and if you get a chance to visit Bangkok I would definitely recommend it.
As a kid I was enthralled by the movie, ‘The King and I’ (I only learned recently that the Thai people are not fans of the film, and in hindsight I can understand why it is problematic) but still wanted to see the royal palace, which did not disappoint. Richly decorated and full of history, it was everything I hoped it would be. I also walked another 10 minutes along the river to Wat Pho, the temple is the site of the giant reclining Buddha. (Quick traveller tip, on the way to Wat Pho you may be approached by tour guides telling you the site is closed today, but they can show you other sites, this is usually a scam)
Like most sacred sites and in the palace you’ll be expected to cover up if you’re showing too much skin, and behave respectfully. Within the grounds of the temple there is a massage school, and if you’re tired from site seeing, this is a perfect chance to rest and have an exceptional massage for around £10.
I would recommend everyone to treat yourself to an authentic Thai massage if you’re visiting, and prices seemed to range from £6-£10. If you’ve never had an authentic Thai massage before you’ll probably be asked to change into loose pyjamas and you’ll lie on a low platform often in the same room as other patrons. Then a very sweet smiley lady about the size of a nine year old boy will twist you like a pretzel and work you over like you owed her money, using her hands, elbows, knees and feet. Don’t be surprised if they kneel on you, digging both their knees into your butt cheeks. However, stick with it because you’ll feel like a million dollars after it.
Bangkok is famous for its night life, and if you’ve ever watched The Hangover 2, it’s totally within the realms of possibility that some people could go totally wild. I didn’t get a chance to visit Kaoh San Road (which by all accounts is the place to go if you’re interested in hard-core partying). I did visit the Pat Pong night market which was good for knock off clothes and tourist tat. It also has a pretty vibrant bar scene. Some hostess bars had worrying young looking girls enticing customers in (I’m trying not to be judgmental, as I was talking to a young Thai woman at my hotel who looked about 11 but was actually 22). Street touts will also try to encourage you into drag shows and “ping pong” shows (and we’re not table tennis!)
Bangkok is pretty hectic, but you should definitely be able to find something you’ll love whether it’s food, shopping, nightlife or history and culture.
You know you’ve landed somewhere pretty special when even the airport has a waterfall, monorail and butterfly garden. It’s also amazingly well run, efficient and pleasant to travel in and out of. It’s a no announcement airport so it’s surprisingly calm without constant intelligible “bing bong” announcements so it’s important to check your flight details.
If you haven’t visited Asia before Singapore is an excellent entry way. As a former British colony English is widely spoken, signs and announcements are also in English (they also drive on the left hand side of the road).
The city itself is a beautiful mix of historic buildings and iconic skyscrapers. It’s a lot greener and less frenetic than cities like Hong Kong and Bangkok. It is also an important financial and business and hub, and it’s clear there is also a lot of money floating about the place. But the city also has a fascinating history and has been a crossroads for multiple cultures.
The local indigenous population refer to themselves as Hainese. Throughout the city you’ll find other communities like Arab Street and Hagi Lane where you can find the beautiful Sultan Mosque, where Muslim merchants originally settled and you can find multiple pretty little Turkish, Indonesian and Malaysian restaurants.
Walk about 10 minutes and you’re in Little India, there is also a sizable China Town, with endless places to eat, a night market and beautiful ornate Hindu temple.
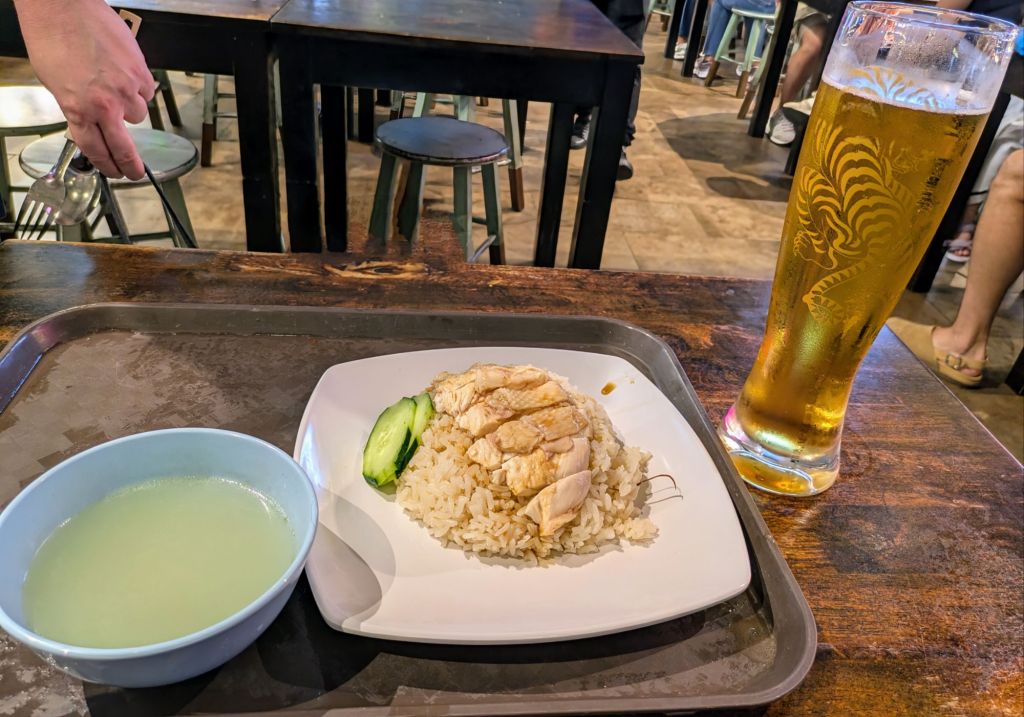
Hawker markets also play an important part in the food culture of the city, producing over 1 million meals daily, as it’s common for locals to eat out daily. They are essentially food courts where you can buy everything from the local speciality of chicken and rice (poached chicken and rice served with a simple but tasty chicken broth and costs about £3.20), through to other dishes from all over Asia.
The Lau Pa Sat hawker market was probably my favourite but is popular with tourists, it runs alongside what’s known as Satay Street. As you’ve probably guessed you can find multiple vendors cooking and selling satay skewers with chicken and prawn being the most popular, but frankly I thought it was overpriced, with food inside the hawker market being better value. The Maxwell hawker market in Chinatown was probably more authentic but maybe less fancy.
Singapore is incredibly easy to get around, the airport is only 30 mins from the city centre, and it has an excellent underground railway system (MRT) with fares costing around £1, and you can just tap your debit card going through the turnstile, so no queuing for a ticket. There is an option for a tourist pass depending on what you’re planning but I found it cheaper to just pay as I went.
The one thing I would recommend to anyone visiting Singapore is to visit the Gardens on the Bay. It’s a huge parkland that is free to visit and contains the iconic tree structures that resemble something from an alien planet or Jurassic park. There is an amazing light show each evening on the hour (this was honestly my favourite thing I did), and if you’re visiting during the day you can visit the Cloud Forest, an indoor botanical garden specialising in exotic plants and orchids, as well as the Flower Dome. You’ll need to pay in to see these as well as the viewing deck for the large tree (not to be recommended if you have a fear or heights).
Ask anyone who has ever been to Singapore and they’ll tell you how clean it is. Chewing gum is banned and smoking outside is banned except for designated areas with a green bin. On more practical considerations, if you need to use your phone lots of companies offer online Esim cards that work in several different Asian countries if you’re travelling, but ordinary sim cards can be purchased everywhere if your phone isn’t compatible with Esim cards. While the public transport system is excellent, I used the Grab transport app a lot when travelling in Asia (they haven’t sponsored me, but if they’d like to I’m definitely open to it). A bit like Uber you can book pick ups, there is a translate function and you can also take a photo of where you are, which was really useful if you’re in a busy street and makes it easier for the driver to find you, as well as knowing what the fare is up front and avoiding the need to haggle to agree a fare.
Singapore is a beautiful city, but very hot and humid. The best piece of advice I can give apart from staying well hydrated is to get up early and to see things, it’s less crowded and cooler. You’ll also avoid the torrential thunderstorms that happened every afternoon when I visited and were pretty cool.
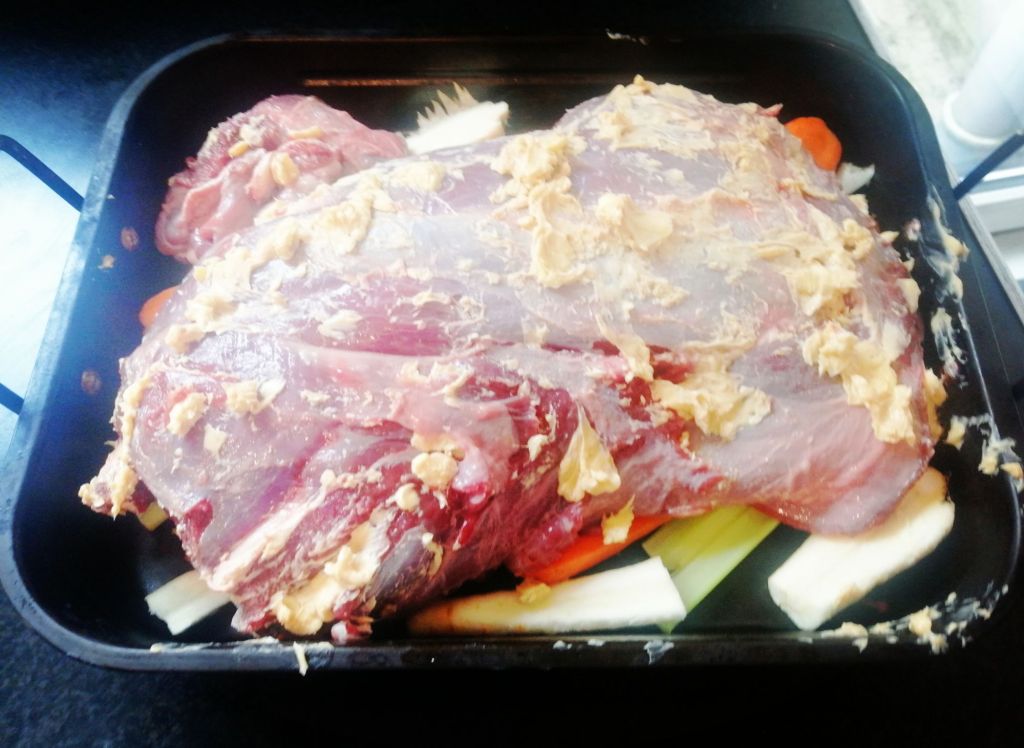
Yes, you read it right, 30 cloves of garlic. Before you imagine that you will stink enough to scare off a small town of vampires I promise you won’t, the garlic mellows and becomes almost sweet. This is a classic French dish, and it’s a classic for a reason. Traditionally it’s made with a whole chicken, but I prefer chicken thighs
The garlic cooks gently in wine and the chicken juices until they are soft and delicious. Cook them with their skin on and when cooked squeeze the soft garlic onto the bread you serve with this dish., they taste amazing.
I used a dish that could be used on the stove top and in the oven. If you don’t have one just transfer to an oven proof dish before putting in the oven.
The whole dish is incredibly tasty, serve the soft chicken with salad and crusty french bread, to spread the confit garlic on and mop up the sauce with it.
Ingredients
1 Kg Chicken thighs (skin on and bone in)
30 Cloves of garlic (about 3 bulbs, remove most of the papery outside, but leave on the tight pink/white skin around each clove)
250 mil White Wine
2 Sprigs of rosemary
25 Grams Butter
1 Tbsp Oil
Salt and pepper
Method
Pat the chicken dry with kitchen paper and season with salt and pepper
Preheat the oven to 180 degrees (Celsius)
In a large oven proof dish heat the oil and butter together. Over quite a high heat brown the chicken thighs on both sides (you might need to do this in a couple of batches, because if you crowd the pan the chicken won’t brown and you don’t want to lose the flavor)
When all the chicken has been browned add the wine and rosemary to the pan and scrape the bottom to release the yummy brown bits
Add the garlic cloves to the pan and stir well, before covering the dish with a lid (if your dish doesn’t have a lid, cover tightly with tin foil
Bake for 1 hour and 15 minutes (maybe a little longer if the chicken thighs are large, just check they are cooked through)
Serve with salad and crusty bread, squeeze the garlic out of it’s papery cover onto the bread and spread with a knife, you can thank me later
Stop throwing away stale bread and use it for this yummy unctuous comforting bake. You can make most of it the night before and impress everyone with a super chic breakfast, but it’s great at any time of the day. This is best if you can start it the night before but if not allow the bread to soak up the egg mixture for at least an hour or two
If you’re being totally authentic you should use Gruyere cheese, but I didn’t have this so I used cheddar and it was yummy too.
Serves 4
Ingredients
8 Slices of stale white bread
175 Grams Cheese (save about a third of the cheese to sprinkle on top before you put the bake in the oven)
4 Slices of ham
6 Eggs
350mil Milk
2 Tbsp Soft butter
2 Tbsp Dijon mustard
For the bechamel sauce
40 Grams Butter
20 Grams Plain Flour
4000 mil Milk
Salt and pepper
Method
Butter 4 slices of bread, and spread the other 4 slices with mustard
Thinly slice two thirds of the cheese, and with ham make 4 cheese and ham sandwiches
Cut each sandwich into 4 triangles. Lightly grease an oven proof dish and arrange the sandwiches in the dish.
Whisk the eggs and milk together with a pinch of salt and pepper and pour over the sandwiches making sure they are all coated
Cover the dish with cling film and allow to sit overnight in the fridge (or for at least an hour or two)
Preheat the oven to 180 degrees (Celsius)
Make a bechamel sauce, melting butter in a sauce pan before stirring in flour to make a roux type paste and then gradually stir in the milk and heat until the sauce thickens and doesn’t taste floury anymore, season with salt and pepper
Grate the remaining cheese, and remove the oven proof dish from the fridge. Top the sandwiches with the bechamel sauce and sprinkle with cheese
Bake for 30-40 minutes until deeply brown and bubbly.
I make a big batch of these and freeze them, so feel free to reduce the amount of ingredients if you want to make a smaller batch.
These were baked in the oven, but you could cook them in an air fryer or fry in a pan if you find this easier.
I used a mix of minced beef and pork, but lamb works well and you can also swap out the herbs for what you have (parsley and dill are nice combo to use). Breadcrumbs soaked in milk help keep these moist, and I’m going to say it again, but always have a bag of breadcrumbs in the freezer. It makes recipes like this super quick and easy.
These are great with sweet potatoes/rice and veggies if you’re doing meal prep, or in meatball subs.
Ingredients
800 Grams Minced Beef
500 Grams Minced Pork
75 Grams Breadcrumbs
150 Mls Milk
3 Cloves of garlic
1 Tsp Black pepper
1 Tsp Smoked paprika
1 Egg
2 Tbsp Mixed herbs (I used mint and oregano)
Method
Line 2 large baking trays with tin foil or bsking parchment
Add the milk to the breadcrumbs and allow to soak in
Add all the ingredients in a large bowl and mix with your hands until all the ingredients are well combined
Lift enough of the mix to make a meatball about the size of a golf ball and set on the lined tray. Continue doing this until you have used up all the mix
Put the trays into the fridge and chill for 20-30 minutes
Preheat the oven to 180 degrees Celsius
Bake meatballs for 25-30 minutes (or until cooked through). If you are freezing some of these allow to cool complete before freezing
Trapped at home on rainy miserable Saturday with a shitty cold I wanted something sweet but couldn’t face going out and having change out of my oodie (if don’t have one yet, get one they are fantastic in cold weather (I’m not advertising, but if any oodie makers would like to send me one I wouldn’t say no).
Anyway, after raiding the cupboards this is what I came up with and they were delicious. I used Greek yoghurt because I has some that needed to be used up but could also use milk instead. If you’re lactose intolerant you could swap the dairy for the same volume of stewed apple or mashed banana. I’d also recommend toasting the hazelnuts in a dry pan first. Its not mission critical if you’re pushed for time (or just can’t be arsed) but it does make them even tastier.
Makes 12
Ingredients
200 Grams Self raising flour (or 200 Grams of plain flour qnd 2 teaspoons of bsking powder if you don’t have self raising flour)
100 Grams Sugar
2 Eggs
200 Grams Yoghurt
50 Grams Hazelnuts
50 Grams Dried cranberries
100mil Oil or Melted butter
Method
Preheat the oven to 200 degrees Celsius and line a muffin tin with muffin cases
Add all the dry ingredients to a large bowl
Mix all the wet ingredients together and mix well until fully combined
Stir the wet ingredients into the dry ingredients and mix well making sure that the fruit and nuts are evenly distributed throughout the batter
If you have one of those fancy ice cream scoops you can use it to evenly distribute the batter into the muffin cases. I dont have one. So I just used 2 dessert spoons to scoop and then scrape the batter in the cases.
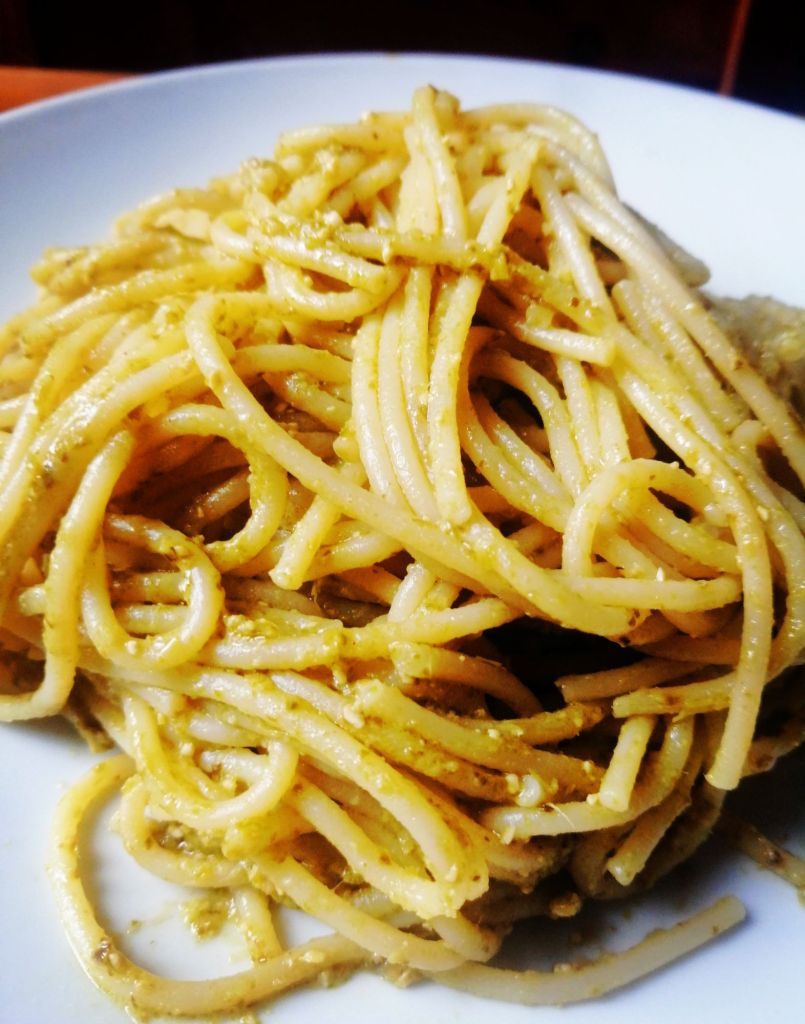
I had this in a restaurant a couple of months ago and couldn’t stop thinking about it, so I had to make my own. I originally had this made with tagliatelle, but I only had spaghetti at home, so use what you have.
Serves 2
100 Grams Spaghetti (dry weight, cook according to the instructions on the packet)
100 Grams Smoked salmon(roughly chopped, or many supermarkets sell smoked salmon trimmings, which is ideal for this and mucu cheaper)
1 Tbsp Tomato puree
1 Clove of garlic (finely chopped)
Knob of butter or 1 tbsp of oil
100mil Double cream
Black pepper
Method
Cook the pasta according to the instructions on the packet
In a large pan, heat the butter/oil and add the garlic, cook for 20-30 seconds (do not allow to brown)
Add the tomato puree to the pan and cook for 1-2 minutes before adding a ladleful of the starchy water the pasta is cooking in to the pan and stirring well.
Pour the cream into the pan and stir well, cook for another 2-3 minutes until the cream starts to thicken.
Stir in the smoked salmon to warm through, before adding the drained pasta and stir into the sauce
Serve immediately topped with a couple of grinds black pepper
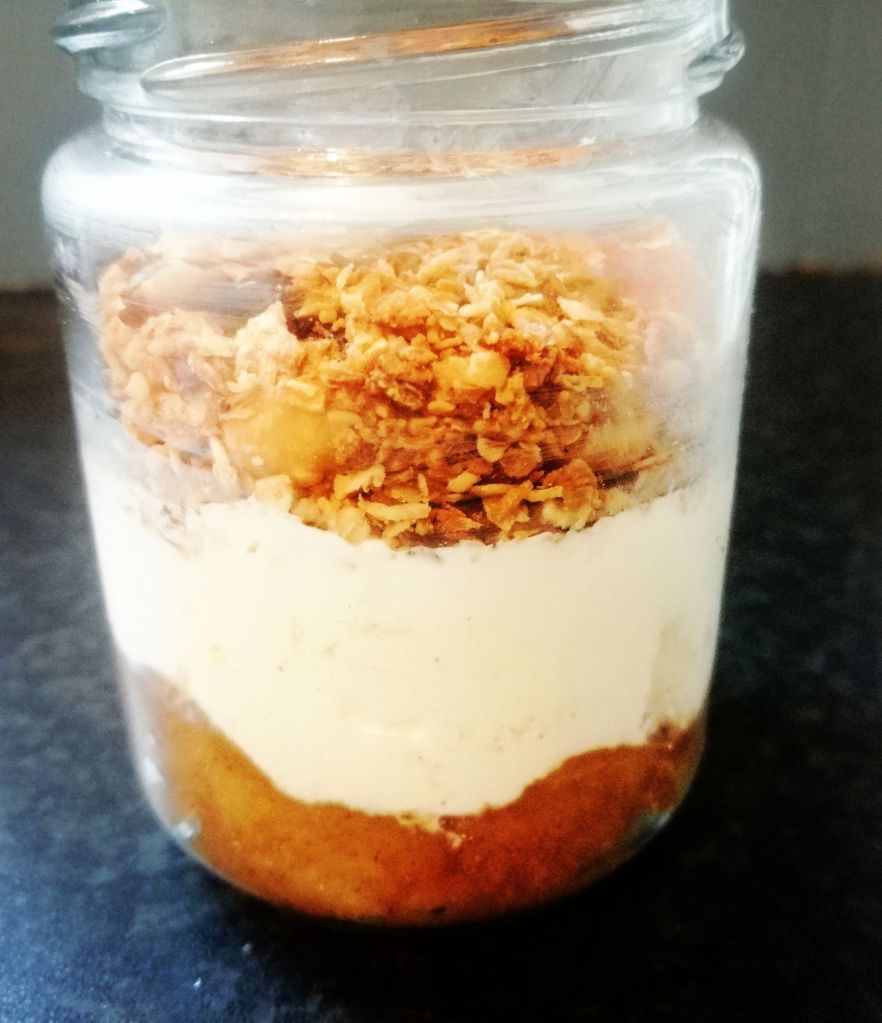
Spiced apple is the taste of autumn for me, but if its not your thing, you can swap it for other fruit. If you’re vegan you can swap out plant based yoghurt for Greek yoghurt.
I’m always shocked at how much fancy coffee shops charge for those individual pots many of us grab for a quick breakfast on the way to work . This recipe makes 4 generous portions for less than the cost of one of the granola pots you buy at well known coffee shops. A bit of time at the start and you have tasty, healthy, grab and go breakfasts for during the week at a fraction of what you’d pay in a chain cafe
Make 4 portions
For the spiced apple layer
4-6 Dessert apples, (peeled, cored, and chopped into 2cm chunks)
1 Tsp Ground cinnamon
1 Star anise
For the yoghurt layer
2 Tbsp of Greek yoghurt per person
For the granola
50 Grams Porridge oats
15 Grams Desiccated coconut
15 Grams Pumpkin seeds
20 Grams Hazelnuts
1Tbsp Oil
1Tbsp Maple Syrup
25 Grams Dried fruit (use any type you like)
Method
Put the chopped apples and spices in a large pot with a splash of water and simmer until the apple starts to break down (I like to keep a bit of texture). Remove from the heat and allow to cool.
Preheat the oven to 200 degrees (Celsius)
While the apple is simmering, mix all rhe ingredients for the granola in a bowl (except the dried fruit, I add this when this when the granola comes out of the oven, or else I find it gets tough and can burn easily)
Transfer the granola to a baking sheet and bake for minutes, stir well as the outer edges will brown more quickly and return to the oven another 5 minutes. When toasty and golden brown remove from the oven allow to cool.
To assemble each pot, put a quarter of the cooked apple in a jar/container, top with 2 tablespoons of Greek yoghurt and the sprinkle the granola mix on top
This dish would normally be made with a rich bachamel sauce full of butter, which while super tasty isn’t the healthiest.
The sauce in dish is thickened with pureed cannellini beans which still provide creaminess but also adds more protein to the dish (you’ll need either a blender or food processor for this part).
Serves 6
Ingredients
350 Grams Cooked chicken (shredded)
150 Grams (Frozen weight) Frozen Spinach (thaw, and squeeze out as much liquid as possible)
400 Gram Can of Cannelini beans (drain off any liquid in the can)
1 Tsp salt
2 Leeks (finely sliced)
2-3 Cloves of Garlic (Finely chopped)
1 Tablespoon Oil
12 Cannelloni Tubes (buy the sort that don’t need pre-cooked)
150 Grams Cheddar Cheese (Grated)
750 Ml Milk
Large handful of chopped parsley
Method
Pre-heat the oven to 180 degrees (Celsius)
Heat the oil in a large pan, add the leeks and cook over a gentle heat until they start to soften. Add the garlic and cook for another couple of minutes (don’t allow the leeks or garlic to brown)
Add the beans to a food processor or blender (if you have an immersion blender add them to a deep container), and half the milk. Whiz until the beans have started to break up, then add the cooked leeks, salt and garlic and the rest of the milk and whiz until smooth. Test the seasoning and add more salt and a little black pepper if you think the sauce needs it).
In a large bowl mix the shredded chicken and spinach together, add one third of the sauce to the chicken and mix well
Take a large oven proof dish and cover the base with one third of the sauce.
Fill the pasta tubes with the chicken mix. (You can use a teaspoon to do this, but thought it was easier to do it with my hands).
Lay the filled pasta tubes in the oven proof dish on top of the sauce. Cover the tubes with the remaining sauce and sprinkle the top of the dish with parsley and grated cheese.
One of my favourite treats while I’m at work is a mid morning cherry scone.
Ingredients
450 Grams Self raising flour (hold back 1 tablespoon of flour to use to coat the fruit)
2 Tsps Baking powder
50 Grams Butter (chilled and cut into small cubes)
50 Grams Sugar
300 Mil Milk
100 Grams Glace Cherries (you can swap this for dried fruit if you prefer)
2 Eggs (beaten)
Method
Sift the flour and baking powder together, and add the butter. If you have a food processor whiz the butter and flour together until it resembles breadcrumbs. You can also use the rubbing in method if you don’t want to use a food processor.
Toss the cherries in 1 tablespoon of flour as this will help prevent them from clumping together. Add the cherries and sugar to the flour mix and stir to combine.
Add the eggs to the milk and stir before adding the dry mix and stir well until fully combined.
Preheat the oven to 220 degrees (Celsius), and line a baking sheet with parchment paper.
Turn the scone mix onto a well floured surface and gently form into a ball (try not to handle the mix too much or you will end up with tougher scones, they’ll still taste good so you don’t need to be too precious about it).
Rub flour onto a rolling pin (or use a wine bottle if you don;t have one) and roll out the scone dough until it is about 2-3 cm thickness. Use a cookie cutter or glass to cut out the scones (how big you want to make them is up to you, I like a fairly substantial scone and this recipe made 8 scones, you can use a smaller cutter to make more dainty scones if you prefer).
Place the scones on the baking sheet and you can brush with a little milk if you want them to have a glaze (I don’t bother with this step, but you can do it if you a fancier scone). Bake for 15 minutes and then allow to cool on a wire rack.
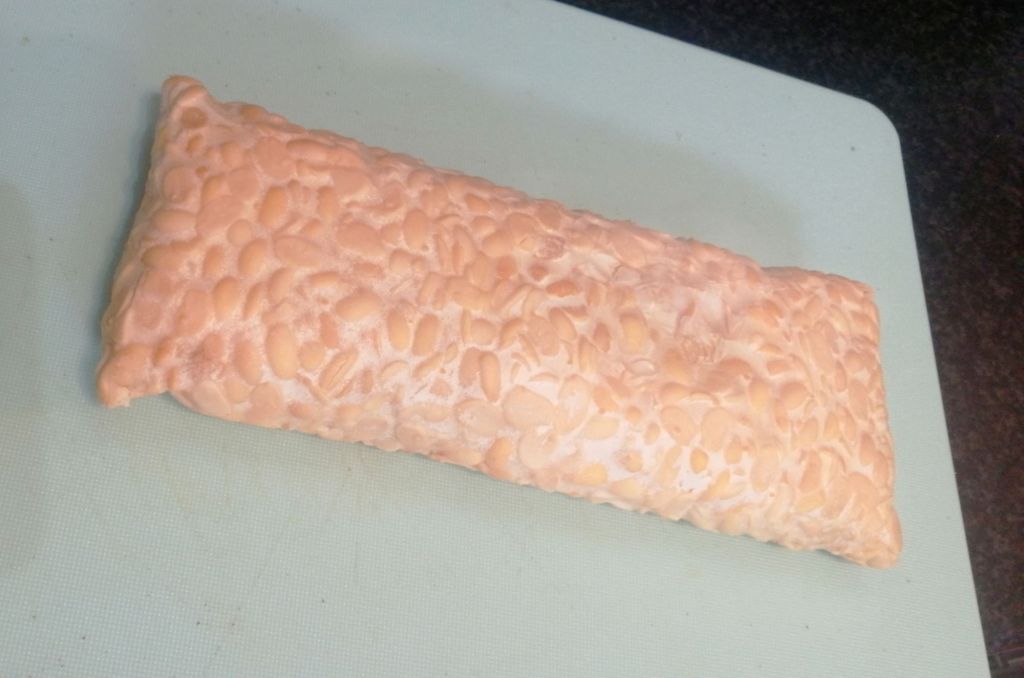
While trying to eat less meat I’ve struggled with plant based protein alternatives. Tofu is s big turn off for me (I’ve given it every chance but it’s just not for me).
I remembered some of the delicious tempeh I had in Bali and gave it a try with a satay type marinade.
If you haven’t used tempeh before, its a soy protein widely eaten in Indonesia and you should be able to find it in the freezer section of Asian supermarkets or some larger supermarkets.
It usually comes in a flat loaf shape and you usually crumble or slice it before cooking.
This is a really versatile dish, you can eat it straight from the oven with rice or noodles, or it also yummy in salads, budha bowls or sandwiches and wraps.
Tempeh makes a great addition to jar salads with veggies, and rice noodles, perfect for bringing to work for lunch.
Ingredients
500 Grams Tempeh
For the marinade
1 Red chilli (finely chopped or 1/2 Tsp chilli flakes)
Thumb sized piece of ginger (grated, or its fine to cheat and use a tablespoon of the prepared stuff in a tube)
2 Cloves of garlic (finely chopped)
3 Tbsp Peanut butter
2 Tbsp Soy sauce
Juice of 1-2 limes (I only had a lemon and also worked OK, because what your after is acidity to balance out the salt and sweet in the marinade)
3 Tbsp Maple syrup (cane sugar is traditional but this work well)
Method
Defrost the tempeh and slice into 1cm thick slices
In a large bowl combine all the ingredients for the marinade and stir well to make sure the peanut butter disolves.
Put the tempeh slices into a large dish and cover with the marinade, ensuring all the slices are covered. Cover and put in the fridge for a couple of hours (ideally overnight)
Preheat the oven to 180 degrees Celsius
Line a baking sheet with parchment and lay the temp slices on this and bake for 20-25 minutes.
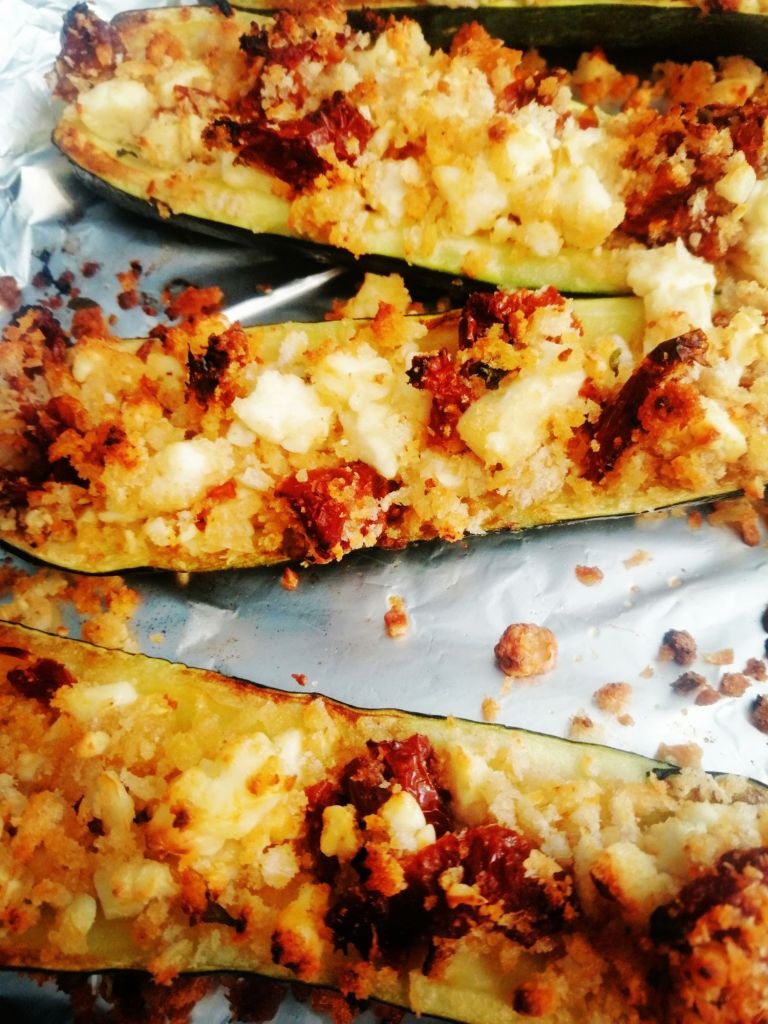
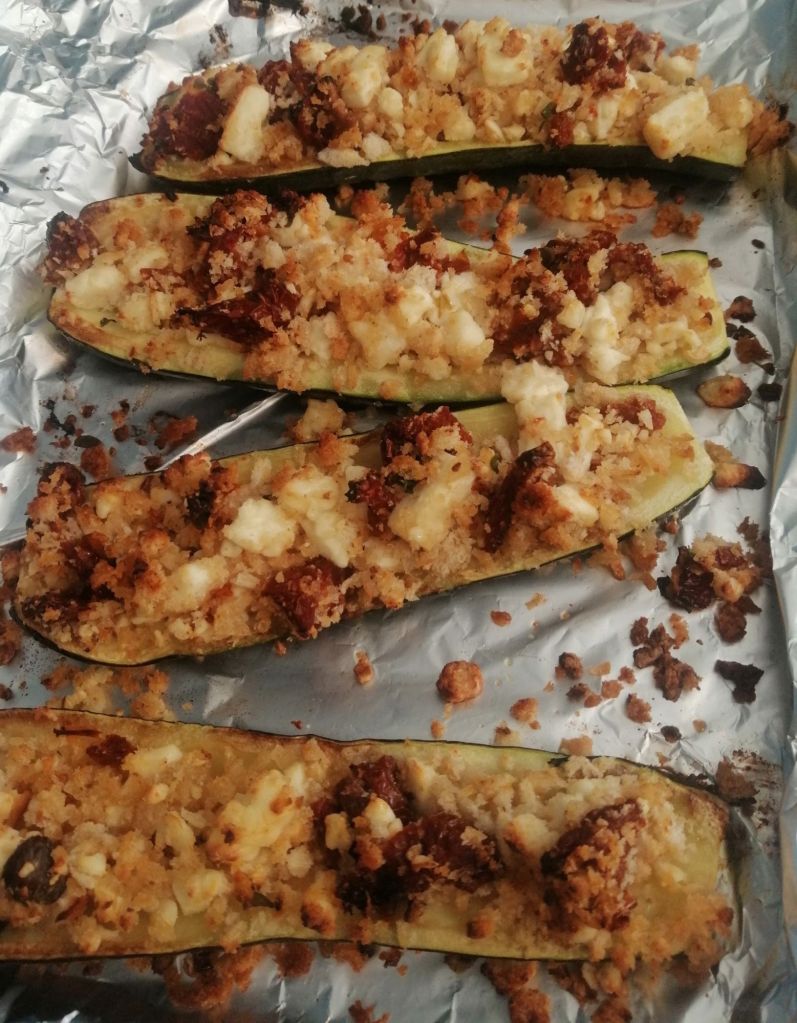
Courgettes can be pretty boring, and during Summer they are cheap snd plentiful. I found myself with a couple of largish courgettes and these can often be watery and tasteless.
I decided to try pimping them up with some some dried tomatoes and feta, and they were yummy. This makes a good lunch dish or you could serve them as a side dish and is fairly quick and easy.
Serves 2
2 Large courgettes
100 Grams Breadcrumbs
100 Grams Feta Cheese (crumbled into 1-2cm lumps
50 Grams Sun dried tomatoes in oil (roughly chopped)
1 Tsp Fresh oregano, or 1/2 tsp of dried (you can use any herbs you have, rosemary also works well, but use a bit less as it’s stronger)
1 Clove of garlic (finely chopped)
1 Tbsp Oil from the jar of sun dried tomatoes
A little extra oil for brushing the courgettes with
Combine the stuffing ingredients in a large bowl
Method
Preheat the oven to 180 degrees (Celsius)
Trim the top and bottom of the courgettes and cut in half length ways, use a teaspoon to scoop out the seeds in the centre of the courgettes
Brush with oil and place cut side down in a baking dish, and bake for 10 minutes
In a large bowl combine the rest of the ingredients
Remove the courgettes from the oven and over to the cut side with a spatula
Fill the scooped out centre of the courgettes with the filling before returning to the oven and bake for another 10 minutes until the filling is golden brown
I visited Morocco years ago and fell in love with the food (not so much the scorching heat and hard sell tactics of the street hawkers).
Tagines are kind of a stew containing meat and or pulses, vegetables, dried fruit, and lots of spices all cooked in a special clay pot that gives it its name (I did have one but broke it because I’m incredibly clumsy and is part of the reason why I can’t have nice things). An ordinary casserole dish will do the job, or cover an oven proof dish with tin foil.
You can swap the ingredients based on what you have or what is in season, and adjust the spicing to suit your own taste.
Ingredients
8 Chicken thighs (skin on and with the bone in)
1 Large onion (thinly sliced)
1 Red pepper (cut into 2-3cm chunks)
150 Grams Green beans (I used frozen)
12-16 Prunes (without stones, you can also swap these for dried apricots if you prefer)
2 Cloves of garlic
1Tsp grated ginger
1Tsp Ground coriander
1Tsp Ground Cumin
1Tsp Ground cinnamon
1Tsp Salt
400 Mil Passata
250 Mil Chicken stock (its OK to use a stock cube)
400 Grams Can of chick peas (drained)
Method
Preheat oven to 180 degrees
Heat a heavy pan and add the chicken thighs skin side down and brown before turning and cook for another couple of minutes before adding the rest of the ingredients and mixing well
If your pan isn’t oven proof, then transfer everything to a casserole dish and cook in the oven for 30-40 minutes
Serve with cous cous or other grains. Flat bread are also great to mop up all the tasty juices. This is even better served the next day
I had never heard of this stunningly beautiful place before, but had been telling a couple of friends about Wild Women of Woods for ages, and when this event came up we decided to go for it.
Dunseverick is about 90 minutes from Belfast. Close to the Giant’s Causeway and the Dark Hedges (famous location from Game of Thrones).
Wild Women events are always great fun, and this was a one day event (ideal for us “Mild Women” who aren’t up for the longer camping events just yet). But if camping is your thing and you feel better/safer doing it with a group of like minded, friendly women I guarantee you’ll have great craic.
If you’re visiting Dunseverick, you’ll need to navigate a narrow windy road to get to the Harbour. Once there you’ll find a decent sized car park, bathrooms and even a cute little shack were you can buy hot drinks and snacks and take in the views.
Being wild women, we hiked along the shoreline, and were treated to more breathtaking scenery than you could shake a big stick at. The hike was fairly physical with lots of stiles to climb over, this was fine but might be worth remembering if you have bad knees etc.
After trekking back, the group decided to go for a dip in the deeper sheltered rock pools (I’ve gotten quite into sea swiming recently, and even if you just prefer to go for a dip its meant to be great for boosting your immune system).
All dried off and snuggled up in oodies (best invention ever). Rachel who runs Wild Women of the Woods NI and her fantastic volunteers treated us to a super tasty barbecue. Which was no easy task to feed over 40 ravenous ladies, on an uncharacteristically sunny almost tropical Summer evening. Afterwards everyone just rested, hung out, chatted, laughed and got to know people, some of us just enjoyed soaking up beautiful surroundings that we would have never thought to visit before.
If you’ve seen Wild Women events before but were maybe a bit unsure about trying one, I promise you’ll see gorgeous places, enjoy fabulous food and meet lots of really lovely people.
If you learn to make no other sauce, then I would encourage you to learn this.
It takes 5 minutes to make in a food precessor and goes with absolutely everything. You cam go old school and roast and peel red peppers, but if you like a short cut, then a jar of roast peppers works just as well. Try it with grilled chicken or fish, use it as a dip or toss it into some pasta, its also yummy spread on sandwiches or burgers (I feel myself turning to Bubba describing all the ways you can eat shromp in Forrest Gump, but you get the idea).
The sauce is originally from Spain, and most families have their own recipe, so don’t be afraid to tweak it to suit yourself. I had some cherry tomatoes that were going soft so I roasted them in the oven beforehand, but if you don’t have time to do this, use a jar of sun dried tomatoes. This recipe makes a fairly big batch, but you can reduce the amounts. The sauce can live in your fridge for 4-5 days, but you may tempted to take spoonfuls of it every time you pass the fridge.
Ingredients
100 Grams Blanched almonds (you could alao use hazelnuts)
650 Gram Jar of roasted red peppers, drained weight 400 Grams (well drained and roughly chopped)
2-3 Cloves of Garlic (roughly chopped)
250 Grams Roasted tomatoes (or a jar of sun dried tomatoes)
25-50mil Olive oil
1/2 Tsp Smoked paprika
1 Tbsp Red wine vinegar (I only had cider vinegar, ad it was fine)
Method
Add the almonds to a food processor and pulse 3-4 times until they are well broken up
Add the other ingredients (hold back some of the oil, as may not need it all)
Whizz in the food processor until it starts to form a sauce. Check the flavour and add the rest of the oil if you think it needs it. Blitz some more until it has the consistency you like (I like mine fairly rustic and chunky, but you can continue blending until you have a super smooth sauce if that’s what you prefer.
Refrigerate until ready to use (can be eaten hot or cold).
This is actually more of a sweet loaf/tea bread, but you can kid yourself that this is slightly healthier than normal cake because it also incorporates vegetables. This is really good on it’s own, but I also like to spread cream cheese or butter on it.
The courgette/zuchini keeps the cake super moist and tender, and during the Summer when they courgettes are cheap and plentiful this is a good way to use them up if you are running out of ideas.
If you’re super organised and want to make a double batch this also freezes really well.
Ingredients
2 Eggs
125ml vegetable oil
350 Grams Courgettes, coarsely grated
300 Grams Plain flour
2 Tsp Cinnamon
1tsp baking powder
75g Walnuts (roughly chopped)
150g Dried cranberries or sultanas
75 Grams Brown sugar
1/4 Tsp Salt
(extra butter for greasing the loaf tin)
Method
Preheat your oven to 180 degree (Celsius), and line a 2lb loaf tin with parchment paper
Add the oil, sugar, and eggs to a large bowl and whisk until combined before adding the courgette
In a separate bowl, combine all the dry ingredients before adding to the dry ingredients and mix well
Transfer the mix to the prepared baking tin and bake for 1 hour. Test the loaf with a cocktail stick and if it comes out clean the loaf is cooked. If it doesn’t give the loaf another 5 minutes in the oven before checking again
I haven’t had the best luck with scones, usually they ended up like hockey pucks.
A friend who makes great ones advised me that secret is to handle scone dough as little as possible. I decided to try this and instead of Irish version I was always taught to make using a cutter, I tried the American method when the dough baked in piece with sections marked out.
This did the job and these had a nice crust on the outside but stayed fluffy inside (yay, I have broken the scone curse placed on me by Sr Claire in 3rd year home economics for throwing dough). I also gave these a cheeky wee lemon drizzle when the come out of the oven, that brings them to another level.
Serve these with lemon curd and whipped cream if you want to be posh (it’s sooo good), but these are also good with just butter.
You can use defrosted frozen blueberries which are cheaper, but remember to drain them well before adding to the mix so it doesn’t get too messy. These also freeze well, but don’t use the lemon drizzle if you know you are going to freeze them.
Makes 8
Ingredients
150 Grams Blueberries
1 Lemon (juice and zest)
100 Grams Chilled butter (cut into small cubes)
1 Tsp Baking powder
350 Grams Self raising flours
200mil Milk
2-3 Tbsp. Icing sugar
Method
Preheat your oven to 220 degrees (Celsius), and line a baking sheet with parchment (or else grease the baking sheet well if you don’t have parchment)
Add the flour, baking powder and butter to a food processer and pulse until the mixture looks like bread crumbs. If you don’t have a food processer, use the rubbing in method, rubbing the flour and butter between your fingers until it looks like breadcrumbs
Grate the lemon zest wth a fine grater and add to the flour mix along with sugar and mix well. Add the milk and stir the dough until it is just starting to come together, then gently mix in the blueberries so that they stay whole, but try to make sure they are evenly spread within the dough
Gather the dough in a ball, (it should be fairly soft dough). So that I handled the dough as little as possible, I dusted a little flour onto the baking parchment and sat ball of dough in the centre. Dust a rolling pin ( or wine bottle or what ever you have) with a little flour, and gently roll the dough out in a circle about 4 cm deep
With a sharp knife, score a deep cross into the dough, and then cut these quarters again until you end up with 8 evenly sizes segments (don’t cut the dough right through)
Bake for 10-15 minutes, and allow to cool slightly. In a small bowl add the juice from the lemon you zested and add to the icing sugar and mix well before drizzle over the scones
Once cool break the scones into individual sections a serve with butter or lemon curd and cream
Good side dishes can make a meal. I love this with roast chicken but it’s also yummy with fish, barbecued meats, or griddled halloumi.
Rice can be a bit meh, but herbs and lemon give this a really fresh taste. I used chicken stock, but you can swap this for vegetable stock if you’re vegetarian.
Ingredients
100 Grams Uncooked rice (I used basmati, but if you’re using a different type of rice then make sure to rinse it first so it fluffs up)
1 Small onion or shallot (finely chopped)
1-2 Cloves of garlic (finely chopped)
1 Tbsp Olive oil
200 mil Chicken/vegetable stock
1 Lemon (juice and zest)
1 Tsp Dried Oregano (or 1 Tbsp fresh oregano)
1 Tsp Dried Dill (or 1 Tbsp fresh dill)
Method
Heat the oil in a large pot with a lid, and gently fry the onion/shallot over a medium heat until it starts to become translucent, then add the garlic and cook for a further minute
Add the rice, salt and stock and cover the pot with a lid, before bringing to the boil. Reduce the heat and simmer for 10 minutes. Remove from the heat and the rice should continue to cook with the residual heat until the rice has absorbed all the stock (if you’re using brown rice you may need to cook for longer)
Grate the zest of the lemon with a fine grater, before squeezing the juice and setting to one side
Stir the lemon juice and zest into the rice and cover with a lid again for another 5-10 minutes before checking that the rice is fully cooked before stirring in the herbs.
Once you try homemade pesto, you’ll never eat the stuff in a jar again.
Most people have tried pesto with pasta, and it’s a classic for a reason plus it takes only 5-10 minutes to make. I use a food processer, but you can use a pestle and mortar if you want to go old school.
I love it in Italian sandwiches made with focaccia and filled prosciutto and buratta (you can use any combo and it will still taste amazing with the pesto).
Ingredients
100 Grams Pine nuts (or you can use blanched almonds if you can’t find them)
1 Large bunch of basil
50 Grams Parmasan or Granna (finely grated)
1-2 Cloves of garlic (peeled and roughly chopped)
100mil Olive oil (you may want to use more or less depending on how lose you want the pesto)
Method
In a dry pan, heat the pine nuts until the start to brown, remove from the pan and allow to cool
Add the pine nuts to a food processer and blitz a couple of times until the nuts have broken up
Add the rest of the ingredients (hold back half the oil) and blitz for a couple of seconds.
Check the consistency of the pesto, and continue to add the olive oil until you have reached the thickness you want (I like it quite thick and chunky but some people prefer a smoother pesto)
Use as a spread in sandwiches or as a pasta sauce. It will keep well in fridge for 2-3 days
About 30 minutes by train from Florence you’ll find Bologna (arguably the food capital of northern Italy).
Most of us have eaten spaghetti bolognese, and the locals are slightly aghast at our version. Firstly they use tagliatelle (never spaghetti), the sauce is more meat heavy, sometimes using a mix of pork and beef and only a small bit of tomato is used to make the sauce a more appealing colour.
What the locals are really obsessed with is tortolini in broth (compulsory at Christmas, with people putting their orders in to local pasta shops months in advance) and the larger tortoloni served with butter and sage and usually filled with the region’s famous cured meats like mortadella or salami.
The city offers various food tours and if you’re a foodie I’d highly recommend going on one. You’ll be able to taste some outstanding food and wine, visit great places and meet cool and interesting people. I’d recommend going hungry, as the samples are generous and I needed to go lie down after mine and was in a food coma for several hours.
The city’s history dates back to before the Romans, with the oldest university in Europe, in existence since the 11th century. It still has a huge student population and there’s no shortage of good affordable places to eat catering to them.
The city is definitely a bit rougher around the edges than other Italian cities I’ve visited but is probably more authentic and less touristy. Bologna’s nickname amongst Italians is il Rosso (the red one). Due to the colour of the buildings and the city’s history of left wing politics. In reality the city’s buildings are various shades of red, orange and deep yellow making it especially pretty in the evenings as the light begins to fall.
You’ll also find covered portico walkways all over the old city (40 km worth). These were built from the medieval age onwards as a way of resolving the issue of accommodating all the students in the city. The streets were already small and narrow and the town council didn’t want to use up any more valuable space. So building owners could build up from the first floor and the street level was unaffected, as people could still pass below. (Quick traveller tip, if visiting, research where you are staying. I stayed on a street with 3 bars close by, all of which had outdoor seating. The bars here close at 3am, and the street scene afterwards can be “lively”. My host left me a set of ear plugs which should have been my first clue).
There are plenty of different tours if you want to find out more about city’s history but if you’re a petrol head you can also book visits to the Ducatti and Lamborgini factories close by. I got talking to a Dutch biker who had visited the Ducatti factory and he was quite misty eyed and super impressed by it. There is even a police car Lamborgini donated by the factory.
Bologna is well worth a visit and has something for everyone.
I’m lucky enough to have a friend who’s husband culls local deer. She recently turned with a big of venison including a shoulder of venison (thank you Dermot and Bronagh). Apologies that the photos don’t do this justice, but we fell on this like a pack of animals and were too interested in feeding our faces with delicious roast meat to take decent photos.
This was a bit of an experiment (I’ve never cooked with this cut before, but as its from a really muscular part of the animal so I knew to cook it long and slow, at least 4 hours, plus resting time). Because venison is so lean I wanted to keep it from drying out. I did this by slathering it in miso butter (which tasted yummy but didn’t overwhelm the taste of the meat).
I served this as part of an Easter dinner with roast potatoes and vegetables, but you’ll have plenty of meat left over and it’s great in sandwiches, wraps etc.
Ingredients
2.5 Kg Shoulder of venison (including the bone
125 Grams Butter (softened)
1.5 Tbsp Miso paste
Carrots/celery/parsnips
1 Glass White wine (optional)
Method
Remove the venison from the fridge and allow to come to room temperature
Preheat your oven to 200 degrees (Celsius)
In a large roasting pan, cover the base with celery stalks, halved carrots or parsnips (this will act as a bed for meat to stop it sticking to bottom and will help flavour the meat juices. I use old wonky vegetables that have hanging around the fridge, these won’t be eaten but are just to add flavour)
Mix the butter and miso paste together and rub all over the venison, making sure to get into all the nooks and crannies.
Set the venison on top of the bed of vegetables and add a class of white and a glass of water to the pan (or 2 glasses of water if you’re not using wine)
Cover the roasting dish tightly with aluminium foil and place in the oven
Cook at 200 degrees (Celsius) for 30 minutes before turning the heat down to 150 degrees for at 3.5 hours
After 2 hours remove the pan from the oven. Turn the meat over and baste with juices in the pan. Cover again with foil and return to the oven
After 4 hours check on the meat, if it still feels a little tough, cook for another 20-30 minutes. Remove from the oven and keep covered while the meat rests for at least 30-45 minutes (it’s important not to rush this part as it will help the meat stay tender). Drain of the meat juices and use to make really delicious gravy, or spoon over any left over meat to help keep it moist
If you’re staying in Florence it’s easy to arrange day trips to neighbouring cities like Sienna and Pisa, with stop offs to visit local wineries (do your research as these can vary in quality depending on what you’re looking for).
I opted for that visited Montereggianni, Sienna and San Giammano.
The medieval hill town of Montereggiani with its 14 towers was called the crown of Tuscany by Dante. The town is tiny with currently only 40 inhabitants, but is worth a quick visit for its stunning views.
Sienna was Florence’s sworn enemy from the medieval period and like Florence has an abundance of history and beautiful architecture. More hilly than Florence, the historic main square (site every summer of a super violent horse race dating back to the middle ages, jockies are still allowed to punch, whip and kick each other during the race).
The gothic cathedral is also well worth a visit (entrance fee is €5) and is beautiful with its black and white striped columns, sumptuous paintings and library, displaying illuminated texts that are hundreds of years old, in a richly painted gothic hall.
(Quick Traveller Tip) Public bathrooms aren’t really a thing in Italy, so make sure to use the facilities if you stop in for a coffee or a meal. If you do find a public bathroom you’ll probably have to pay to use, so always keep a couple of euro coins handy)
We moved on to visit San Giammano, a gorgeous hill fort that once boasted of having 77 towers (now there are only 12), built for defense but also to show off the wealth and status of prominent families. The city boasts the world’s best gelateria, with saffron and pine nuts being their signature flavour (it was yummy).
I also visited the Poggio ai Lachi winery, and learnt more about Italian wines (Chianti classico like champagne has to be from a specific region and can be recognised by a black rooster on the bottle).
I tasted several of their fabulous wines along with local specialities like balsamic vinegar and olive oils. The hosts were also great fun. Like many of these places you’ll be encouraged to buy the products you try, but there wasn’t a hard sell which was cool.
It’s hard not to fall in love with the romance of the Tuscan countryside. My new life plan is to win the Euro millions lottery and retire to the region having bought a beautiful farm with an olive grove, vineyard and dog who’ll hunt truffles for me (just putting it out to the universe, (please and thank you).
I love when seasons change and new foods become available.
Asparagus is great at the minute, so I decided to make this yummy creamy quiche with it as the centre piece.
I used marscapone to add creaminess the the egg mix, because it’s what I had in the fridge. You could also use creme fraiche or recotta if this is what have.
I used ready made pastry which made this even easier (it looks quite impressive for not a huge amount of effort if you’re cooking for people and can be serve hot or cold).
Ingredients
1 Sheet of ready made short crust pastry
6 Eggs
1 Leek (finely sliced)
1 Bunch of asparagus
1 Tbsp Oil
100 Grams Marscapone cheese
25 Grams of Parmasan (or other strongly flavoured cheese like mature cheddar)
Salt and pepper
Butter/oil for greasing a loose bottom flan/pie dish
Method
Grease the flan dish, and line with the ready made pastry, making sure the it’s pushed well into the edges. Pierce the base of the pastry with a fork and then chill the flan dish for 30 minutes
In a frying pan heat the oil over a medium heat and gently fry the Leek until it softens but do not allow to brown (set to one side and allow to cool)
To prepare the asparagus, snap off the ends and the blanch the asparagus on boiling water for 30-90 seconds depending on the thickness of the spears). Remove the boiling water and submerge in ice water (this will help keep their bright green colour)
Preheat the oven to 180 degrees Celsius. Cover the base of the pastry with greaseproof paper and poor baking beans or old dried rice or beans on top). Bake for 20 minutes, remove from the oven and carefully remove the greaseproof paper and baking beans
In a large bowl, add the marscapone, parmasan and eggs and whisk until smooth (add salt and pepper)
Cover the pastry base evenly with the cooked leeks, then arrange the asparagus spears wth tops pointing to the outside of the tin
Pour the egg mix on top of the vegetables and carefully place the tin back in the oven ad bake for another 20 minutes or until the centre of the quiche is just starting to set
I want you to keep an open mind. When I first heard of this stale bread soup I thought hell no!
However, I had it when I visited Italy and I’m now a total convert, it was one of the best dishes I tried. Like most popular Italian dishes, this is peasant food, and came about when servants would be given scraps that they would reboil into a soup. Ribollita is actually more like a stew and is extremely satisfying and the perfect comfort food. Each family has their own version, but the basic ingredients are a sofritto (this is a base of finely chopped carrots, celery and onion, I whizz mine in a food precessor when I can’t be bothered standing chopping). For the bread part, I used some stale ciabatta I had, other types of bread like French baguette would also work (not sure how ideal sliced white supermarket bread would be).
Italian Grannies save the rind of parmasan to flavour this, but I just added some of the grated cheese. If you want to make this a vegan dish you can swap this out for pine nuts. The beauty of this is that it is the original zero waste recipe. Basically you use what ever you have and it’s perfect for using up those left over bits in your fridge. You can also season with the flavours you like. The original version I tried had fennel seeds, for the version I made at home I used oregano because it’s what I had. Rosemary or basil would also work well, so feel free to experiment.
Serves 3-4
400 Mil Can Chopped tomatoes or pasatta
400 Mil Can Cannalini beans (set aside half the tin and mash with a fork, this will help mske the ribollita creamy, as with the other ingredients feel free to use whatever type of brand you have)
1/2 Tsp Chilli flakes
1 Tbsp Olive oil
1 Tbsp Tomato puree
100 Grams Stale bread (broken into 3-4cm chunks)
2 Handfuls shredded cabbage (I used savoy cabbage because this is what I had, but kale or cavelo nero also work well in this dish
This might be the most beautiful city I’ve ever visited and has been on my bucket list since I was a teenager.
The city is full of breathtaking architecture and history, with a total of 77 museums (all of which you’ll need to pay to visit) . The best and most well known is theq Uffizzi. (tickets will cost €29 to book in advance, and you can get a combination ticket that will also allow you to visit the Pritti Palace and Bomboli gardens a short walk over the Ponte Vecchio).
A quick word of warning, even if you book your ticket online in advance you’ll need to queue to collect your physical ticket (no scanning QR codes) and then join another queue for entry. Also don’t bring a heavy coat (the gallery gets really warm even on a cool Spring day) the cloakroom ironically doesn’t accept coats or jackets but you can stash backpacks there.
The Birth of Venus
Once you get inside you’ll see arguably the best collection of Renaissance art in the world from Botticelli, Michael Angelo and Leonardo da Vinci among others. If you need a break from all this fabulousness the museum has a cafe that serves drinks, snacks and lunch and if you take a table on the terrace you get an amazing view of the Palazzo Vecchio while enjoying your Aperol Spritz, with prices that are compatible with the surrounding bars and restaurants.
When you’ve finished with the Uffizi you can walk a short distance to the famous Ponte Vecchio lined with super expensive jewellers. On the other side of the river you’ll find the Pritti palace (home of Elanora Di Medici who believed the air was better in that side of the river).
Enjoy Negronis with the locals.
If you cross the river Arno at the bridge before the Ponte Vecchio you’ll find yourself in the Santo Spirito district which is still inhabited by locals (virtually everyone has been priced out of the historic areas). You’ll find authentic food, shops selling delicious mortadella, salami with fennel and great cheeses. As this is still a local neighbourhood it’s less touristy and prices in restaurants are about 25-30% cheaper than in the main tourist drags. You can try authentic dishes like gnudi (potato and ricotta dumplings) and ribolleta (a thick hearty soup, cooked to use up left over bread and vegetables which is incredibley tasty).
Food in Florence as you can imagine is amazing. The city is a meat lovers paradise with the most famous dish being steak, the traditional cut is split between 2 people and officially needs to weigh at least a kilo and according to locals should be least 4 fingers wide and is served rare (you might be asked to leave the restaurant if you ask for a well done steak). I had tried a regular steak served with a black truffle sauce (it was so good I think I may have left my body at one point) Wild boar stew cooked long and slow with red wine and lots of black pepper is also popular. You’ll find great pasta everywhere and one of my favourite things we’re the huge schiaccatia (flat Tuscan bread) sandwiches filled with the local cold cuts and cheese (don’t worry vegetarians won’t starve, you’ll find lots of tasty food, vegans may struggle a little).
You’ll find gelato (Italian ice cream) everywhere, it was invented in Florence. Local foodies say to avoid brightly coloured gelato (articial colouring is a no no) and you should also try to avoid shops where the gelato is not covered.
If you feel like treating yourself to something luxurious Florence is famous for its gorgeous perfumeries where you can pre book an appointment and they will help you make your bespoke fragrance in beautiful shops full of original polished wood and apothecary cabinets . Leather goods are also really popular and the San Lorenzo market close to the Duomo is a good place to haggle with the stall holders for nice leather bags. There are also some super fancy cafes and restaurants if you feel like pushing the boat out (the fancy little cake below was €8 but was indescribably delicious).
One of my favourite things in Florence were the walking tours. Lots of companies offer “free” walking tours and simply ask that you tip the guide (usually a minimum of at least €10) and last between 2-3 hours . These guys are great and you’ll learn so much. Florence was founded by the Etruscans (pre Roman empire), but became famous mainly, due to the Medici family 5-6 hundred years ago.
Medici Palace
If you’ve never heard of them try watching the series on Netflix. They were a ruthless banking dynasty that invented the mortgages and cheques. More interestingly they were probably the most important patrons of the arts in Italy, which kicked of the Renaissance along with other wealthy families. It was probably the equivalent of the rivalry between today’s billionaires sponsoring space travel (basically guys with too much money getting into d1ck measuring contests with each other and being afraid of being forgotten after they die like the rest of us). The Medici history is fascinating, full of betrayal, vandettas, intrigue and double crossing. But hey we got lots of stunning art and architecture out of it so it wasn’t all bad.
I’m sad to be leaving Florence and will definitely come back. It’s an incredible city but very busy, so if possible avoid visiting during the Summer when the crowds and heat are meant be unbearable. (Quick traveller tip, if you’re staying in the historic part of the city many of the hotels aren’t based on street level which can make them hard to spot. You’ll also pay a premium for modern luxuries like elavators, air conditioning and en suite bathrooms. But it’s worth foregoing these if you want to stay in a great central location at an affordable price). I stayed in the Hotel Bavaria, which still had beautiful frescoes on the the outside of the building and a now defunct wine window (if you’ve watched Stanley Tucci’s Italian food adventure you’ll see more about these, they were used during times of epidemics to avoid contamination (if they’re good enough for the Tooch, they’re good enough for me).
I was lucky enough to have a short stop over in Milan. Unfortunately due to the weather and a scheduling snafu, my original plan of taking a day trip Lake Como didn’t happen. But when things don’t work out as planned go to plan B.
It turned out to be a great plan B. While I’m a bit of a history nerd, I’m also a confirmed caffeine fiend, so when I saw a tour combining both I was sold. Maria our guide not only took us around the interesting historical areas of the city like the cathedral, royal palace, the Galleria Vittorio Emanuele ll, La Scala opera house and the trendy Brera district, she interspersed these with stop offs for coffee in interesting coffee spots serving different styles of coffee (coffee is a big thing in Milan).
(Quick traveller tip, museums in Milan are free on the first Sunday of the month, but expect long lines). Leonardo Da Vini also moved to Milan when he was 30 and you can visit different museums to see his work. You can also try to book to view his Last Supper but this can be booked up months in advance so be prepared. If you feel like even more culture you can don your glad rags and visit the world famous La Scala opera house. Performances can book out months in advance as well but you can try your luck and visit the box office at 1.30pm to see if any tickets are available. You might be able to get a seat (with obstructed view) for €10. It was a great way to get a feel for the vibe of the city and not just haul around historic buildings.
Remember to pace yourself, I went all in and was pretty wired afterwards as I wasn’t used to having so many espressos in one morning (totally worth it though). I would definitely recommend doing this tour and you can find out more by visiting @cliotales on Instagram.
Milan is kind of like a European version of New York but with more history and better architecture. It’s famous not only as business and financial hub but as the fashion capital of Italy. The super elegant Galleria Vittorio Emanuele ll is right beside the Duomo and has gorgeous high end designer shops like Prada and Dior (many of these you have to visit by appointment, to keep the tourist riff-raff like myself out). If you feel the need for some refreshment you can visit the Camparinella bar just inside the Galleria.
Milan is the birthplace of Campari, so when in Milan! A Campiri and soda will set you back about €8 if you stand at the beautiful art deco bar being served by well appointed barmen in crisp white jackets. You’ll pay a little more if you want to sit at a table. (Quick traveller tip, you may incur a small surcharge if you take a table in a cafe or bar in Italy) . Instead many Italians prefer to eat and drink at a counter. This is really common if you’re going out for breakfast, don’t expect bacon and eggs, as a common Italian version of breakfast is a quick coffee/cappuccino and pastry eaten standing at a counter.)
The are any number of great places to eat ranging from super filling sandwiches to grab and go, to very posh fine dining restaurants. Milan is famous for its risotto (risotto Milanese). This is bright yellow, and coloured with saffron (although apparently less scrupulous restaurants will use turmeric or yellow food colouring because it’s cheaper). I had it for lunch one day and to be honest, while I enjoyed it, I wasn’t blown away (maybe I didn’t get a great version) . Milan also has some amazing bakeries and I tried pistachio coffee for the first time (Italians love pistachios so much so, you can even them on pizzas), and that for me was my favourite taste of Milan.
Milan is pretty cheap to fly to, as a couple of different low cost airlines fly there. I flew into Milan Bergemo airport and the bus transfer to the city centre dropping off at the central station was €10. The city also has great public transport links with buses, trams and metro service. €2.20 will get you to most parts of the city and is valid for 90 minutes. Day cards and multiple day passes are also very reasonably priced. If you’re not staying Milan for a long time I’d suggest staying by the central station. It also has metro stops and it’s a good base for seeing the city and the next leg of your trip. It also has an amazing food court (go to the mercato side of the station). You can get coffee and a pastry or select from pizza, sandwiches, aranccini, sushi or steak all while having a beer while waiting your train.