Good side dishes can make a meal. I love this with roast chicken but it’s also yummy with fish, barbecued meats, or griddled halloumi.
Rice can be a bit meh, but herbs and lemon give this a really fresh taste. I used chicken stock, but you can swap this for vegetable stock if you’re vegetarian.
Ingredients
100 Grams Uncooked rice (I used basmati, but if you’re using a different type of rice then make sure to rinse it first so it fluffs up)
1 Small onion or shallot (finely chopped)
1-2 Cloves of garlic (finely chopped)
1 Tbsp Olive oil
200 mil Chicken/vegetable stock
1 Lemon (juice and zest)
1 Tsp Dried Oregano (or 1 Tbsp fresh oregano)
1 Tsp Dried Dill (or 1 Tbsp fresh dill)
Method
Heat the oil in a large pot with a lid, and gently fry the onion/shallot over a medium heat until it starts to become translucent, then add the garlic and cook for a further minute
Add the rice, salt and stock and cover the pot with a lid, before bringing to the boil. Reduce the heat and simmer for 10 minutes. Remove from the heat and the rice should continue to cook with the residual heat until the rice has absorbed all the stock (if you’re using brown rice you may need to cook for longer)
Grate the zest of the lemon with a fine grater, before squeezing the juice and setting to one side
Stir the lemon juice and zest into the rice and cover with a lid again for another 5-10 minutes before checking that the rice is fully cooked before stirring in the herbs.
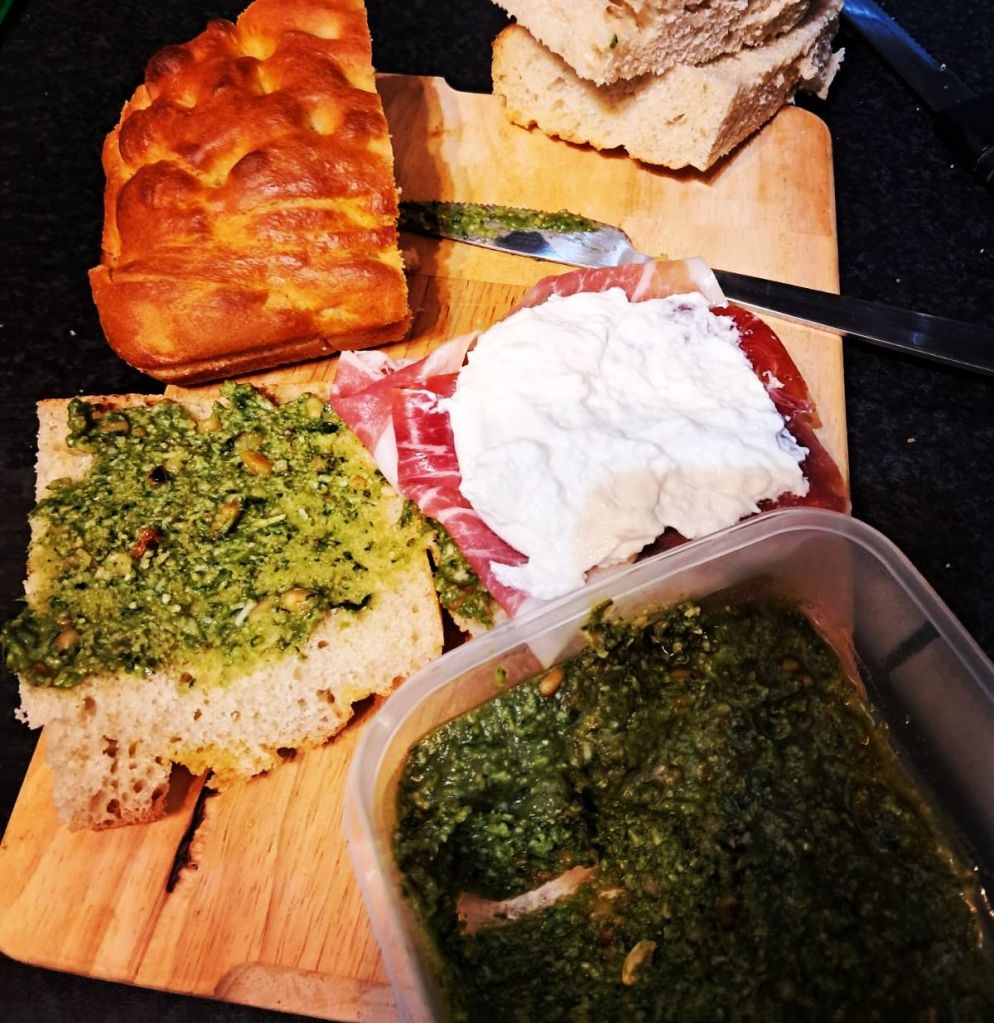
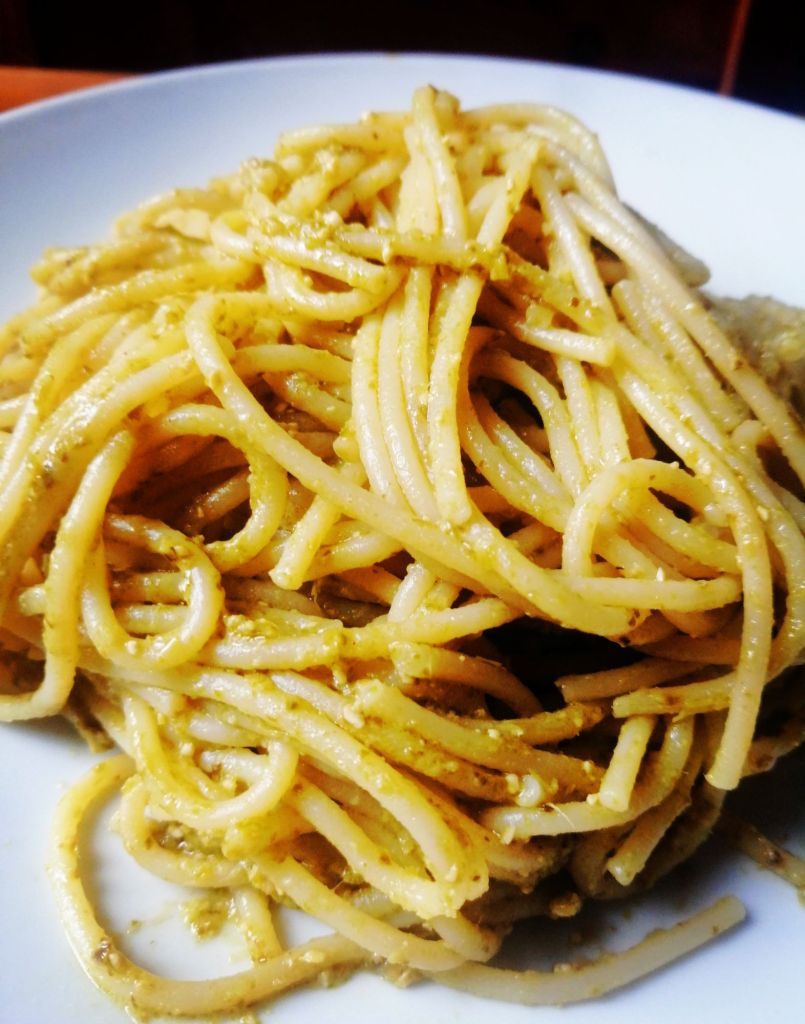
Once you try homemade pesto, you’ll never eat the stuff in a jar again.
Most people have tried pesto with pasta, and it’s a classic for a reason plus it takes only 5-10 minutes to make. I use a food processer, but you can use a pestle and mortar if you want to go old school.
I love it in Italian sandwiches made with focaccia and filled prosciutto and buratta (you can use any combo and it will still taste amazing with the pesto).
Ingredients
100 Grams Pine nuts (or you can use blanched almonds if you can’t find them)
1 Large bunch of basil
50 Grams Parmasan or Granna (finely grated)
1-2 Cloves of garlic (peeled and roughly chopped)
100mil Olive oil (you may want to use more or less depending on how lose you want the pesto)
Method
In a dry pan, heat the pine nuts until the start to brown, remove from the pan and allow to cool
Add the pine nuts to a food processer and blitz a couple of times until the nuts have broken up
Add the rest of the ingredients (hold back half the oil) and blitz for a couple of seconds.
Check the consistency of the pesto, and continue to add the olive oil until you have reached the thickness you want (I like it quite thick and chunky but some people prefer a smoother pesto)
Use as a spread in sandwiches or as a pasta sauce. It will keep well in fridge for 2-3 days
Side dishes can be a bit meh, and this is a tasty and healthy way of getting more vegetables way into your diet.
I like this served on a bed of humus, and it makes a really good vegan meal. It’s also really good served along side roast meat, and takes very little prep.
Makes 4 servings
Ingredients
Half a red cabbage divided into 4
Zest and juice of 1 small orange
1 Tbsp Vegetable oil (plus extra to grease the baking tray and drizzle over the cabbage)
1 Tbsp White wine or cider vinegar
Salt and pepper
Method
Preheat the oven to 180 degrees (Celsius), lightly grease a baking tray
Divide half the cabbage into 4 (remove most of the stalk in the centre). Lightly drizzle with oil and bake for 25-30 minutes (or until tender)
To make the dressing, grate the orange zest, and then squeeze the juice into a bowl. Stir in the oil and vinegar and season with salt and pepper
Remove the cabbage from the oven, and drizzle with the dressing before serving
El Bulli was one of the most famous 3 Michelin star restaurants in the world. I don’t claim this was what they served their customers, but apparently they would provide a 3 course meal for staff each day, and this is one of those dishes.
Anyone who’s ever worked in fancy restaurants will you the traditional staff meal can often be a bit ropey to say the least (I worked in a place once that only ever fed us cheap and nasty chicken nuggets). A cook book based around El Bulli’s staff meals has actually been published called The Family Meal (dropping hints ahead of Christmas, just in case Santa is reading this)
It’s good to see El Bulli fed their staff well, and while it isn’t an extravagant dish, it’s delicious. The thing that takes it to another level is the Picada (a Catalan version of pesto, made with hazelnuts and parsley).
Do yourself a favour and try to buy ready blanched hazelnuts, it will save a lot of time and effort.
Ingredients
For the soup
1 Onion (finely chopped)
1 Tbsp Oil
1 Clove garlic (finely chopped)
2 x 400 Gram Tins of cannellini beans
1 Litre Vegetable Stock (I used a 2 x stock cubes)
400 Mil Carton of Passata
1 Tsp Rosemary (Finely chopped)
1 Sprig of Thyme (or 1/2 Tsp of dried Thyme)
Salt and Pepper to taste
For the Picada
1 x Large punch of parsley or couple of handfuls (roughly chopped)
1-2 Cloves of garlic
75 Grams Hazelnuts (try to buy the pre-blanched one, as removing the skins is a pain in the a*se)
50-75 Mil Olive oil, (or more if you want the Picada to be looser)
1/2 Tsp Salt
Serves 4
Method
For the soup, heat the oil in a large pot, and add the onion and cook over a medium heat until it becomes translucent, add the garlic and cook for 1-2 minutes before adding the rest of the soup ingredients to the pot. Simmer for over a low heat for 20 minutes.
While the soup is cooking you can make the picada. If you haven’t been able to find ready blanched hazelnuts, heat the nuts in a frying pan until they smell nutty (I know this sounds weird but when you can smell the nut smell it means they are ready), Transfer the toasted nuts onto the centre of a clean tea towel, bring the edges together and roll the nuts within the towel until the papery outer layer comes away
If you have more sense than I did and have bought hazelnuts without skins, add these to a food processer and pulse a couple of times until the nuts have broken up. Add the rest of the picada ingredients to the food processer and blitz until you have a bright green paste. I like mine quite chunky and rustic, but you can whizz it up until you get a super smooth paste if that’s your thing.
Transfer the picada to a bowl and wipe the food processer, and you will be ready to transfer half the soup to the food processer and whizz until smooth before returning to the pot and stirring well. This helps to thicken the soup
Add half the picada to the soup and stir well, before serving in large bowls. Spoon a dollop of the picada in the centre of each bowl, serve crusty bread for a simple but delicious meal.
It’s comfort food season and this rich velvety smooth soup will make you feel all warm and cosy inside.
I like to top mine with some croutons made from stale baguette I had left over, and a little grated cheese. It’s also amazing topped with some crunchy bacon bits.
Ingredients
1 Cauliflower (broken into thumb sized florets)
1 Large potato (peeled and into 2-3 cm cubes)
1 Onion (finely chopped)
1 Tbsp Oil
350 Ml Milk
1 Litre Vegetable stock (I used 2 stock cubes)
100 Grams Mature cheddar or other strong cheese (grated)
Method
Heat the oil in a large pot and fry over a medium heat until the onion softens
Add the potatoes and cauliflower to the pot and cook for 5 minutes stirring occasionally
Add the milk and vegetable stock and heat until just before the soup comes to the boil. Turn the heat down and simmer for 15 minutes
Check that the potatoes and cauliflower are cooked (they should be soft enough to stick a fork in easily)
In a food blender or with an immersion blender whizz the soup until totally smooth. Add the grated cheese and give a final whizz to make sure it incorporated, cook for a further 5 minutes
Taste the soup to check the seasoning and add salt and pepper if you think it needs it. Sprinkle with your favourite topping
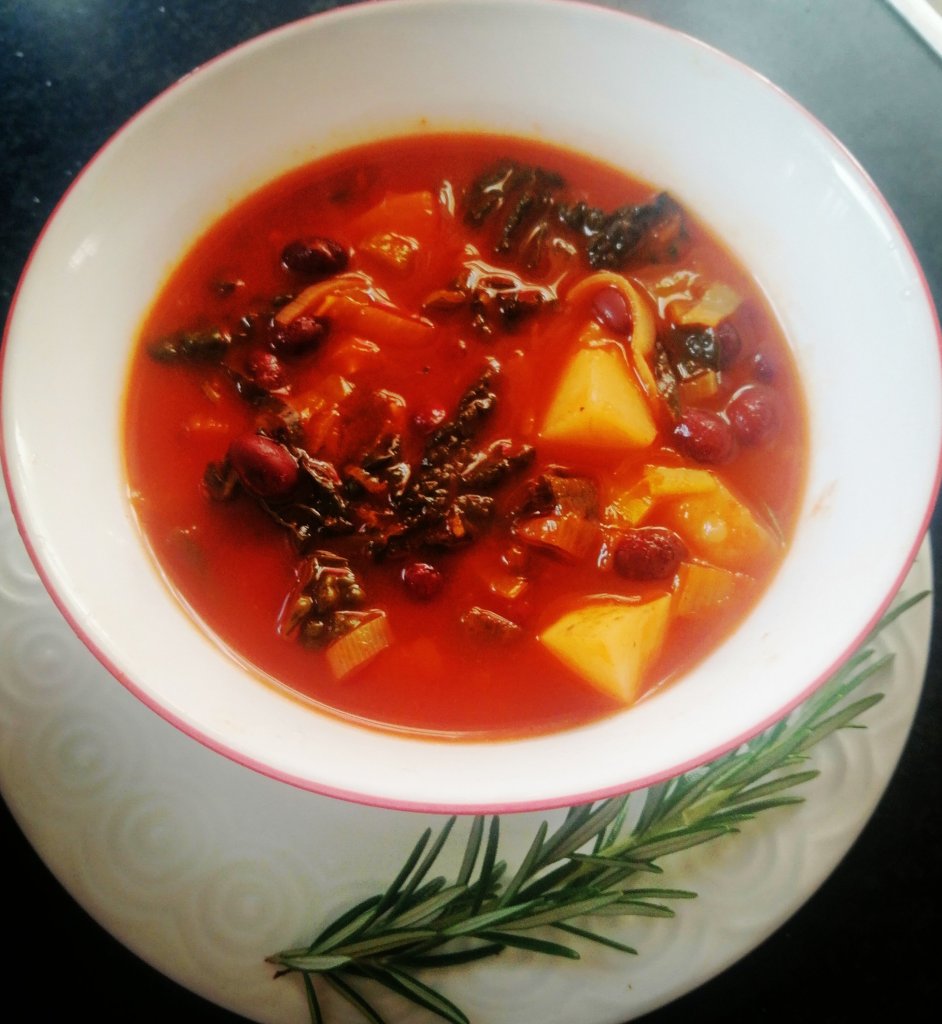
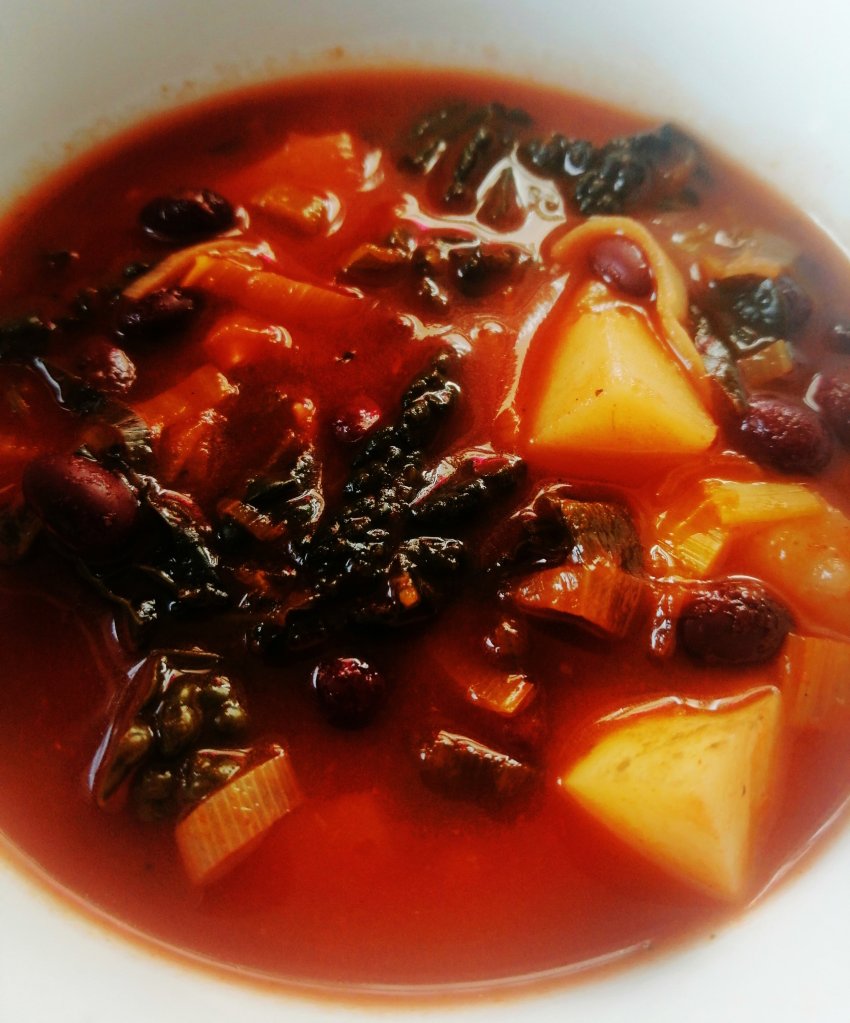
Soup is virtually impossible to mess up. So when it’s cold and wet outside its the ideal thing to make that’s cheap and easy. Its also a great filling lunch to bring to work if you’re on a budget.
This soup is vegan friendly, but if you need a meat fix, you can also add some cooked chorizo or smokey bacon and reduce the amount of smoked paprika.
Ingredients
1 Small Leek (roughly chopped)
2 Handfuls of either cabbage, kale or cavelo Nero (shredded)
3-4 Small potatoes (skins left on, and cut into 3-4cm cubes)
1 Vegetable stock cube
1 Tsp Smoked paprika
1 Can Black beans (you can use any type you like)
3 Cloves of garlic (finely chopped)
1 Tsp Chilli powder (optional)
Large sprig of rosemary, or thyme
1 Tbsp Vegetable oil
500ml Carton of passata
1 Tbsp Tomato puree
Salt
Method
Heat the oil in a large pot over a medium heat and add the leek. Fry until the leek starts to soften
Add the potatoes, tomato puree, chilli powder, rosemary and paprika and cook for 2-3 minutes
Add the crumbled up stock cube, pasatta, garlic, 1 litre of water, and bring the soup to the boil. Add your greens and beans, reduce to a simmer and cook until the potatoes are soft
Check the seasoning and add salt if you think it needs it.
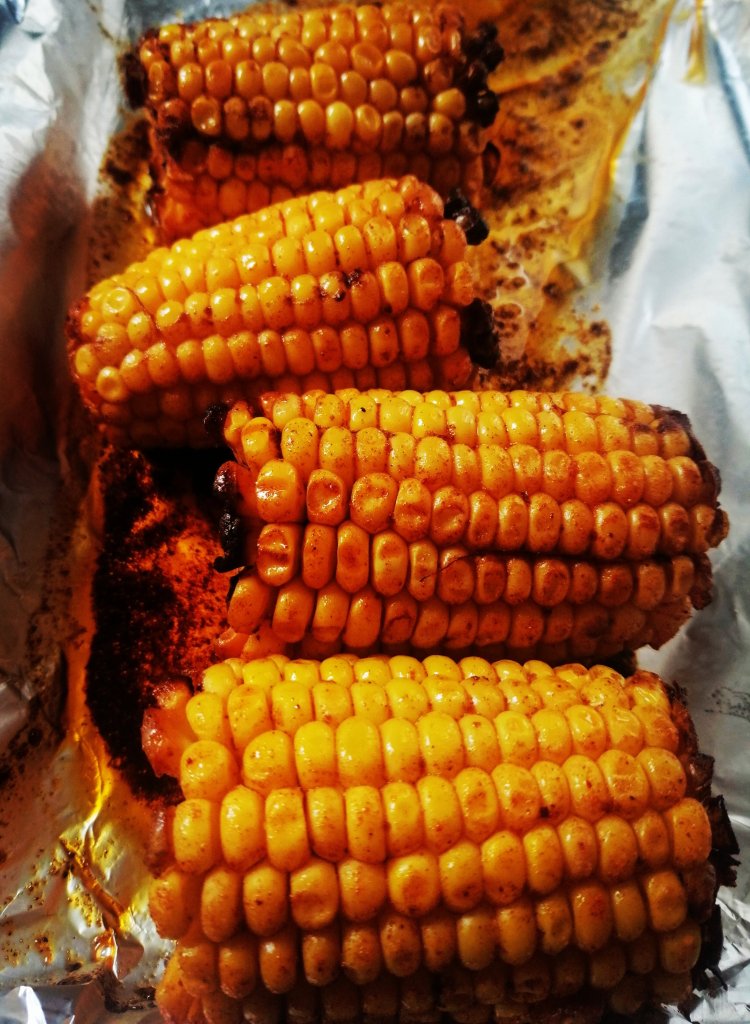
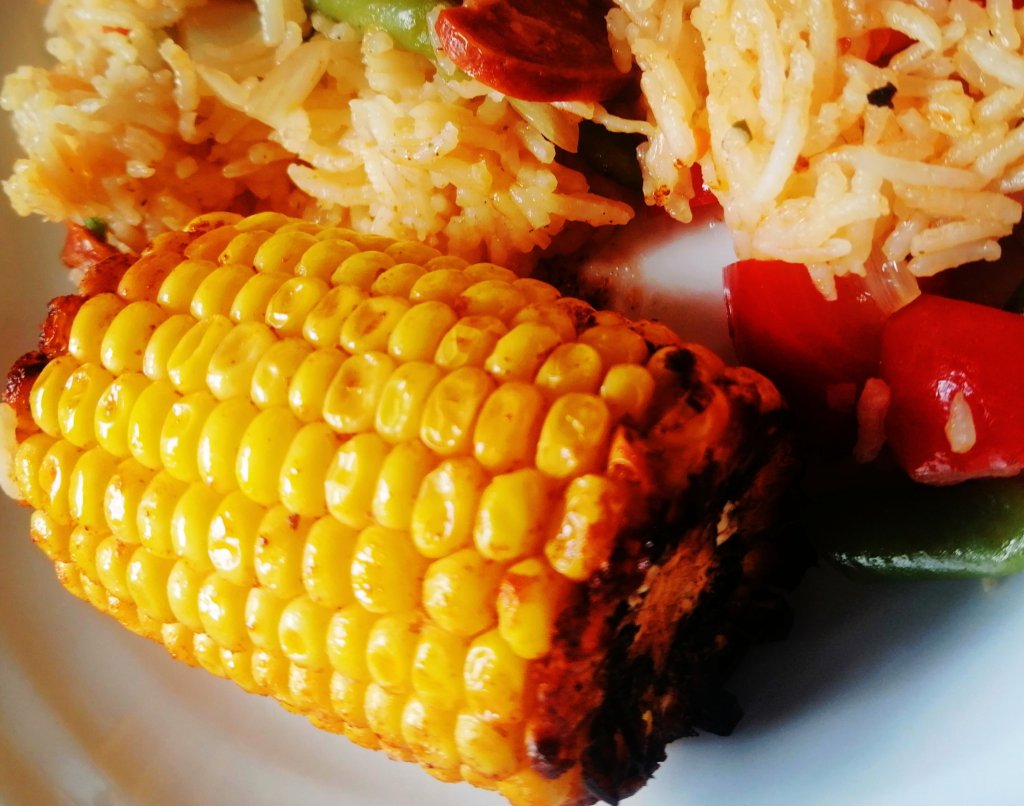
Corn on cob makes a great side dish, and is low effort and tastes great cooked on the barbecue or in the oven.
I used fresh mini corn cobs, but you can also use frozen ones that you have defrosted. There’s no need to blanch the corn first, it can go straight in the oven or on the barbie (just remember to turn occasionally).
Serves 2-4
4 Mini corn cobs
1-2 Tbsp Oil
1 Tsp Smoked paprika
1 Tsp Salt
Method
Preheat your oven to 200 degrees (Celsius).
Add the salt, oil, and paprika to a bowl an stir well
Roll the corn cobs in the oil mix and place on an oven proof dish
Bake for 15 minutes (don’t try to eat immediately as they’ll be piping hot)
If you have watched The Bear recently, its a fairly accurate representation of the highly stressed shouty nightmare that a professional kitchen can be.
I made this version shown in the TV show and am slightly addicted to it. A simple omelette with a Boursin cream cheese filling and a handful of crushed sour cream and chive crisps over the top is amazing.
You can go down the chefie route and and sieve the eggs first to make the omelette super smooth, but if you can’t be bothered it won’t affect the taste. In the TV show the chef also piped the cheese onto the omelette, but really who has the time, just spread it , it will taste the same.
Give this a try, and I guarantee you’ll make it again.
Serves 1
Ingredients
3 eggs
Large knob of butter
50 Grams Boursin garlic and chive cream cheese
Salt and pepper
Handful of crushed sour cream and chive potato crisps/chips
Method
Whisk the eggs together (you can put them through a sieve if you want a really smooth omelette but it isn’t essential)
Heat the butter in a pan over a medium/high heat
When the butter has started to foam slightly (don’t let it brown), add the eggs.
Roll the eggs around the pan and with a spatula move the cooked parts towards the centre of the pan so that runny bits run out to the edges and cooks. It doesn’t have to be perfect it just has to be cooked
Spread the Boursin on one half of the omelette and fold over. Cook for another minute to allow the Boursin to warm through
Top with the crushed crisps (you can also used chopped chives or herbs of you have them) and devour immediately
Barbie fever has taken over the world. I was more of a tomboy and never really got into Barbie, but it did give the chance to make something cute and pretty.
These may look “rustic”, but if you can be bothered with the faff of a piping bag, you can make the meringue nests a little more uniform, and the cream in top look fancier. They can be kept undecorated in an airtight container for 3-4 days. If you’re entertaining this is useful so that you can make these on advance and assemble at the last minute.
I used the tiniest amount of rose water in the cream (less is definitely more with this stuff), but if it’s not your thing it’s fine to leave it out. Just to be whimsical I used some pink food colouring in the meringue and some dried rose petals just be fancy, but these will still taste great with out the girly touches.
Makes 6-8 meringue nests
150 Grams Sugar
3 Egg whites
Pink food colouring (optional, ideally use a gel food colouring, I added a tiny bit but can add according to how strong you want the colour to be)
For topping
300 ml Double or whipping cream
50 Grams Icing sugar
1/4 Tsp Rose water (optional)
200 Grams Raspberries
1 Tbsp Dried rose petals (optional)
Method
Preheat your oven to 110 degree (Celsius)
Line a baking sheet with baking parchment, and draw 6cm circles as a guide for your meringue nests . I have a silicon baking sheet with circles already drawn on which is really handy
Using a stand mixer or electric whisk, whip your egg whites into soft peaks
Continue whisking (if you’re using food colouring add it now) and gradually add the sugar to the egg whites until the meringue is stiff and glossy
Using the circles on your baking sheet as a guide, spoon or pipe the meringue into the circles
Bake for 1 hour 45 minutes and then switch the oven off and leave the meringues on the oven while it cools down
When the meringues are completely cold, whip the cream, icing sugar and rose water together until it forms stiff peaks
Spoon or pipe on top of the meringues and then top with fresh raspberries and sprinkle with rose petals for a little bit of fanciness
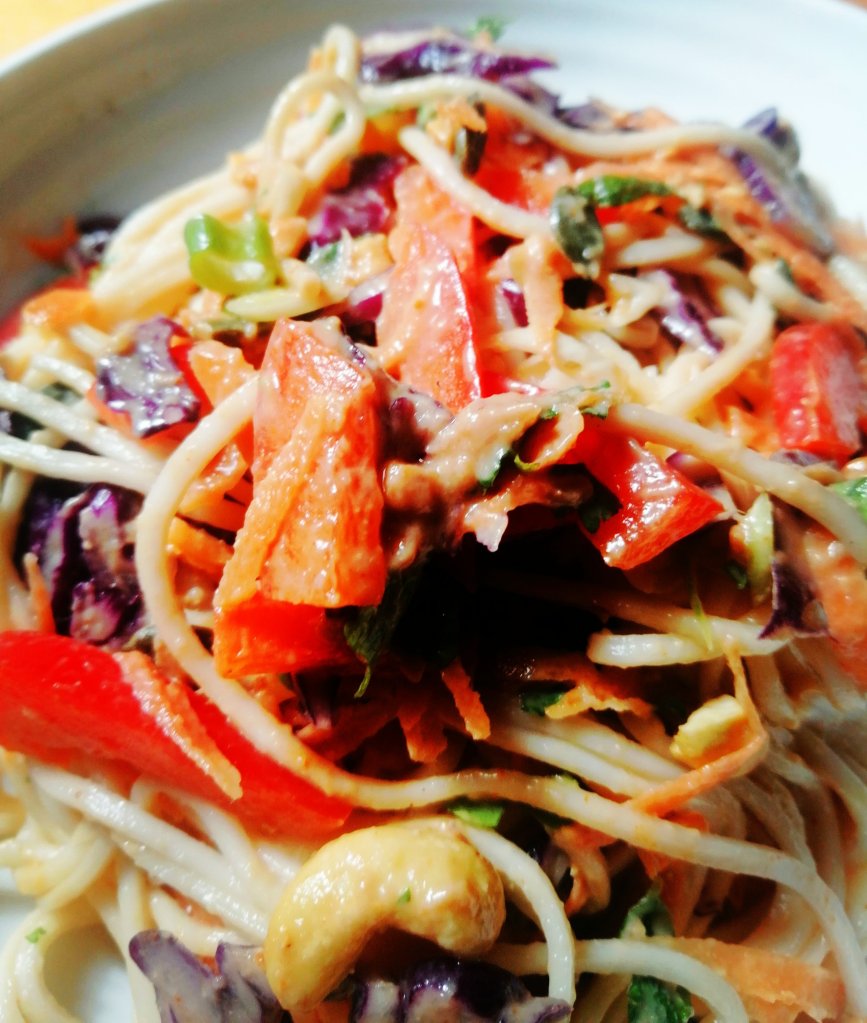
Trying to get away from winter’s stodgy comfort food, doesn’t mean giving up on flavour.
This salad is jam packed with flavour and texture and takes 10-15 minutes to knock up. It’s also gluten free and vegan and makes a great lunch box filler if you’re fed up with sandwiches.
Ingredients
500 Grams Dried rice noodles
1/4 Red cabbage (finely sliced)
3 Scallions/spring onions (finely sliced)
2 Small carrots (grated)
1 Red pepper (finely sliced)
2 Tbsp Coriander (finely chopped)
2 Tbsp Mint (finely chopped)
Dressing
2-3 Tbsp Peanut butter
1 Tbsp Sesame oil
1 Tbsp Soy sauce
1 Tbsp Grated ginger
1 Tsp Maple syrup or Honey if you’re not vegan
1 Tsp Chilli flakes
1 Tbsp White wine vinegar or lemon juice
Topping (option)
2 Tbsp Pumpkin seeds
100 Grams Cashew nuts/peanuts (toasted)
Method
Toast the nuts in a hot frying pan and set to one side and allow to cool.
Cook the rice noodles according to the instructions on the packet. Drain the noodles and add to a bowl of ice water to stop them over cooking.
Add all the dressing ingredients to a bowl and mix well. You might need to add some hot water to loosen up the dressing if its too thick.
Drain the cold noodles and add to a large bowl. Stir in the vegetables and dressing and mix well.