I haven’t had the best luck with scones, usually they ended up like hockey pucks.

A friend who makes great ones advised me that secret is to handle scone dough as little as possible. I decided to try this and instead of Irish version I was always taught to make using a cutter, I tried the American method when the dough baked in piece with sections marked out.

This did the job and these had a nice crust on the outside but stayed fluffy inside (yay, I have broken the scone curse placed on me by Sr Claire in 3rd year home economics for throwing dough). I also gave these a cheeky wee lemon drizzle when the come out of the oven, that brings them to another level.
Serve these with lemon curd and whipped cream if you want to be posh (it’s sooo good), but these are also good with just butter.
You can use defrosted frozen blueberries which are cheaper, but remember to drain them well before adding to the mix so it doesn’t get too messy. These also freeze well, but don’t use the lemon drizzle if you know you are going to freeze them.
Makes 8
Ingredients
150 Grams Blueberries
1 Lemon (juice and zest)
100 Grams Chilled butter (cut into small cubes)
1 Tsp Baking powder
350 Grams Self raising flours
200mil Milk
2-3 Tbsp. Icing sugar
Method
- Preheat your oven to 220 degrees (Celsius), and line a baking sheet with parchment (or else grease the baking sheet well if you don’t have parchment)
- Add the flour, baking powder and butter to a food processer and pulse until the mixture looks like bread crumbs. If you don’t have a food processer, use the rubbing in method, rubbing the flour and butter between your fingers until it looks like breadcrumbs
- Grate the lemon zest wth a fine grater and add to the flour mix along with sugar and mix well. Add the milk and stir the dough until it is just starting to come together, then gently mix in the blueberries so that they stay whole, but try to make sure they are evenly spread within the dough
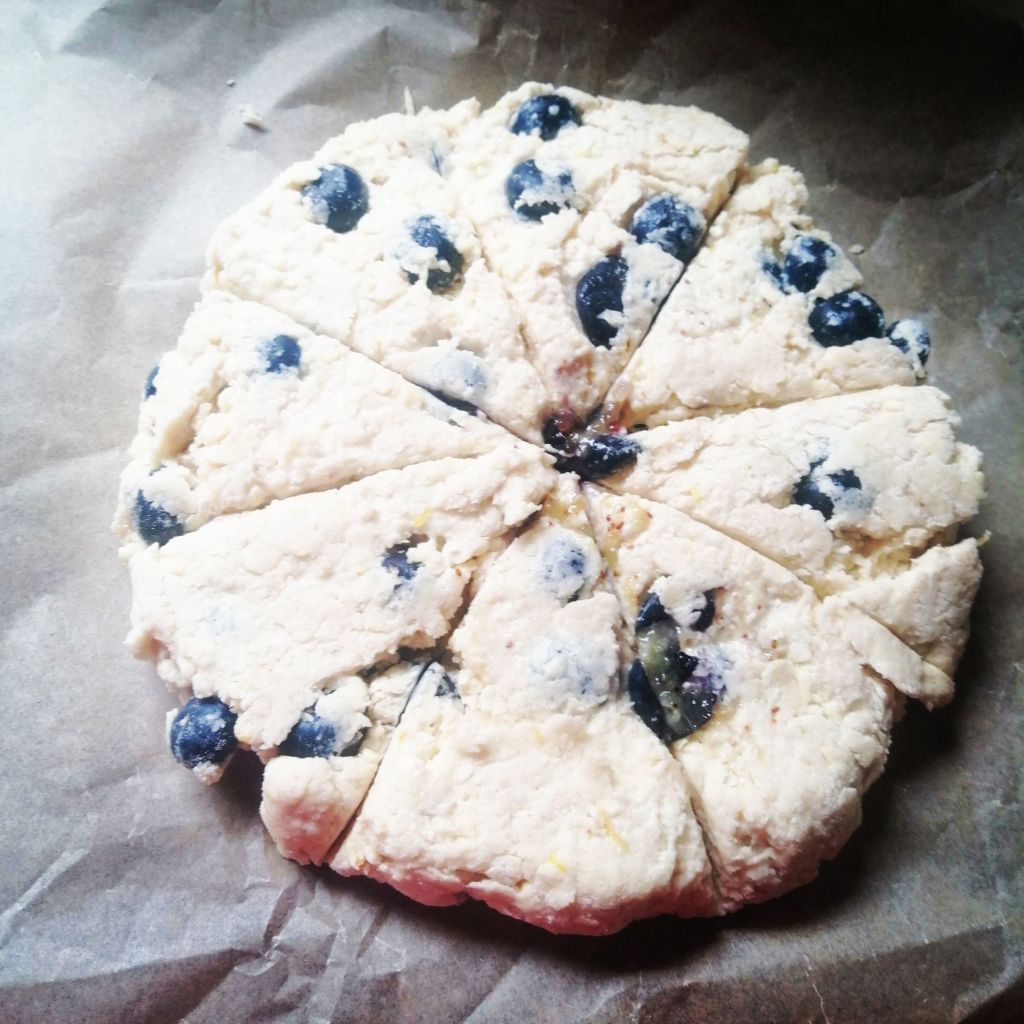
- Gather the dough in a ball, (it should be fairly soft dough). So that I handled the dough as little as possible, I dusted a little flour onto the baking parchment and sat ball of dough in the centre. Dust a rolling pin ( or wine bottle or what ever you have) with a little flour, and gently roll the dough out in a circle about 4 cm deep
- With a sharp knife, score a deep cross into the dough, and then cut these quarters again until you end up with 8 evenly sizes segments (don’t cut the dough right through)
- Bake for 10-15 minutes, and allow to cool slightly. In a small bowl add the juice from the lemon you zested and add to the icing sugar and mix well before drizzle over the scones
- Once cool break the scones into individual sections a serve with butter or lemon curd and cream