Pears Belle Helene

Autumn is the best time for most pears and I love them.  But they can be spiteful little sh*ts, staying like granite for weeks before turning into mush in about 20 minutes.

This classic  french recipe is perfect if you have really hard pears and can’t be bothered waiting on them softening.  I mean, soft poached pears, vanilla  ice cream and hot chocolate sauce, OMG Yum.

It’s also a great dessert if you’re cooking for people, as you can poach the pears the day before and then just add a scoop of shop bought vanilla ice cream and it takes 2 minutes to make a super simple chocolate sauce. 

It’s the ideal dessert if you’re making a heavy main course as it’s pretty light but still tastes indulgent.  If you’re catering for anyone who needs a gluten free dessert this is a great go to (just check the ingredients on the ice cream when you’re buying it).

Serves 4

(for the poached pears)

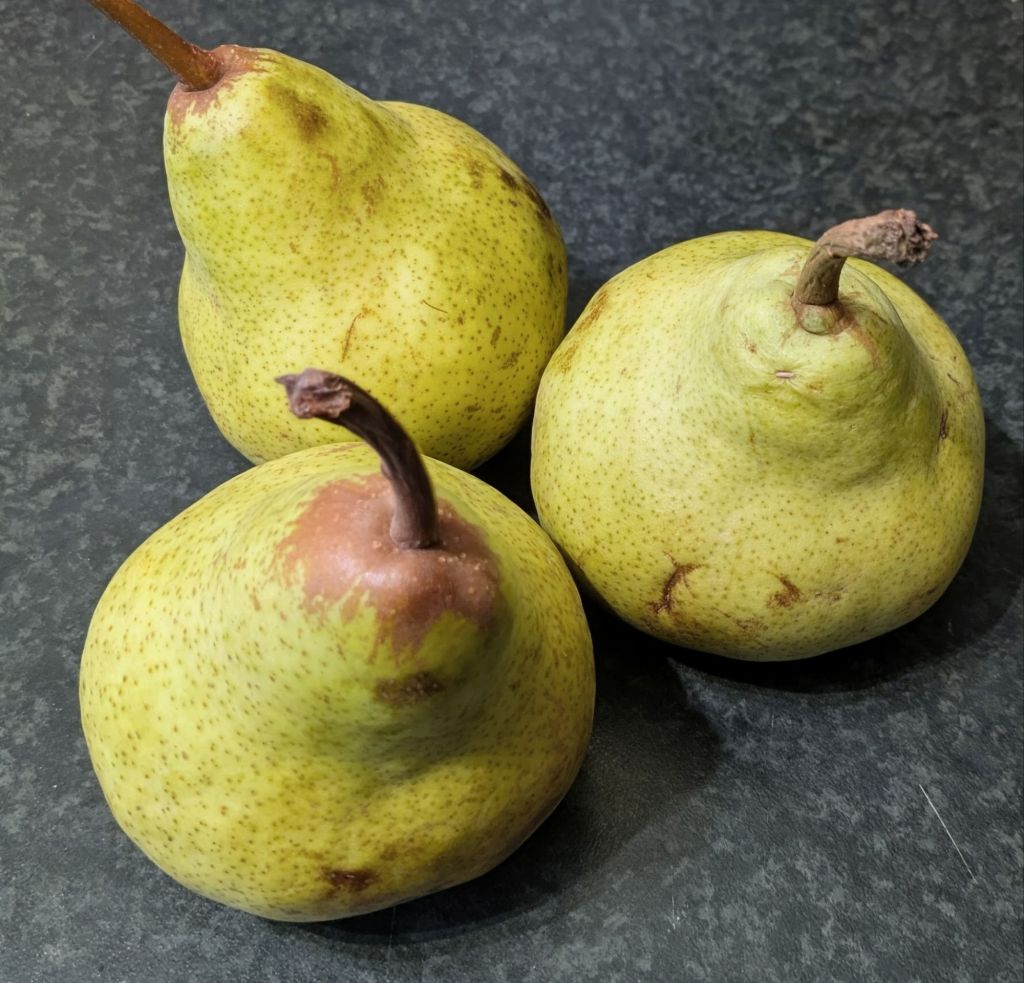
4 Pears (variety isn’t important as long as they’re not soft)

125 Grams Sugar (you can add more sugar if you like to the poaching liquid, but I prefer desserts that aren’t super sweet)

1 Tsp Vanilla extract (optional)

750 Mil Water

For the chocolate sauce

150 Grams Dark chocolate

150  Mil Double cream

4 Scoops of vanilla ice cream

50 Grams Toasted almonds (optional)

Method

  • Add the sugar, water, and vanilla extract to a pot and heat until the sugar has dissolved into the water
  • Peel the pears (leave the stem on if possible), and try to remove the bottom spiky bit and some of the core of the pear, don’t scoop out too much or the pear might fall apart once poached
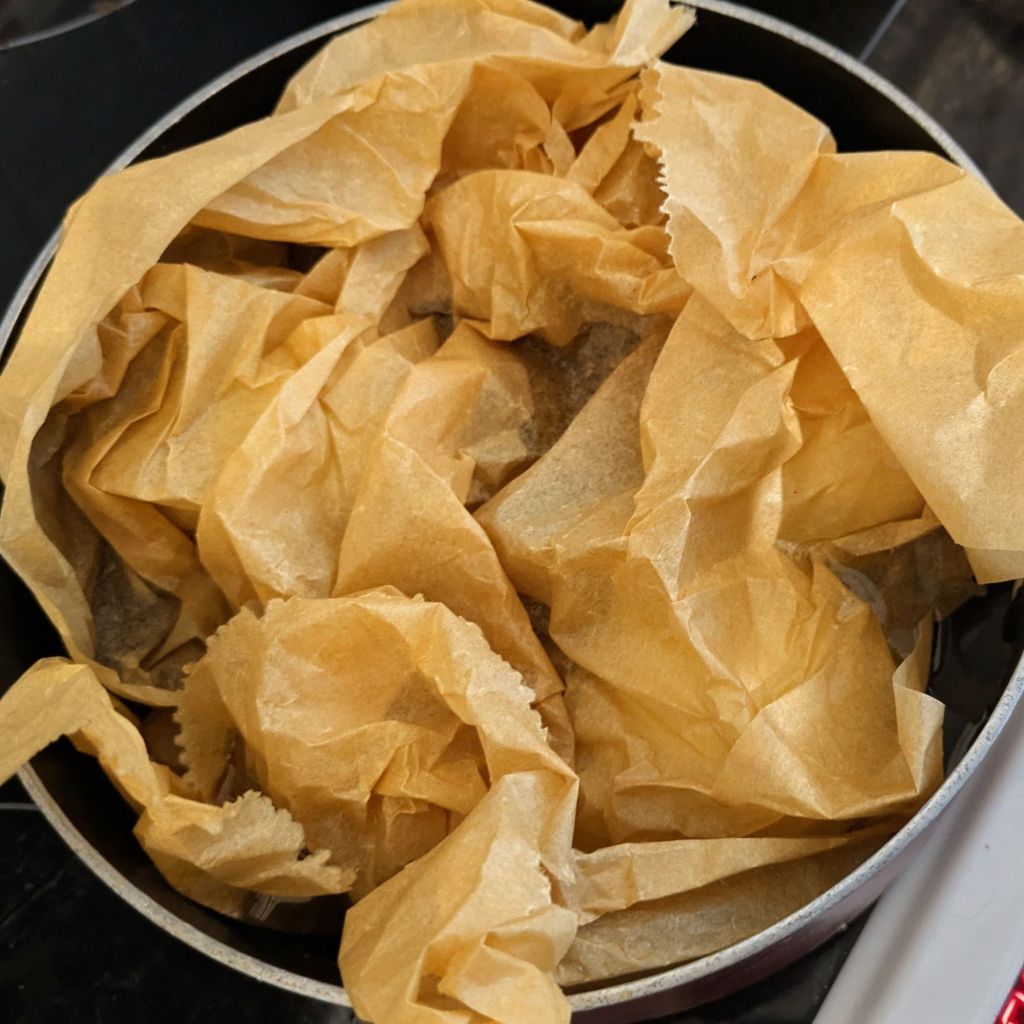
  • Add the pears to the poaching liquid and simmer on a low heat for about 15-20 minutes depending on how big or firm the ears are.  I top this with some scrunched up grease proof paper that sits directly if the pears and poaching liquid.  This isn’t essential but it helps stop too much evaporation and keepy things in place. 
  • Test the pears with a fork to make sure they are soft and lift them out onto a plate with a slotted spoon and allow to cool.  If you’re making them to eat the next day, then chill in the refrigerator
  • When you’re ready to serve transfer the pears to individual bowls or plates.
  • Break your chocolate into small pieces and put in a microwave safe dish.  Heat the chocolate for 30 seconds at a time (stirring each time) in the microwave to make sure it melts but doesn’t burn. 
  • When the chocolate is melted whisk in the double cream until you get a glossy creamy chocolate sauce.  If I’m being fancy I like to pour it into little jugs so people can pour it over themselves, otherwise just spoon it over
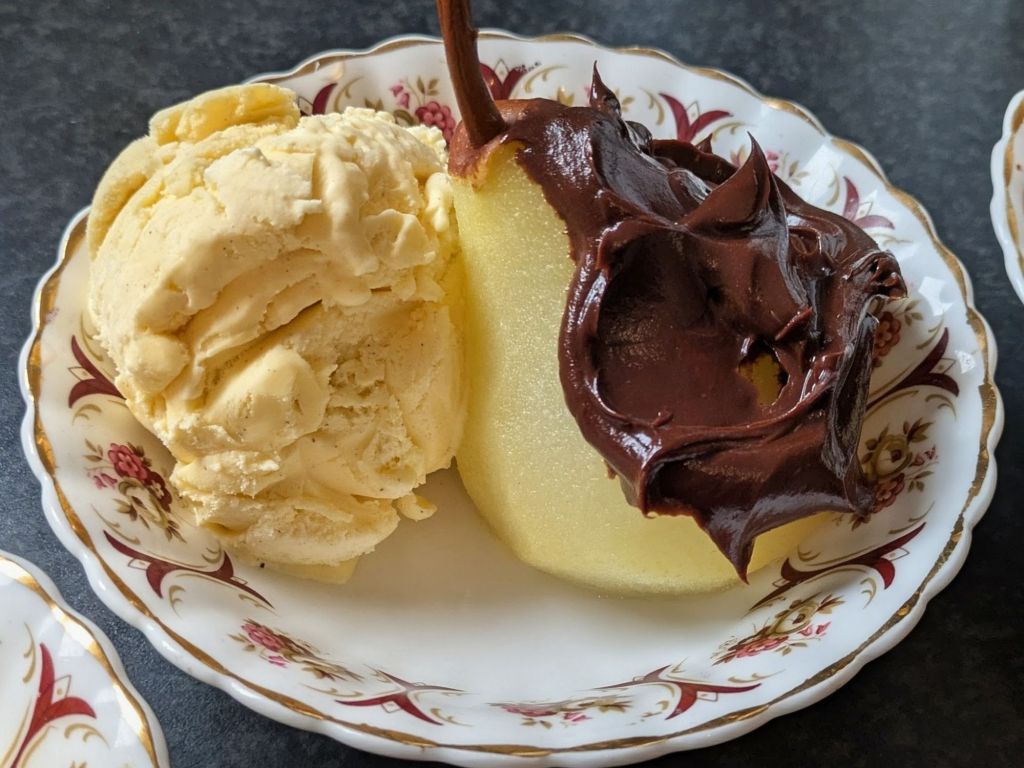
  • Add a scoop of ice-cream onto the plate with the poached pear and then spoon over the chocolate sauce and sprinkle with toasted almonds (if you’re eating this on your own or with a trusted loved one, there is no judgement here if you want to lick the plate, and you will)

Chocolate Chip Banana Bread.

I went away overnight and within 24 hours a bunch of bananas had turned manky and over ripe.

Never one to waste food, the recipe perfect for bananas that are past their best called to me.  I decided to add in some chocolate just to make it even yummier, but if you’re a psychopath and don’t like chocolate you can leave it out.

140 Grams Butter (soft/room temperature)

140 Grams Sugar

140 Grams Self raising flour

1 Tsp Baking powder

1 Tsp Vanilla extract

2 Eggs

3 Bananas (mashed)

100 Grams Chocolate (you can use chocolate chips, but i just cut up a milk chocolate bar)

Msthod

  • Preheat the oven to 180 degrees Celsius qnd line a 2lb loaf tin wirh baking parchment
  • Using an electric whisk or stand mixer, cream the butter and sugar together
  • Add the vanilla, eggs and bananas to the butter and sugar and mix well
  • Whisk in the flour, a third a a time until fully combined
  • Stir in the chocolate until its evenly distributed through out the batter
  • Pour the batter into the loaf tin, making sure the mix gets right into the corners
  • Bake for 45-50 minutes, you’ll know the banana bread is ready when you stick a cocktail stick into the middle of tbe loaf and it comes out clean.  Allow to coo in the tin foe 15 minutes before try to cut (best left to cool completely, but it smells so good you might not be able to help yourself)

Pear and Chocolate Muffins

Rich chocolate muffins with a bite of juicy pear in each one.

Ground almonds in this recipe keeps these super light and moist, yummy.

Makes 12

Ingredients

150 Grams Ground almonds

2 & 1/2 Tsp Baking powder

40 Grams Cocoa powder

175 Grams Butter, plus 1 Tbsp

175 Grams Sugar, plus 1 Tbsp

3 Eggs

150 Grams Self Raising flour

4 Tbsp Milk

4 Firm pears (peeled and cored, and cut into 2-3cm chunks)

Method

  • Preheat the oven to 180 degrees (Celsius). Line a muffin tin with paper cases, or else grease the cups with extra butter to make them easy to remove
  • Add a tablespoon of butter and sugar to a frying pan and melt before adding the pears. Gently cook over a medium heat for 2-3 minutes stirring occasionally (don’t let them get too soft). Remove from the heat and allow to cool
  • With an electric whisk, or stand mixer cream the rest of the butter and sugar together until light and fluffy.
  • Add the eggs one at a time and continue mixing, (don’t panic if it looks like it’s curdled, it’s fine)
  • Add the milk and the rest of the dry ingredients and mix until well combined
  • Empty the pears into the muffin mix and gently fold them into the batter with a metal spoon until they are evenly distributed
  • Spoon equal amounts of the mix into the muffin cases and bake for 30 minutes
  • Allow to cool and then dust with icing sugar

Biscoff Bon Bons (only 3 ingredients)

I love a simple recipe, and if it doesn’t require a ton of ingredients even better.

These make a nice gift, and are fairly easy to make.  You need to reduce the Biscoff biscuits to fine crumbs.  You can do this by putting them into a plastic bag bashing the living daylights out of them (great as stress relief) . An easier way is to blitz them in a food precessor until you have fine crumbs, (you might have to do this in two batches). You can halve the recipe if you want to make a smaller batch.

If you want to make these a little bit more grown up can also add a tablespoon or two of your favourite booze.

Makes between 36-40

500 Grams (reduced to very fine crumbs)

250 Grams Cream cheese

300 Grams Dark chocolate

Method

  • Add the cookie crumbs and cream cheese to a large bowl and mix until thoroughly combined
  • Line or lightly grease a try. Take a small teaspoon of the mixture roll it into a ball about the size of a cherry, and place on the tray. I usually keep a bowl of water beside me when doing this, as its easier to do if your hands are slightly wet. Continue making small balls of the mixture and put on the prepared tray until it has used up.
  • Put the tray in the fridge and chill for 1 hour
  • Break the chocolate into small pieces and place in a microwave proof dish. Microwave for 30 seconds at a time (stirring in between each blast so it doesn’t burn) until the chocolate has melted
  • Using 2 forks to lift the bon bons, dip into the chocolate and place back on the tray. Repeat until all the bon bons have been coated. Allow them to set for an hour in the fridge then transfer to an air tight container, or place in tiny paper cups if you’re feeling fancy

Queen of Sheba Cake (Reine de Saba)

Sometimes I make things simply because the name tickles me, (blue moo pie, hummingbird cake etc).

I heard of this cake when reading about the legendary foodie and promoter of French cuisine, Julia Childs, and decided I had to make it.

This is a single layer cake, and is quite light, unlike some super rich dense chocolate cakes. It’s perfect if you don’t want something too heavy at the end of a meal, but is also delicious with a coffee if you feel the need for a little afternoon pick me up.

This recipe has some rum in it, but if you don’t do alcohol or just don’t like rum you can replace it with 2 tablespoons of strong coffee.

Serves 8

Ingredients

For the meringue

Pinch of Salt

3 Eggs (separate the yolks and whites)

1 Tbsp Sugar

For the cake

115 Grams Butter (Softened)

150 Grams Sugar

115 Grams Dark chocolate (melted)

2 Tbsp Rum, or strong black coffee

25 Grams Ground Almonds

1/4 Tsp Almond extract (optional)

60 Grams Plain Flour

For the decoration

2-3 Tbsp Flaked almonds

60 Grams Dark chocolate (melted)

60 Grams Butter (melted)

Method

  • Preheat your oven to 180 degree (Celsius), and prepare a 9 inch cake tin, but rubbing it with butter and then dusting the inside with a little flour (this will stop your cake sticking to the tin)
  • Add 3 egg whites and a pinch of salt to a bowl, and either in a stand mixer or with an electric whisk, whisk until they start to froth before adding a tablespoon of sugar. Whisk until the egg whites are firm, and you can turn the bowl upside down and the meringue stays in the bowl (be careful doing this so you don’t end up with meringue all over your floor). Set to one side
  • For the cake melt the 115 Grams of chocolate in the microwave, (I use blasts of 30 seconds at a time to make sure the chocolate doesn’t burn), and allow to cool slightly
  • In another bowl, slow whisk the butter and sugar together until it is light and fluffy, gradually add the egg yolks. Add the slightly cooled chocolate, and then the ground almonds, and flour until well mixed
  • Add 1/3 of the meringue mix to the chocolate mix, and mix in with a spatula, with help loosen the chocolate mix. Add the next 1/3 of the meringue mix and gently fold this into the chocolate mix with a spatula (this will help keep the air in the cake mix to keep it light. Fold in the remaining meringue mix ensuring it is thoroughly folded through before transferring to your prepared cake tin
  • Make for 16 minutes (there should still be a little wobble in the centre) . Allow to cool in the tin for 10-15 minutes before turning out onto a wire wrack to cool
  • When the cake is cool, toast the flaked almonds in a dry frying pan for a couple of minutes, keep moving them around so they toast evenly and be careful as they can burn easily.
  • Melt the chocolate and butter for the topping in a bowl in the microwave (try blasts of 30 seconds and stir in between blasts to make sure it melts evenly), mix well when finally melted
  • Pour the chocolate and butter mix over the cake and spread evenly to make sure it runs down the sides evenly (I put a plate under wire wrack to catch any icing that runs of the cake and save mess)
  • Sprinkle the edges and sides of the cake with the toasted almonds (store in an airtight box if not eating immediately)

Mini Egg/Chocolate Chip Cookies

I love eating things other people make and one of my workmates made these and I was instantly addicted. So a big shout out to Christina for being kind enough to give me the recipe.

Christina’s recipe uses dark chocolate (either chips or chopped up chocolate), but because it coming up to Easter I decided to use smashed up mini eggs which are my total downfall. These cookies are also a great way to use up any random chocolate you have lying about after Easter.

You can make the dough a day or two before and keep it in the fridge so that all you have to do is cut it and bake when you need them (if you’re having friends over this means less last minute scurrying around and you appear like a serene domestic goddess with an oven full of delicious cookies)

Ingredients

350 Grams Plain Flour

1 Tsp Bicarbonate of soda

1 Tsp Salt

225 Grams Butter (room temperature and cut into chunks to make it easier to cream with the sugar)

175 Grams Soft brown sugar

50 Grams Caster sugar

1 Tsp Vanilla extract

2 Eggs

350 Grams Smashed up mini eggs (or use chocolate chips or chopped dark chocolate)

Makes 24

Method

  • In a bowl combine all you dry ingredients (don’t add the chocolate yet)
  • In a separate bowl combine the butter. both types of sugar, add vanilla extract and mix until creamy, I used a stand mixer for this which makes it a lot easier but an electric whisk will also do the job
  • Beat the eggs into the butter mixture, and then gradually add the flour. Then stir in our chocolate pieces (I folded them in using a large spoon so that they didn’t get too broken up an electric whisk.
  • Split the dough into 2 halves, and roll each half into a sausage shape roughly 5cm in diameter and wrap each sausage in cling film before chilling in the fridge for at least half an hour
  • Preheat you oven to 190 degrees (Celsius), you’ll probably need a couple of baking sheets, and these should be lined with baking parchment
  • Cut the chilled cookie dough into 2cm think slices and transfer to you baking sheet leaving room for them spread as they cook. Bake for 10-12 minutes

3 Ingredient Vegan Brownies (Gluten Free)

Vegans and those with gluten intolerances often draw the short straw when it comes to desserts. These lovely little Brownies are really chocolatety and don’t make you feel like you’re missing a thing.

A friend told me about these after she saw the recipe online, so apologies if I’m not giving credit to whoever came up with recipe, but she couldn’t remember the site.

With only 3 ingredients these are great to knock up from stuff you have in the cupboards. Because I hate food waste, I always freeze over ripe bananas if I’m not going to eat them. Freeze them whole with their skin on, and they’re perfect for using in recipes like this or banana bread

Ingredients

3 Ripe bananas (mashed)

120 Grams Peanut butter

50 Grams Cocoa powder

Method

  • Preheat your oven to 180 degrees (Celsius)
  • In a large bowl, mash the banana, then add the cocoa powder and peanut butter and mix until thoroughly combined
  • Line a 6 in x 6 in tin with baking parchment.
  • Transfer the Brownie mix to the lined tin and spread evenly.
  • Bake for 25 minutes, and allow to cool in the tin

Chocolate Chip and Walnut Pie

Any type of chocolate dessert is normally a winner. This pie is similar to a Kentucky Derby pie, I have left out the bourbon, and reduced the sugar because I found the original version overly sweet. The finished result is still rich and delicious and feels really indulgent.

This is divine served with whipped cream or vanilla ice cream. If you’re short on time you can use shop bought pastry or even a pre-made pastry case.

Serves 8

(For the pastry case)

125 Grams Butter

200 Grams Plain flour

2 Tbsp Sugar

Pinch of salt

Cold water

For the filling

125 Grams Butter (melted, and allowed to cool)

125 ml Golden syrup

4 Eggs

200 Grams Brown sugar

50 Grams Plain flour

150 Grams Walnuts (roughly chopped)

125 Grams Dark chocolate (roughly chopped) or chocolate chips

1 Tsp Vanilla extract

Method

  1. For the pastry, add the butter, sugar and salt and flour to a food processor and pulse until it resembles breadcrumbs, (you can use the old fashioned rubbing in method if you don’t have a food processor). Gradually add cold water until the mix comes together as a dough. Form into a ball and wrap in cling film and then chill in the fridge for 30 mins
  2. Grease a 12 inch pie dish/tin, ideally one with removable base. Remove the pastry from the fridge and roll out on a floured surface or between two pieces of parchment paper until 1/2 cm thick (you can check the size by placing your tin the centre of the pastry and checking there is enough room to cover the depth of your tin)
  3. Carefully transfer the pastry to the pie dish and gently ease the pastry into the edges, place in the fridge and chill for another 30 mins. Trim any excess pastry that hangs over the edge of your pastry case
  4. Preheat your oven to 180 degree (Celsius), place a sheet of baking parchment in the prepared party case and add baking beans (I use old uncooked rice, rather than buying the fancy clay baking beans), Blind bake for 20 minutes and then remove the baking parchment and baking beans
  5. For the filling mix, whisk the melted butter (make sure its cool), eggs and add the sugar, vanilla extract and golden syrup and whisk until it lightens in colour and increases in volume (the sugar should have dissolved)
  6. Whisk in the flour, ensuring there are no lumps, and then fold in the chocolate and walnuts with a spatula
  7. Pour the filling mix into the pastry case and bake at 180 degrees for 45 minutes, until the centre of the pie is just starting to set (it will continue to cook as it cools)
  8. Cool for a couple of hours before serving with whipped cream or ice cream

Double Chocolate Chip Pancakes

Do you have a chocoholic in your life, then this is the recipe for you?

If you want to do something special serve them with creme fraiche or fresh cream and fruit for the perfect breakfast or brunch dish.

White chocolate chips add a little bit of contrast.

They also make a great dessert, served warm with ice cream and you could even spread them with Nutella if you want to make them even more indulgent.

When bubbles appear on your pancake it’s time to turn it over.

These pancakes freeze well if you want to make a batch and freeze.

Makes 12-15 pancakes

Ingredients

225 Grams Self raising flour

100 Grams Chocolate chips (I used white chocolate chips as I like the contrast)

50 Grams Cocoa powder

1 Tbsp Caster sugar

1 Tsp Baking powder

Large pinch of salt

2 Eggs

400 mil Milk

Oil and butter to fry

Method

  1. Add the flour, cocoa powder, baking powder, sugar and salt to a large bowl and combine
  2. Crack the eggs into the bowl and start to whisk, gradually add the milk and whisk until the mixture is smooth and lump free
  3. Add the chocolate chips and mix well
  4. In a non stick frying pan, add a small knob of butter and a teaspoon of oil and heat over a medium to high heat
  5. Ladle in 2-3 tablespoons of the mixture in to the pan and wait until bubbles start to appear on the pancake. This will be the sign that the pancake is ready to turn, cook for a further minute or two. Repeat until you have used up all the batter (I always give it a stir as the chocolate chips will sink to the bottom and you want some chips in every pancake)
  6. Serve with some butter or syrup, or ice cream if you’re making this for dessert

Mini Egg Rocky Road Bars

You can make an almost infinite variety of rocky road bars. The key thing is include lots of different textures.

I used mini eggs because they are basically my crack cocaine. My other more recent addiction is Bishoff biscuits. I’ve used these here, but you can use any type of crunchy biscuit or cookie you prefer.

Ingredients

400 Grams Chocolate (I used half milk and half dark chocolate, but use what you prefer)

125 Grams Bishoff biscuits

100 Grams Marshmallows

250 Grams Mini Eggs

3 Tbsp Golden Syrup

50 Grams Butter

Method

  1. Break the chocolate in to chunks, and add to a microwave proof bowl along with the butter and golden syrup. Microwave for 30 seconds at a time until the butter and chocolate have melted
  2. Place the biscuits in a freezer bag any bash with a rolling pin (if you don’t have one a tin can will do). The biscuits should be be broken into bits but not too small or all crumbs. Put the broken biscuits in a large bowl
  3. Add half the mini eggs to the freezer bag and bash these too. Add to the broken biscuits and add the Marshmallows
  4. Pour two thirds of the chocolate mix into the bowl and stir until combined. Line a 12cm X 18cm dish with baking paper and transfer the rock road mix into it. Spread evenly.
  5. Cover the rocky road mix with the chocolate you held back. I use a wet palate knife to smooth the top (an ordinary knife is fine if you don’t have one, as rocky roads are bumpy)
  6. Sprinkle the remaining half of the crushed mini eggs and refrigerate for a minimum 1-2 hours before cutting into slices