Chocolate Chip and Walnut Pie

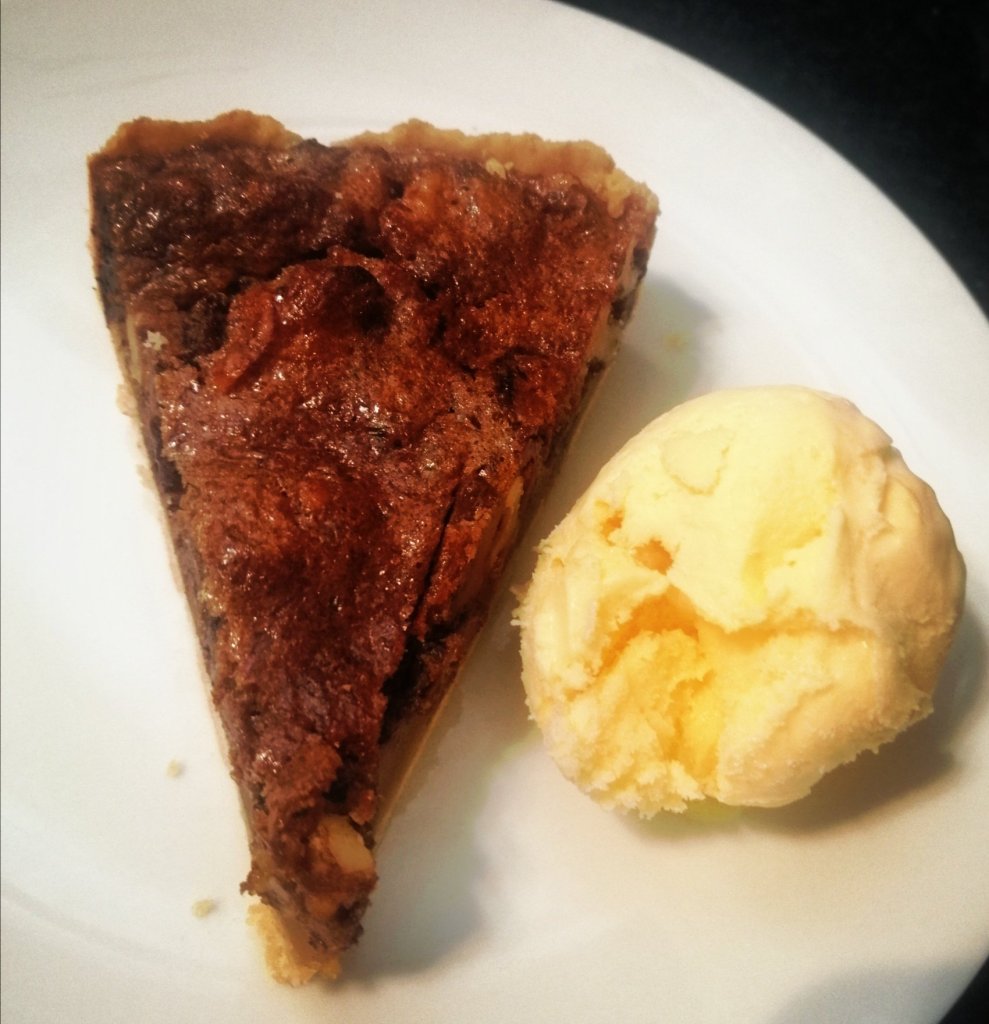
Any type of chocolate dessert is normally a winner. This pie is similar to a Kentucky Derby pie, I have left out the bourbon, and reduced the sugar because I found the original version overly sweet. The finished result is still rich and delicious and feels really indulgent.

This is divine served with whipped cream or vanilla ice cream. If you’re short on time you can use shop bought pastry or even a pre-made pastry case.

Serves 8

(For the pastry case)

125 Grams Butter

200 Grams Plain flour

2 Tbsp Sugar

Pinch of salt

Cold water

For the filling

125 Grams Butter (melted, and allowed to cool)

125 ml Golden syrup

4 Eggs

200 Grams Brown sugar

50 Grams Plain flour

150 Grams Walnuts (roughly chopped)

125 Grams Dark chocolate (roughly chopped) or chocolate chips

1 Tsp Vanilla extract

Method

  1. For the pastry, add the butter, sugar and salt and flour to a food processor and pulse until it resembles breadcrumbs, (you can use the old fashioned rubbing in method if you don’t have a food processor). Gradually add cold water until the mix comes together as a dough. Form into a ball and wrap in cling film and then chill in the fridge for 30 mins
  2. Grease a 12 inch pie dish/tin, ideally one with removable base. Remove the pastry from the fridge and roll out on a floured surface or between two pieces of parchment paper until 1/2 cm thick (you can check the size by placing your tin the centre of the pastry and checking there is enough room to cover the depth of your tin)
  3. Carefully transfer the pastry to the pie dish and gently ease the pastry into the edges, place in the fridge and chill for another 30 mins. Trim any excess pastry that hangs over the edge of your pastry case
  4. Preheat your oven to 180 degree (Celsius), place a sheet of baking parchment in the prepared party case and add baking beans (I use old uncooked rice, rather than buying the fancy clay baking beans), Blind bake for 20 minutes and then remove the baking parchment and baking beans
  5. For the filling mix, whisk the melted butter (make sure its cool), eggs and add the sugar, vanilla extract and golden syrup and whisk until it lightens in colour and increases in volume (the sugar should have dissolved)
  6. Whisk in the flour, ensuring there are no lumps, and then fold in the chocolate and walnuts with a spatula
  7. Pour the filling mix into the pastry case and bake at 180 degrees for 45 minutes, until the centre of the pie is just starting to set (it will continue to cook as it cools)
  8. Cool for a couple of hours before serving with whipped cream or ice cream

3 Ingredient, Condensed Milk and Fruit Squares

We’re currently getting battered by storms and I couldn’t face going out, so I had to work with what I had. 

I love this recipe as it takes minimal effort and can be made with ingredients you normally have in your cupboard.  I recommend everyone always has a tin of condensed milk in the cupboard.  It can be used for everything from making ice cream, sweets and baking.

These are perfect with a cup of tea or coffee on a miserable day (they also freeze well, just freeze before you decide if you’re going to sprinkle with icing sugar)

Ingredients

390ml Tin of condensed milk

160 Grams Self raising flour

350 Grams Dried fruit (you can use any fruit you like or a combination)

Icing sugar for dusting (optional)

Makes 15 squares

Method

  1. Preheat your oven to 180 degrees (Celsius), and line a 16cm x 24cm baking tin with baking paper
  2. Add the flour, fruit, and condensed milk to a bowl and mix well
  3. Transfer the batter to the baking tin and bake for 25-30 mins
  4. Cool in the tin for 30 minutes, and then add a dusting of icing sugar if you want to make it look pretty. Cut into squares and store in an air tight box for up to 2-3 days

Pear and Almond Tart

Some ingredients are just made to go together and pears and almonds are two of the them. 

I have a bit of a love/hate relationship with pears.  When they are perfect they’re hard to beat.  The only issue is that they are like granite and inedible, and then turn to mush within about 20 minutes.  They are the ultimate passive aggressive fruit!

Frangipane filling

This recipe is great for using pears that are too hard to eat if you can’t be bothered with the game of chicken involved in waiting for pears to ripen.

This is a pretty rich recipe, but isn’t meant to be eaten every day and looks really impressive if you’re cooking for friends. 

It’s important to blind bake the pastry case first

You can make the pastry case and the frangipane filling in advance, which means you can have more time with your guests. You could even use shop bought pastry if you don’t have time (home made is better though). This is really good on it’s own but a little fresh cream or ice cream also doesn’t hurt if you want to be properly indulgent.

Yummy with ice cream

Ingredients

For the pastry case

200 Grams Plain flour

100 Grams Butter (chilled and cut into small cubes)

1 Tbsp Caster sugar

1 Egg yolk

For the frangipane filling

115 Grams Butter (at room temperature)

115 Grams Caster sugar

115 Grams Ground almonds

1 Tsp Vanilla extract (optional)

2 Eggs

2 Large pears

Method

  1. In a food processor add the flour, sugar, and butter. Whizz until the mixture looks like coarse breadcrumbs (you can run the butter and flour in together by hand if you prefer)
  2. Add the egg yolk and a small amount of cold water and whizz again until the mix starts to come together. Start to press the mix together to form a dough, adding a small amount of cold water if necessary. Form into a ball, wrap in cling film and refrigerate for 30 minutes
  3. Grease a 9in x 9 in loose bottemed flan tin. When the pastry has chilled, place on a floured surface, and roll out in a circle approximately 1/2 cm thick.
  4. Lay into you prepare flan tin making sure that it’s pressed into the edges. Place a sheet of baking paper on top and baking beans (I use old dried rice) to weigh down the pastry and blind bake in an oven pre heated to 180 degrees. Bake for 15 minutes before taking the case out if the oven, carefully lift the the baking paper by the 4 corners taking care not to spill any of the baking beans/rice onto the pastry case.
  5. Return the pastry case to the oven and bake for a further 10 minutes before removing from the oven and allowing to cool
  6. To make the filling, add the butter and sugar to a bowl and mix with an electric whisk until light and creamy. Add the vanilla, almonds and eggs and beat in until combined
  7. Peel, core and quarter the pears, before cutting into slices about 1cm thick
  8. Spread the almond mixture into the pastry case. Arrange quarter of the pear so the narrow part is towards the centre of the tin and wider part is towards the outside work as quickly as you can to prevent the pear discolouring
  9. Once you have arranged the pears, return the flan tin to 180 degree oven and bake for 25-30 minutes until the centre is just starting to set (it will continue to cook as it cools). Allow to cool in the tin for another 15 minutes before attempting to cut.

Lockdown Chilli

Yep, we’re in bloody lockdown again and we’re all trying to limit how much we go out.

With this in mind, like last time I decided to have a look and use up food I already had at home. I first made this type of chilli years ago when I was a flat broke student. My Mum would sometimes send me home with a bag of tinned food. I came up with this version of chilli and it’s surprisingly flavoursome.

I know most people wouldn’t use corned beef in a chilli, but it works well. If you don’t want to use baked beans you can use whichever beans you like, just maybe add some vegetable stock to loosen up the mix. This is also a good dish to use up any vegetables that have been hanging around your fridge or freezer for a while.

It’s cold and miserable outside and while I’ll admit it’s not fine dining it’s quick, cheap and proper comfort food. This goes well with rice, or pasta, in a baked potato or with garlic bread.

Ingredients

340 Gram Tin of corned beef (cut into cubes)

500 Gram Carton of passata (or a tin of chopped tomatoes)

410 Gram Tin of baked beans

1 Tbsp Oil

1 Tbsp Tomato purée

1 Onion (chopped fairly finely)

1 Carrot (grated)

1 Red pepper (cut into 1 cm chunks)

1 Tsp salt

1 Tsp Ground cumin

1 Tsp Chilli powder

1 Tsp Ground coriander

3 cloves of garlic

Method

  1. Heat your oil in a large flat bottom pan. Fry the carrot, pepper, and onion over a medium heat until the the onion becomes translucent
  2. Add the garlic, spices, tomato puree and corned beef, and stir through the vegetables and cook for 5 minutes until the corned beef starts to break down.
  3. Stir in the passata, and baked beans, mixing well. Cook over a medium heat for a further 15 minutes. Stir occasionally to prevent sticking
  4. Serve with your favourite carbs. This keeps in the fridge for 3-4 days

Cinnamon and Apple Blondies

It’s cold, dark, and miserable outside, I’m having a “big” birthday and there is nowhere open to go out and celebrate.

Combine the cake mix thoroughly before adding the apples.

To try and stave off the impending dispair this will bring, for the mean time I’m all about the comfort food.

Toss the apples in a little flour before adding to the mix.
Apple should be folded into the mix with a metal spoon.

I’ve made blondies before and they have a similar texture to brownies but as they don’t use chocolate, they have more of a caramely flavour. This works really well with apple and cinnamon. This time of year these are the flavours I love.

Yummy with ice cream

These are great with a cup of tea or coffee, but they’re also fantastic with custard or ice cream as a dessert. These freeze well, and will last 2-3 days in an air tight tin.

Ingredients

2 Apples (peeled, cored and cut into 1cm cubes)

1/2 Tsp Baking powder

100 Grams Soft brown sugar

100 Grams Caster sugar

1 Tsp Cinnamon

275 Grams Plain flour

1/2 Tsp Salt

1 Egg

100 Grams Butter (melted)

Method

  1. Preheat your oven to 180 degrees, and line a 8 in x 8 in baking tin
  2. Add the eggs and sugar to a bowl and mix with an electric whisk until light and fluffy
  3. Gradually whisk in the melted butter (allow to cool a little before adding)
  4. Hold back 2 tablespoons of flour, but gradually add the rest of the flour, baking powder and cinnamon and fold into the sugar and eggs mix with a metal spoon
  5. Once you have peeled and chopped the apples toss the pieces in the 2 tablespoons of flour
  6. Fold the chunks of apple into the batter until evenly distributed
  7. Transfer the mix to the baking tin, and bake for 50 minutes. Check . Allow to cool in the tin for 15 minutes before cooling on a wire wrack

Hazelnut and Raspberry Eton Mess

Chewy meringue, luscious cream, and juicy raspberries

Most of my baking is throw it in a bowl give a quick stir and throw it in the oven. Every now and again I like to go a little bit fancier, not as fancy as those creations you see in French patisseries that are total works of art, but a bit more involved than a tray bake.

As with some of my favourite recipes this came together as the result of an accident. I was in a supermarket and meant to lift ground almonds but lifted ground hazelnuts instead. If you can’t find ground hazelnuts, just give whole hazelnuts a whiz in the food processor, just don’t go too fine with them or else the hazelnuts will start to release their natural oils which is death for a meringue. I used raspberries in this, but oranges or strawberries also go really well.

I’ll be honest, I was trying to make pretty frou frou little meringue nests. It went horribly wrong (I have a checkered past with meringue and it beat me once again. I think I need one those beautiful very expensive mixers, just saying in case anyone would like to send one to the Sunnyside Kitchen and break my meringue curse). If you are better with meringues than I am please give the little nests a try I think they would look adorable.

My meringue nests didn’t really work out.

So I had a pile of ugly meringues, and rather than waste these I just adapted what I had and layered broken meringue, cream, chocolate and fruit to make a version of Eton mess, it tasted fabulous! This is also a fantastic gluten free dessert.

I like to think of cooking as a metaphor for life, sometimes you end up with something you didn’t want or didn’t ask for. Sometimes things don’t work out as you hoped or planned. But with a little imagination and the right attitude you can still create something great.

Served in little jars or glasses these make a delicious dessert.

Ingredients

Meringue

150 Grams Hazelnuts (ground)

7 Eggs whites

385 Grams Caster sugar (if you don’t have caster sugar, whiz ordinary granulated sugar in a food processor of a couple of seconds)

1/2 Tsp White wine vinegar

Filling

100 Grams Chocolate (use the the type you prefer and grate or scrap into curls

1 Punnet of raspberries

250 Ml Whipped Cream

Method

  1. Pre-heat your oven to 180 degrees, line two baking sheets with baking parchment, drawing on circles (if making meringue nests)
  2. Separate your eggs and whisk the egg whites until they resemble stiff peaks, whisk in the sugar a tablespoon at time and then add the vinegar.
  3. Gradually fold in the ground hazelnuts with a metal spoon, and then pipe or spoon onto the prepared baking trays
  4. Bake for 25-30 mins and remove and allow cool before carefully removing from the baking parchment
  5. When the meringue are completely cold, start to layer them up with the whipped cream, prepared fruit and grated chocolate. I use little jam jars, but these also look really good served in tall glasses. If you have any whole hazelnuts left you could also toast these in a pan and allow them to cool before topping the desserts to give some crunch

Date and Walnut Wheaten Bread

Tell me whats not to like about bread still warm from the oven, and smeared with butter.

One of my favourite places to visit in Northern Ireland is Newcastle Co. Down. There are lots of things to love, breathtaking scenery, amusement arcades, seaweed baths, a lovely promenade, and the world class Tollymore forest Park. I visited recently and tried to find a little bakery that used to sell the most amazing date and walnut wheaten bread. Sadly the shop is gone but the visit inspired me to come up with a version of it which isn’t half bad.

The perfect mix of sweet and savoury.

This bread is great just sliced and slavered in butter/jam. It’s also savoury enough to taste great when topped with cheese, or along side soup. You can also devide the bread mix into eight to make little wheaten rolls.

Ingredients

275 Grams Plain flour

200 Grams Wholemeal flour

175 Grams Dates (chopped)

75 Grams Walnuts (chopped)

50 Grams Butter (melted)

1 Egg

1 Tsp Baking soda

1/4 Tsp Salt

250ml Buttermilk (I didn’t have buttermilk, so you can improvise as I did. I used normal milk and added 1 Tbsp of lemon juice and left it to sit for 10 minutes)

Simple round loaf with a cross cut across the centre

Method

  1. Preheat your oven to 200 degrees
  2. Add the flours, walnuts, dates, salt and baking soda to a bowl and combine
  3. Make a well in the centre of the flour mixture, add the egg, and melted butter. Add the milk a little at a time until you have quiet a moist dough.I like to use my hands to mix the ingredients, but you can also use a wooden spoon.
  4. Turn the dough onto a floured surface, and shape into a circle, around 14-16cm in diameter
  5. Put the loaf onto baking sheet lined with parchment paper. Cut a cross across the loaf, about a third of the depth of the loaf
  6. Bake for 45 minutes, check the loaf is ready by tapping the bottom to makes it sounds hollow

Potato, Sausage, and Apple Skillet

I love a quick dinner after a long day when standing cooking holds little appeal. If you can be organised enough to cook extra potatoes for dinner the day or two before this makes this even quicker.

My sort of comfort food

Nothing says comfort food to me like spuds. Crispy fried potatoes, meaty pork sausages and hot sweet apples makes a really dreamy combination. On a chilly Autumn evening this makes a perfect dinner, it’s also really good with fried egg on top.

Serves 4

Ingredients

500 Grams Cooked potatoes cut into chunks (I like to leave the skins on)

8 Pork sausages (cut into chunks)

2 Red onions (thinly sliced)

2 Dessert apples (cut into chunks)

2 Tbsps Olive oil

Salt and pepper

Method

  1. Heat 1 Tbsp of olive oil in a large skillet or heavy frying pan
  2. Add the cut up sausages and onions, and stir occasionally until browned
  3. Remove from the pan and set to one side. Add the other tablespoon of oil to the pan and add the potatoes, cooking until brown
  4. Add the sausages, onions, and apple to the pan, cook for another 5 minutes. Season with salt and pepper, and if you’re feeling really fancy you could sprinkle over some chopped herbs like parsley, or sage

Garlic Bread Vegetable Bake

I did the thing I normally do when I go to a farmer’s market. I bought way too much random stuff because I thought it looked good. I got it home and then had to think what I was going to do with it.

Note to self, stop buying too much stuff at the market.

This is a scrummy mix of colours and textures. Delicious Autumn vegetables in a creamy sauce, with a little bit of heat from smoked paprika, topped with crunchy, cheesy garlic bread.

Who doesn’t like garlic bread (weirdos, that’s who). You can use any combination of vegetables you like, pumpkin, butternut squash, or green beans also work well.

Crunchy Cheesy Perfection

I tried this recipe on one of my oldest friends. I was nervous because she owns a steak restaurant and is a confirmed carnivore and got two enthusiastic thumbs up (still sorry I forgot to send you home with a doggy bag Mags, but here is the recipe as promised). Go get your comfort food on.

Ingredients

1 Tbsp Olive oil

250 Grams Brussels sprouts

150 Grams Cavelo Nero (or Kale)

1 Pepper

1 Onion

175 Grams Mushrooms

2 Courgettes

400 Grams Cream cheese

250ml Vegetable stock

1/2 Tsp Smoked paprika

Handful of parsley

25 Grams Butter

2 Cloves of garlic

50 Grams Cheddar Cheese

1 Baguette

Method

  1. Cut the bottoms of the Brussels sprouts and halve. Remove the stalks from the cavelo nero and slice. Cook the sprouts and cavelo nero in the vegetable stock for 5 minutes, until just tender
  2. Slice the courgettes, onions, mushrooms and pepper, and fry in the olive oil in a large frying pan for about 5 minutes until soft
  3. Add the sprouts, cavelo nero and vegetable stock to the frying pan. Sprinkle the smoked paprika over the vegetables, and add finely chopped parsley and cream cheese
  4. Mix until thoroughly combined
  5. Crush or mince the garlic and combine with butter
  6. Slice the baguette into 2cm slices, and spread with the garlic butter
  7. Put the vegetable mix into an oven proof dish and top with the slices of buttered baguette
  8. Top with grated cheese and bake in an oven preheated to 180 degrees, for 30 minutes until golden brown