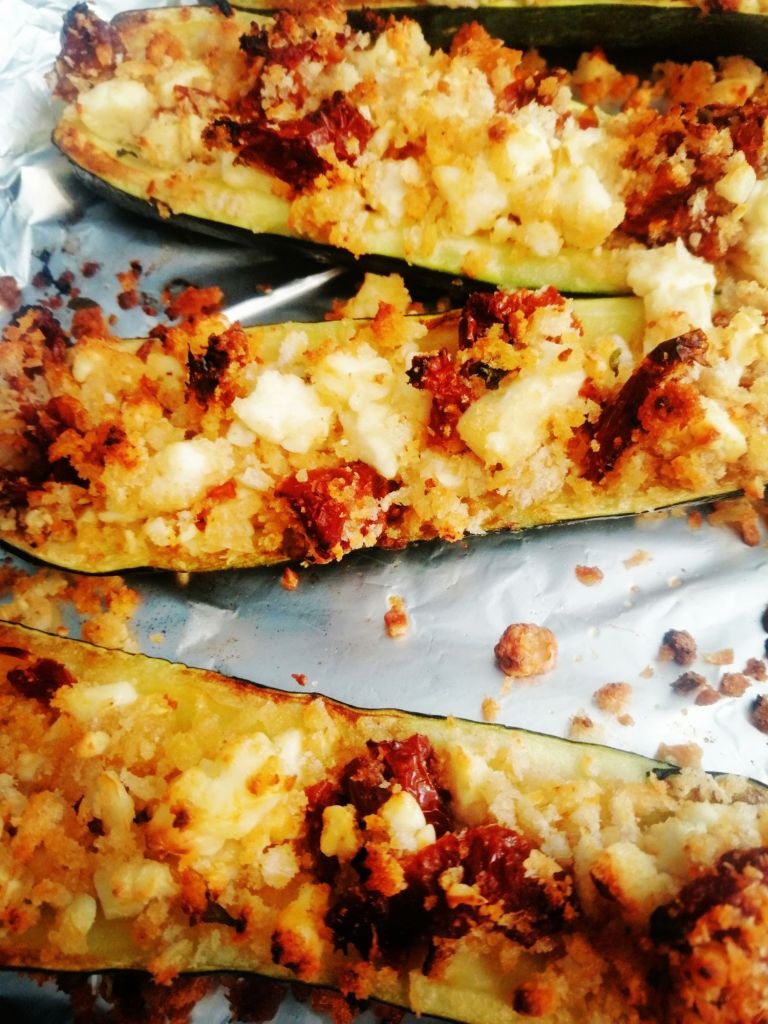
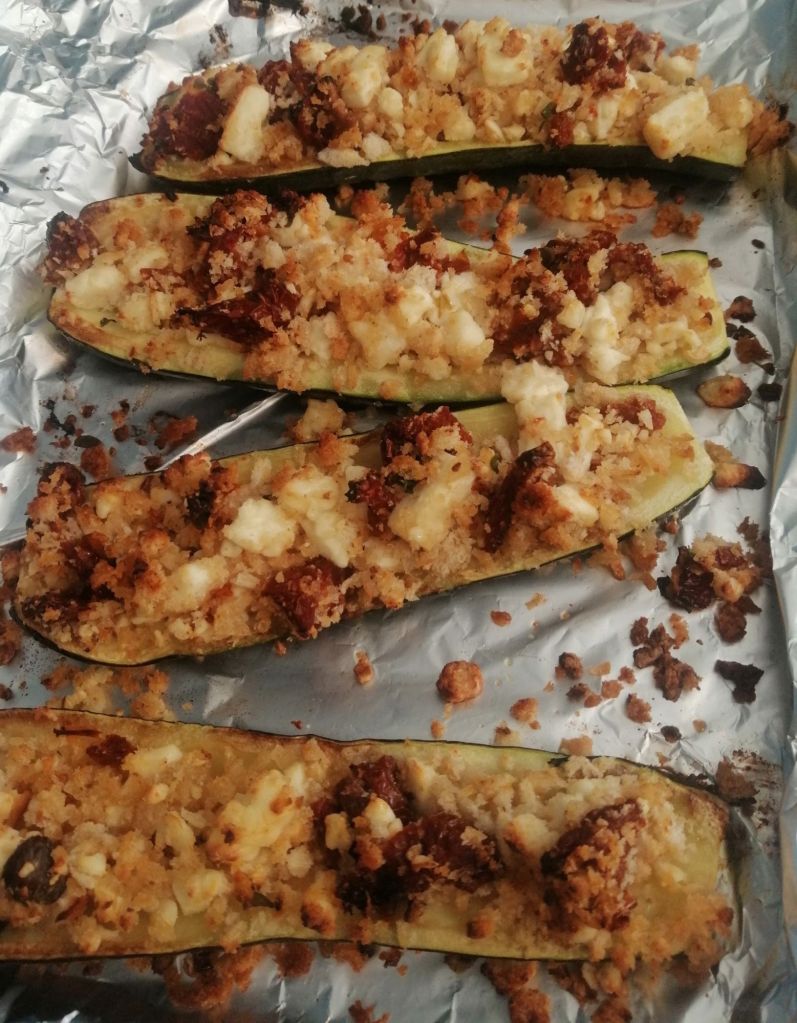
Courgettes can be pretty boring, and during Summer they are cheap snd plentiful. I found myself with a couple of largish courgettes and these can often be watery and tasteless.
I decided to try pimping them up with some some dried tomatoes and feta, and they were yummy. This makes a good lunch dish or you could serve them as a side dish and is fairly quick and easy.
Serves 2
2 Large courgettes
100 Grams Breadcrumbs
100 Grams Feta Cheese (crumbled into 1-2cm lumps
50 Grams Sun dried tomatoes in oil (roughly chopped)
1 Tsp Fresh oregano, or 1/2 tsp of dried (you can use any herbs you have, rosemary also works well, but use a bit less as it’s stronger)
1 Clove of garlic (finely chopped)
1 Tbsp Oil from the jar of sun dried tomatoes
A little extra oil for brushing the courgettes with
Combine the stuffing ingredients in a large bowl
Method
Preheat the oven to 180 degrees (Celsius)
Trim the top and bottom of the courgettes and cut in half length ways, use a teaspoon to scoop out the seeds in the centre of the courgettes
Brush with oil and place cut side down in a baking dish, and bake for 10 minutes
In a large bowl combine the rest of the ingredients
Remove the courgettes from the oven and over to the cut side with a spatula
Fill the scooped out centre of the courgettes with the filling before returning to the oven and bake for another 10 minutes until the filling is golden brown
I love dishes made with ingredients I usually have in my kitchen. No part of this recipe is difficult, just break it into 3 steps, bread, feta and grapes.
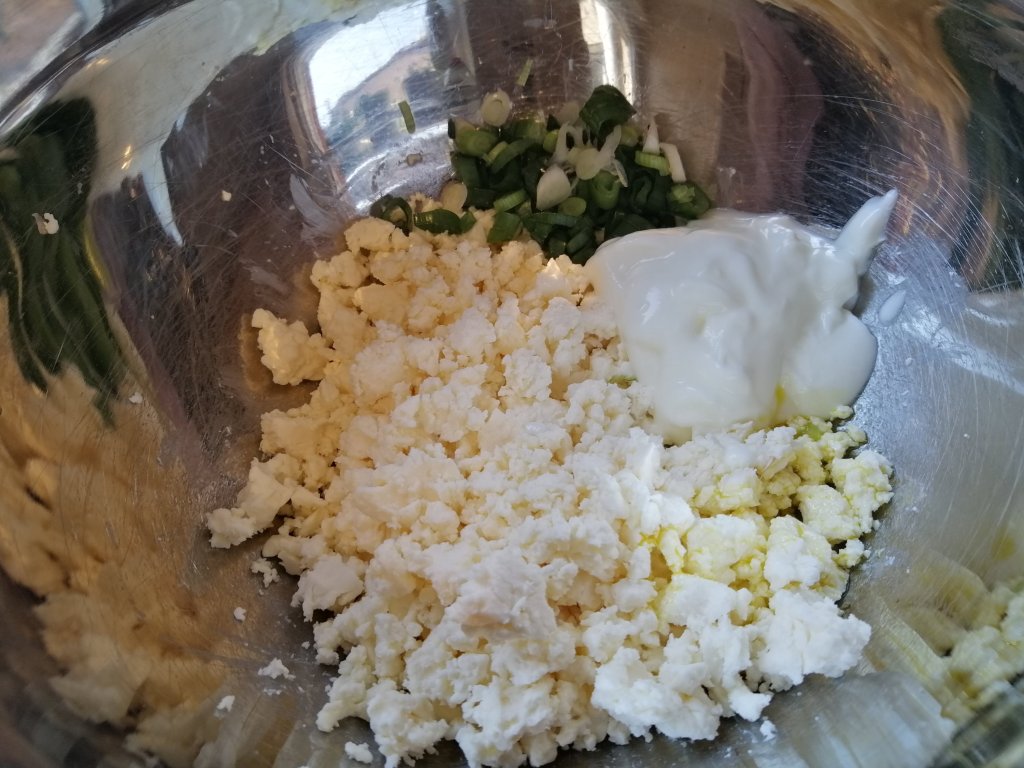
The cheese, oil, yoghurt and spring onions before whipping
This is a pretty fancy starter but all the elements can be made well in advance and assembled at the last minute. If you want to make delicious canapes this also works brilliantly on wafer thin slivers of sour dough bread or those tiny little croustad cups you can buy in some delicatessens It’s also great for a lunch dish.
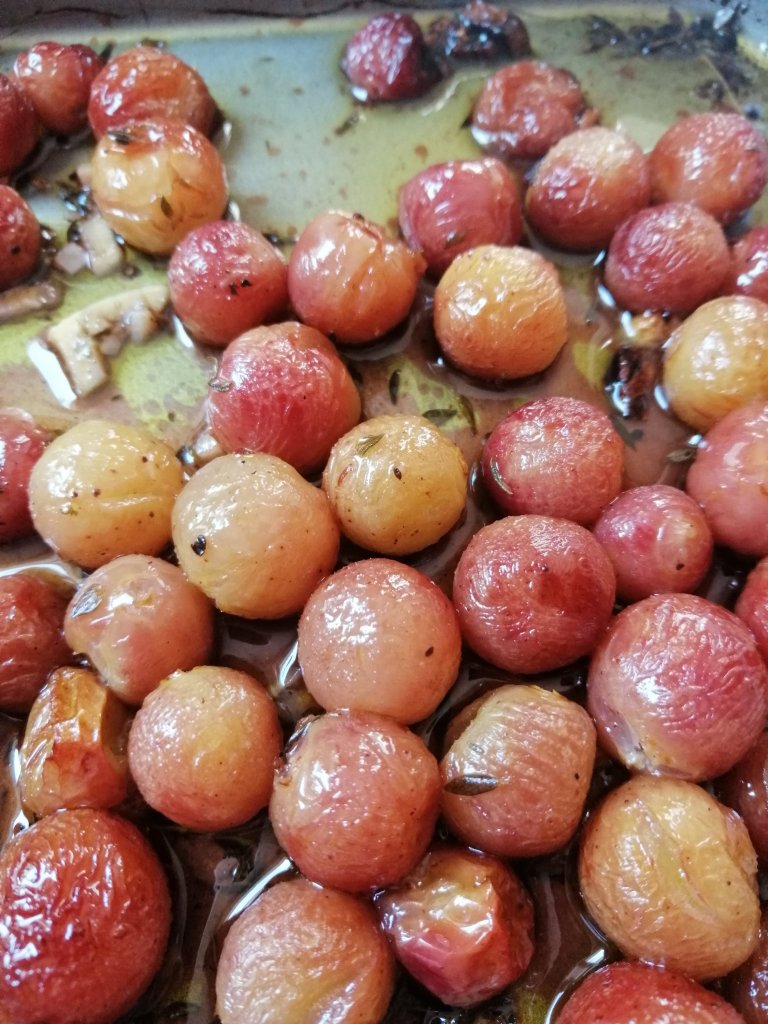
Straight from the oven, perfect once the grapes start to look s little shriveled
I love whipped feta, and it can be used in salads, wraps, sandwiches or as a dip. It’s also really good with roasted vegetables or sun dried tomatoes.
Feta, once it has been whipped
The roast grapes are something you might not have tried before, but their sweetness works really well with the saltiness of the feta.
Ingredients
For the bread
1 Ciabatta loaf (you can use other breads like sour dough or French baguette if you prefer), cut into 1-2cm thick slices
Pre-heat your oven to 180 degrees. Remove the grapes from the stem and add to an oven proof dish along with the other ingredients. Swirl the grapes around to make sure they are coated with the oil, thyme and garlic. Bake for 25-30 minutes or until the skins start to blister, remove from the oven and allow to cool
Place the sliced bread on a baking tray and drizzle with oil on each side. Bake in the oven for 10-15 minutes, remove and rub each slice with a clove of garlic
In a large bowl, crumble the feta, and add the other ingredients and whip with an electric whisk for 5 minutes or until creamy.
When the bread is cool, spread with a layer of whipped feta, and top with the roasted grapes
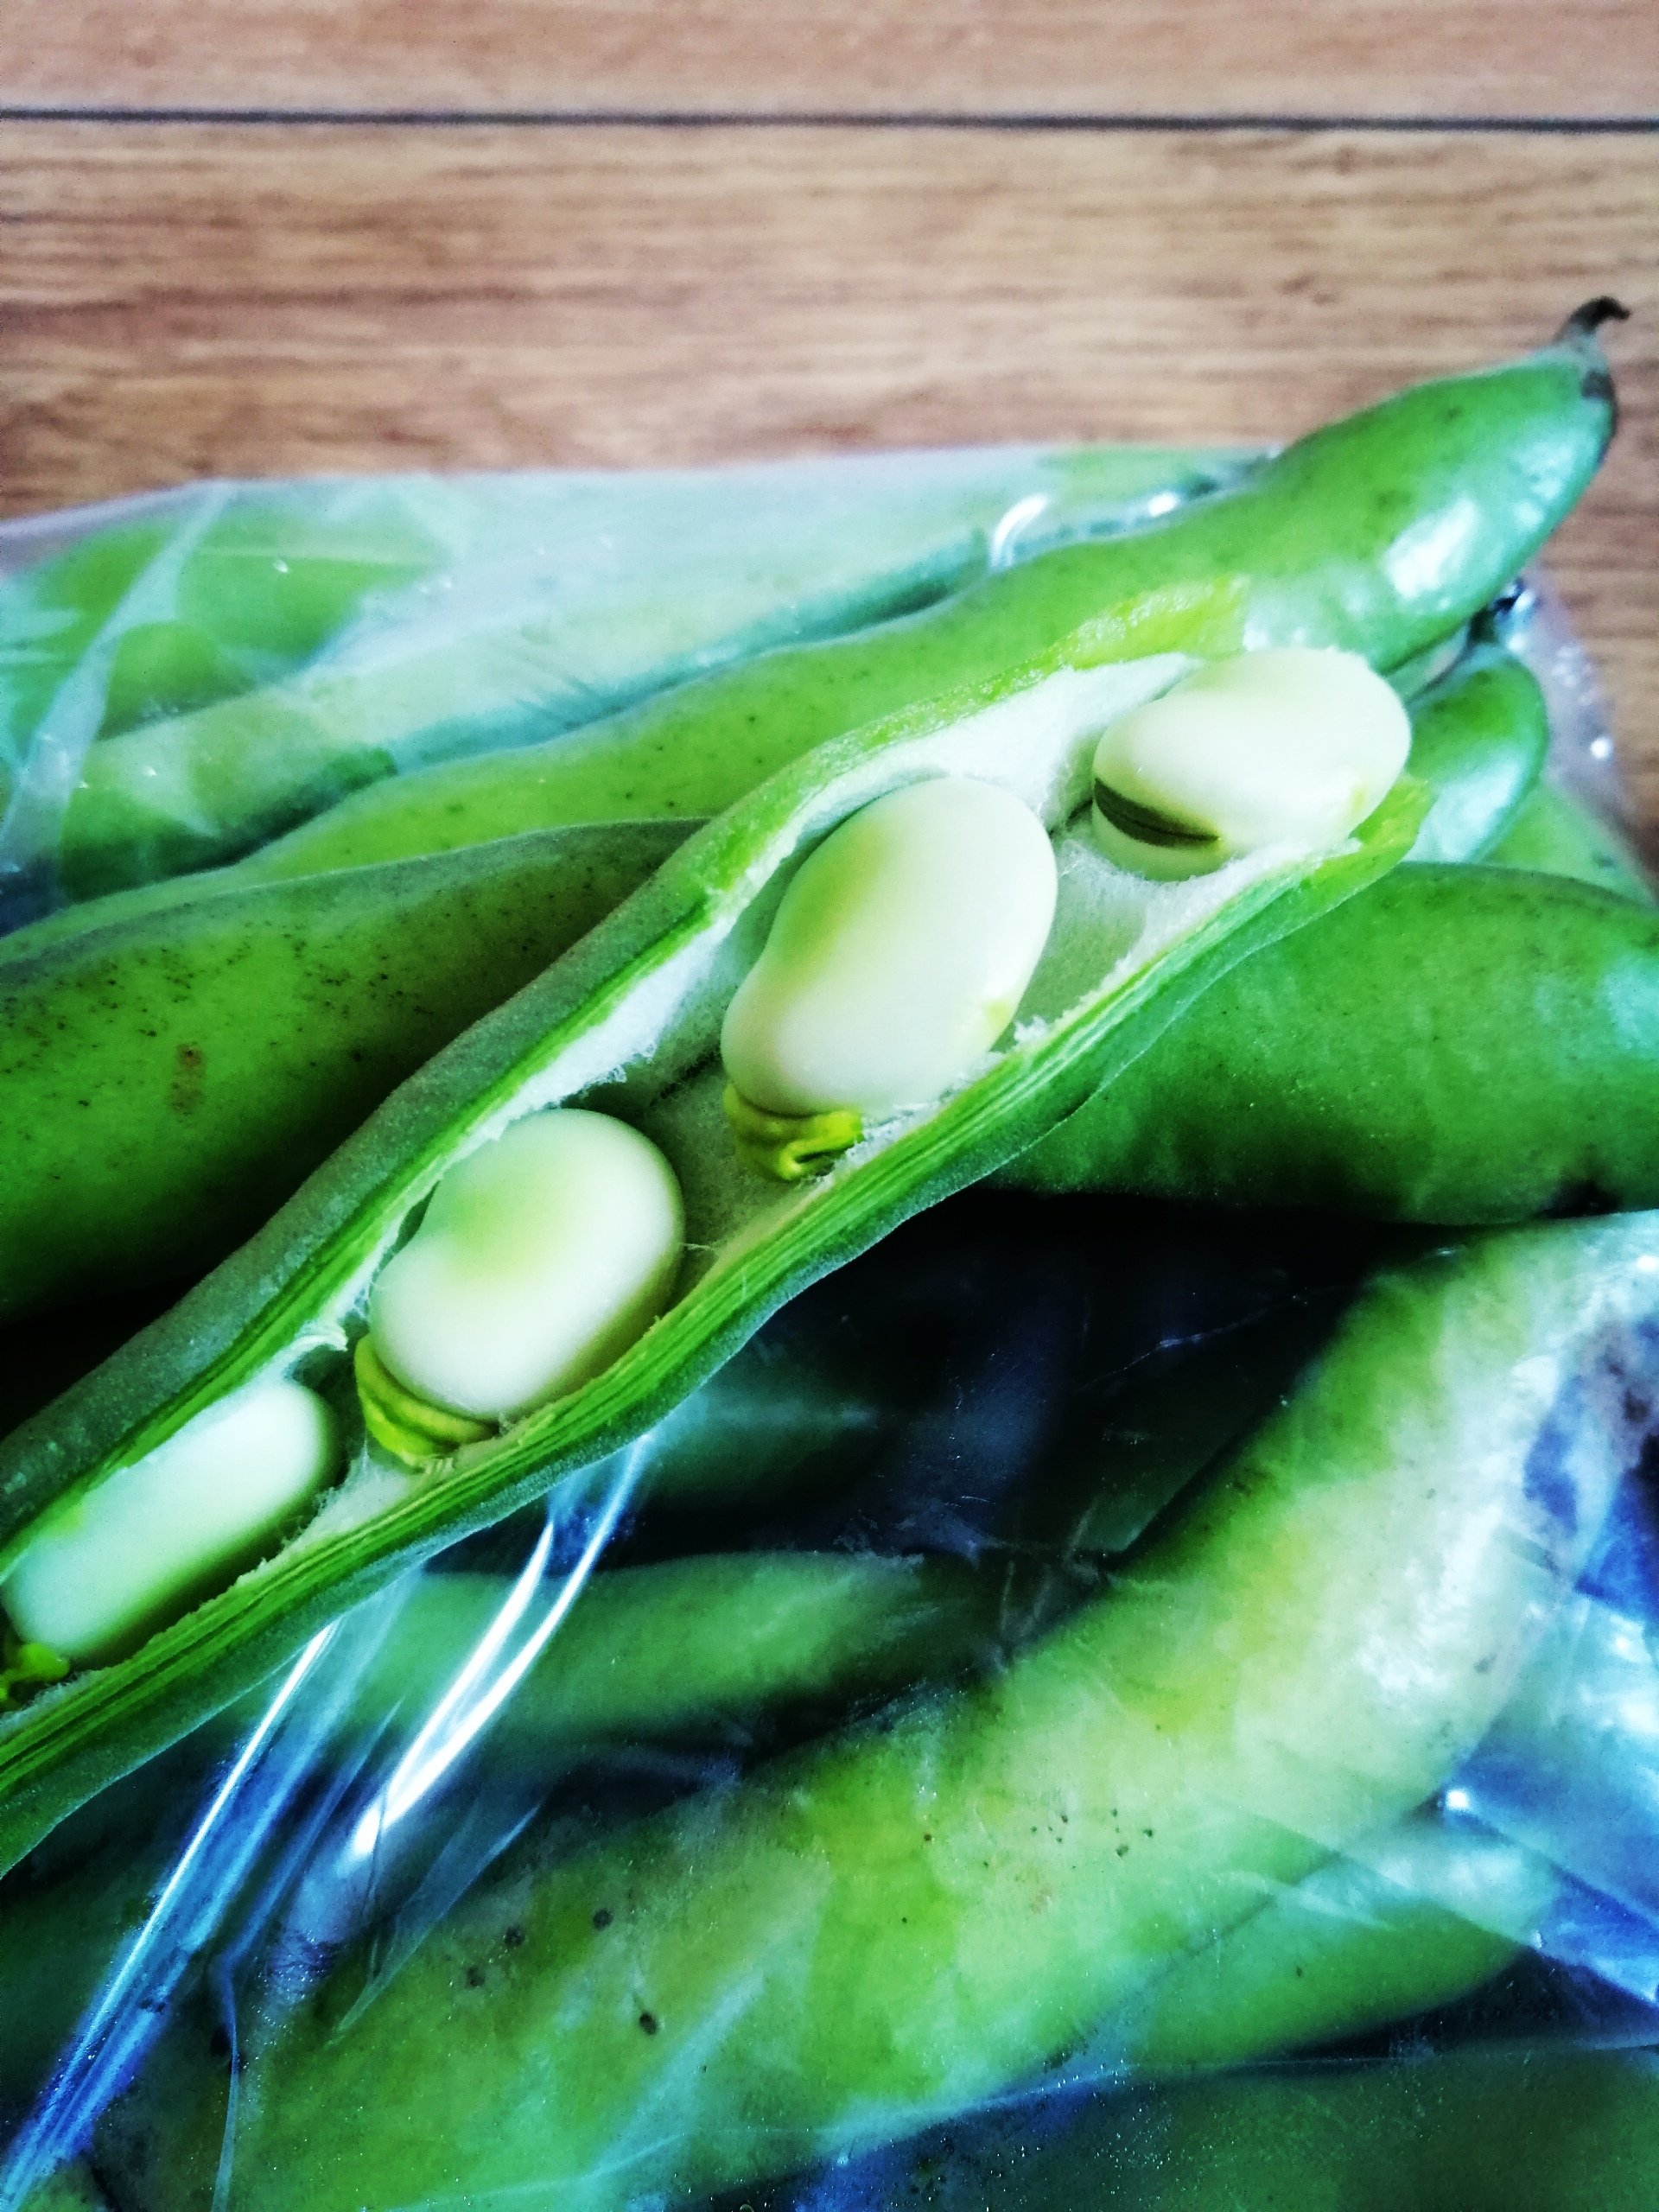
I’m guilty of falling into food ruts, making the same thing or using the same ingredients. The great thing about Summer is that so many gorgeous vegetables like broad beans come into season.
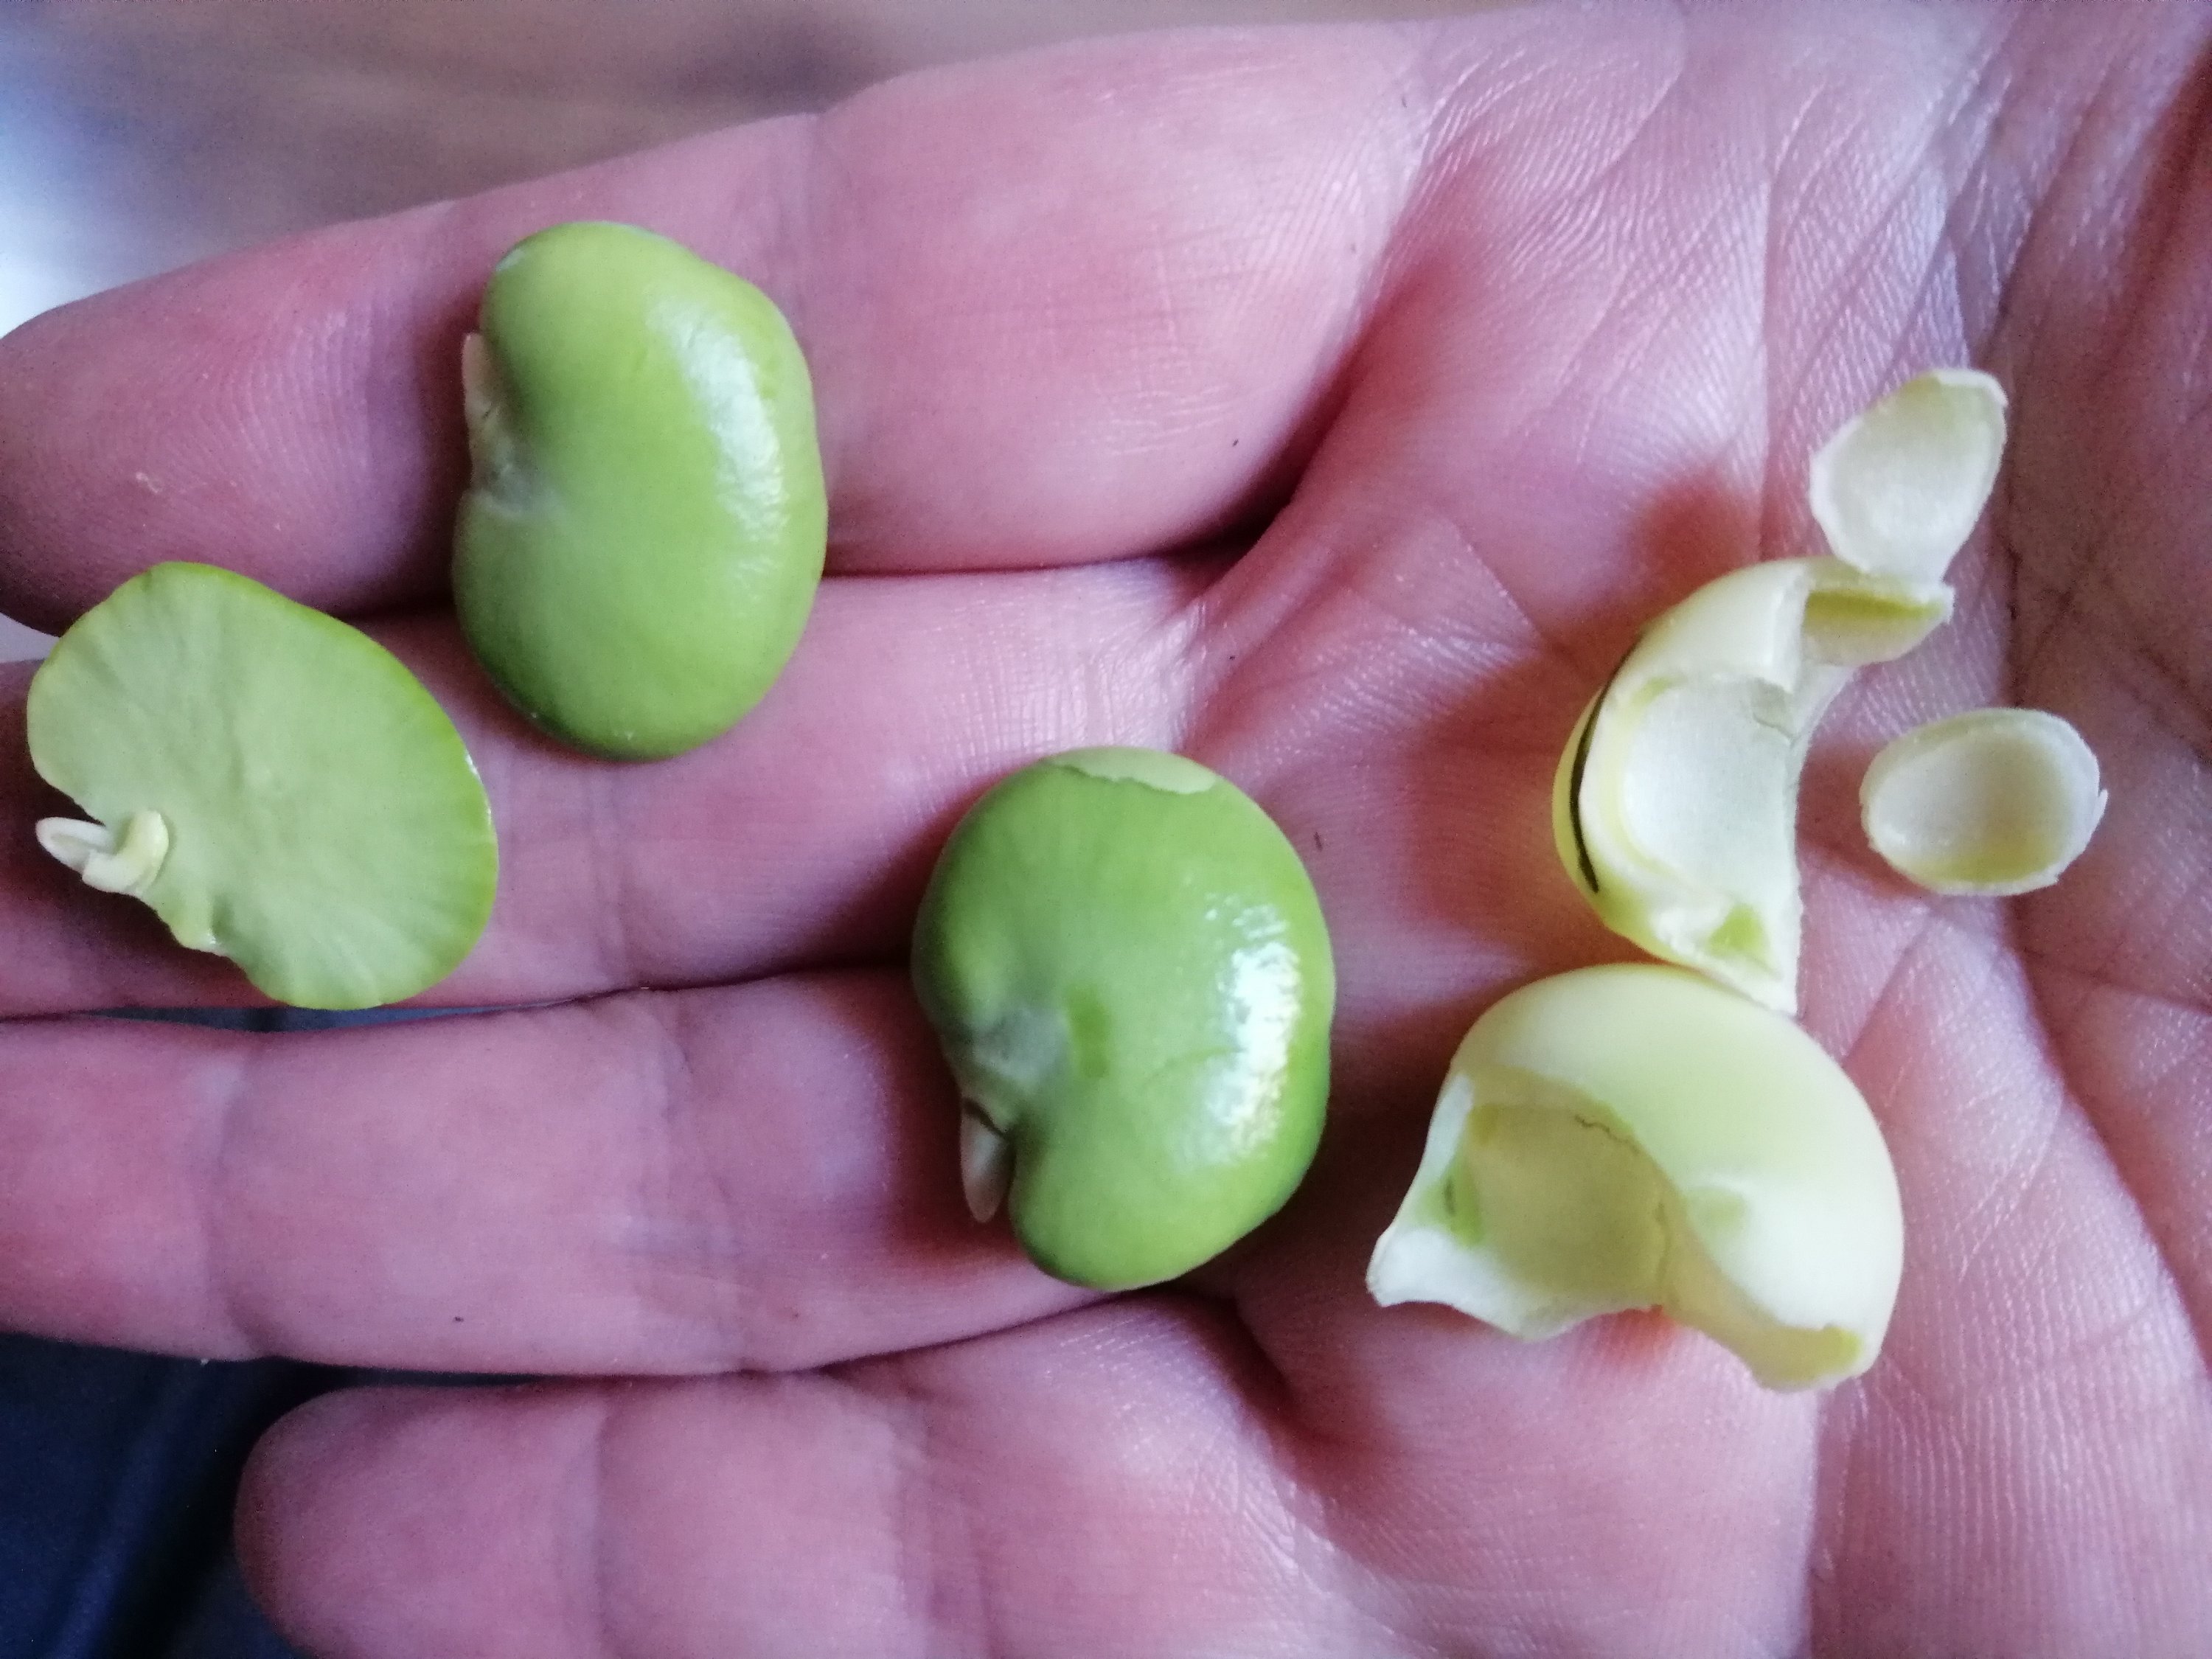
Yes it is a bit more fiddley to shell the beans, but it’s a good job to do while chatting in the phone or even better if you have kids, little fingers are made for jobs like this.
As a kid I wasn’t a fan of broad beans. I’d only ever had them with the tough whitish green slightly bitter layer left on and boiled to within an inch of their life. Fast forward and while visiting a friend her Mum made this dish. With the outer layer removed the beans are sweet and tender. Add a mint dressing and you have a really light Summery salad. This is also great in wraps and sandwiches.
It’s really worth taking the time to peel the outer coating.
Ingredients
1Kg Grams Broad beans in pods
2 Tbsp Oil (I used rapeseed oil, but any neutral tasting oil will do)
1 Tbsp White wine or cider vinegar
2 Tbsp Fresh mint (finely chopped) or 1 Tbsp dried mint
Method
Remove the broad beans from their pods, and then peel off the whitish outer coating. This will show the tender green bean inside, gently pull the two halves apart
Once you have shelled all the beans, blanche in boiling water for 1 minute and then transfer quickly to a bowl of cold water (this will help keep them bright green
Add your oil, vinegar and mint to a large bowl and stir, add the beans and make sure they are well coated
Season with salt and pepper if you feel it needs it
Like a lot of people I’m prone to getting stuck in food ruts. You buy the same thing every week, and you cook the same thing all the time, it’s easy but it is boring.
I started getting vegetable box deliveries and sometime I choose an option that’s a bit of a luck dip so that I’m forced to make something different, and you’re forced to work with new ingredients. (This week’s box came with a packet of sauerkraut!, but that’s a whole other recipe).
I had been over indulging in the “pure filth” recipes lately and wanted to feel I was eating something good for me for a change. So with a box full of lovely colourful ingredients I made this fresh crunchy salad with a dressing made with creamy tahini, tangy ginger and a little bit of chilli heat. I like to sprinkle it with nuts, for extra protein.
This is a great vegan dish ( I eat big bowls of this on its own), but is also a great side dish. I used the vegetables I had in a vegetable box, but the beautiful thing about this is that you can adapt the vegetables depending on availability and what’s in season.
Do yourself some good and enjoy a delicious crunchy multi-coloured big bowl of fibre and vitamins.
Ingredients
2 Carrots (grated)
1/2 Red pepper (finely sliced)
1 Large gold beetroot (grated)
2-3 Radishes (finely sliced)
4-5 Stalks of Rainbow chard (finely sliced)
1 Small Celeriac (grated)
For the dressing
1 Red chilli (finely sliced)
2 inch piece of ginger (grated)
3 Tbsp Tahini
Juice of one lemon
Method
I was lazy and used a food processor to grate many of the ingredients. If you don’t have one a box grater does the same job, it will just take a little longer
If you’re using celeriac make sure to cover this with the lemon juice as soon as you grate it to prevent it from discolouring
Combine all your ingredients in a bowl (once you have grated or sliced your vegetables).
In a separate bowl add the dressing ingredients and mix well. You want to add a little water to loosen the dressing, depending on how thick your tahini is.
Add the dressing to the salad and mix thoroughly
Top with walnuts, or toasted cashews or pine nuts also work well.
I have vegetarian friends who scream at the thought of this, because it’s often the only vegetarian option available in restaurants.
I do sympathise, but done well there is a reason why some things are classics I understand that goats cheese is like kryptonite for some people, so I went with a really creamy soft cheese (that wasn’t too “goaty”), but this also works well cheeses like Gorgonzola.
Do you think you’re not keen on beetroot, I was an adult before I actually discovered that I liked it. I was put off by being made to try disgusting pickled beetroot as a child, and having horrible purple vinegar run into the other food on my plate. I’m probably over sharing my personal childhood trauma, but I know a lot of people have been put off for the same reason. When roasted, beetroot is sweet and earthy and goes really well with the soft cheese. I was lucky enough to get little beetroots in my farm box ranging in colour from gold, pink to deep purple, the range of colour is nice but they all taste the same, so give them a go.
Ingredients
150 Grams Soft goats cheese
200 Grams Roasted beetroot
200 Grams Salad leaves (I used rainbow chard, but use what you like)
25 Grams Walnut (Optional, I actually for forgot to add these, but they add some extra crunch to your salad)
2 Tbsp Olive oil
1 Tbsp White wine vinegar
Method
Pre-heat your oven to 180 degrees, wrap your beetroot in tin foil and place on a baking try. Bake until you can stick with a knife into the beetroot and an its soft. Set to one side and allow to cool, remove the skin with a knife, and cut into bite size pieces
Spread your washed salad leaves across a platter, top with the beetroot
Scoop teaspoon sized dollops of the cheese across the platter and sprinkle with walnuts if you are using them
Mix the oil and vinegar together and drizzle over the salad and serve immediately
If you’re wondering what remoulade is, the best way to describe it is a fresher, less gloopy, fancier version of coleslaw.
I’m trying to support local businesses and keep my food miles down (so I don’t feel guilty about my travel miles). So I ordered a vegetable box from a local farm. The vegetables were great, but in the middle of the box was celeriac. I had eaten it before but had never cooked with it.
It may not be pretty but it tastes great.
I decided to make remoulade, because it’s a fantastic Summer dish. This is perfect with barbecued meats, but also goes really well with fish. For vegetarians it’s a great addition to salad bowls to add some tang and texture, I also like to use it sandwiches as alternative to coleslaw. This is quick and easy to make, and will in the fridge for 3-4 days.
Great with barbecued meat or fish.
Ingredients
200 Grams Celeriac (roughly grated)
1 Large apple (roughly grated with skin left on)
Juice of half a lemon
1 Tbsp Grain mustard
3 Tbsp Mayonnaise
Method
Remove the course outer skin of the celariac, and grate along with apple before adding to a bowl
Cover the celeriac and apple with the lemon juice.
Stir in the mustard and mayonnaise until thoroughly combined, refrigerate if not eating immediately
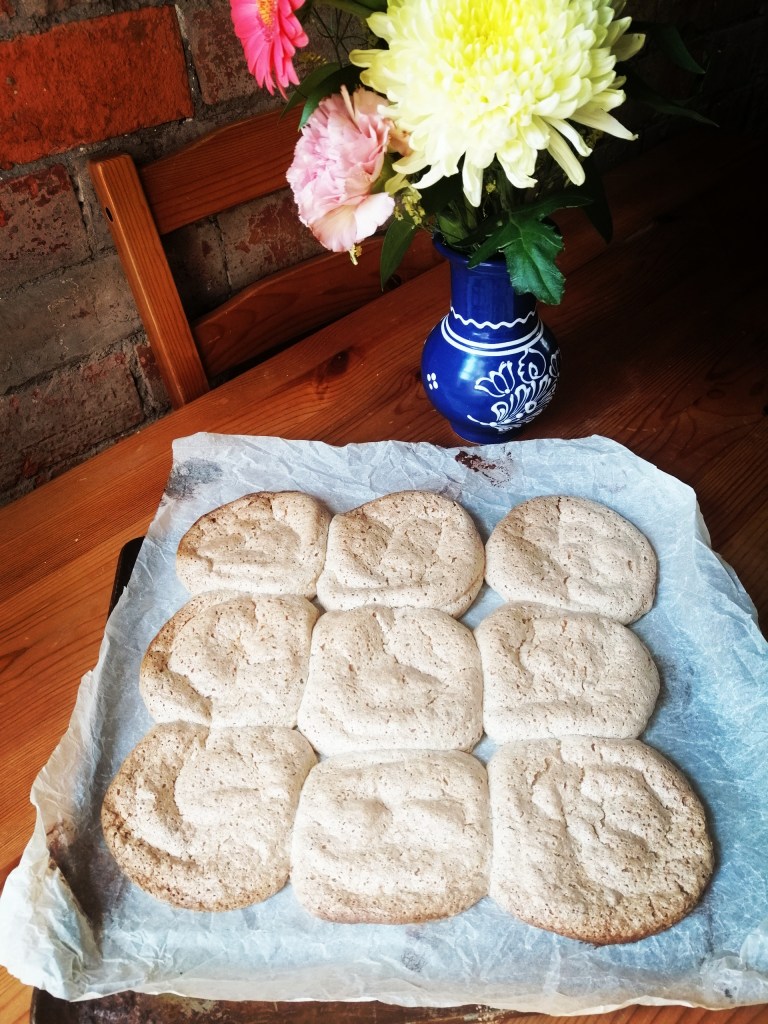
Chewy meringue, luscious cream, and juicy raspberries
Most of my baking is throw it in a bowl give a quick stir and throw it in the oven. Every now and again I like to go a little bit fancier, not as fancy as those creations you see in French patisseries that are total works of art, but a bit more involved than a tray bake.
As with some of my favourite recipes this came together as the result of an accident. I was in a supermarket and meant to lift ground almonds but lifted ground hazelnuts instead. If you can’t find ground hazelnuts, just give whole hazelnuts a whiz in the food processor, just don’t go too fine with them or else the hazelnuts will start to release their natural oils which is death for a meringue. I used raspberries in this, but oranges or strawberries also go really well.
I’ll be honest, I was trying to make pretty frou frou little meringue nests. It went horribly wrong (I have a checkered past with meringue and it beat me once again. I think I need one those beautiful very expensive mixers, just saying in case anyone would like to send one to the Sunnyside Kitchen and break my meringue curse). If you are better with meringues than I am please give the little nests a try I think they would look adorable.
My meringue nests didn’t really work out.
So I had a pile of ugly meringues, and rather than waste these I just adapted what I had and layered broken meringue, cream, chocolate and fruit to make a version of Eton mess, it tasted fabulous! This is also a fantastic gluten free dessert.
I like to think of cooking as a metaphor for life, sometimes you end up with something you didn’t want or didn’t ask for. Sometimes things don’t work out as you hoped or planned. But with a little imagination and the right attitude you can still create something great.
Served in little jars or glasses these make a delicious dessert.
Ingredients
Meringue
150 Grams Hazelnuts (ground)
7 Eggs whites
385 Grams Caster sugar (if you don’t have caster sugar, whiz ordinary granulated sugar in a food processor of a couple of seconds)
1/2 Tsp White wine vinegar
Filling
100 Grams Chocolate (use the the type you prefer and grate or scrap into curls
1 Punnet of raspberries
250 Ml Whipped Cream
Method
Pre-heat your oven to 180 degrees, line two baking sheets with baking parchment, drawing on circles (if making meringue nests)
Separate your eggs and whisk the egg whites until they resemble stiff peaks, whisk in the sugar a tablespoon at time and then add the vinegar.
Gradually fold in the ground hazelnuts with a metal spoon, and then pipe or spoon onto the prepared baking trays
Bake for 25-30 mins and remove and allow cool before carefully removing from the baking parchment
When the meringue are completely cold, start to layer them up with the whipped cream, prepared fruit and grated chocolate. I use little jam jars, but these also look really good served in tall glasses. If you have any whole hazelnuts left you could also toast these in a pan and allow them to cool before topping the desserts to give some crunch
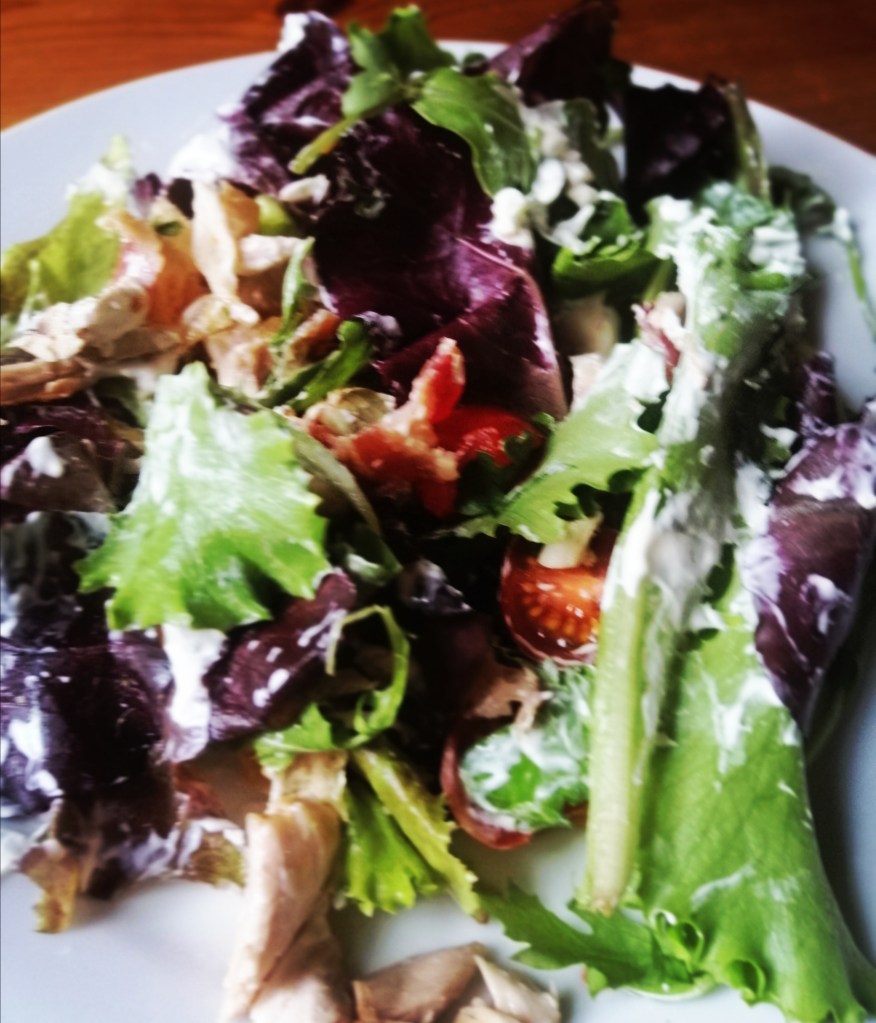
This is the perfect salad for people who think they don’t like salads.
What makes it so good is the ranch dressing. I’m warning everyone in advance, this isn’t a salad for the diet conscious. Ranch dressing is rich and creamy and makes just about anything taste fantastic. It’s doubles as a dip, and is also fantastic in sandwiches with tortilla chips, chicken wings, or if you’re one of those people who like to dip their pizza, (FYI the Italians are horrified by this and have threatened to take pizza back if the rest of the world doesn’t behave itself. I won’t tell them if you don’t).
The salad hits all the bases, soft chicken, crispy salty bacon, sweet cherry tomatoes, and a rich creamy dressing. You can always use the shop bought ranch dressing if you don’t have time or the ingredients, but do yourself a favour and give it a try. This is great for anyone following low carb or gluten free diet.
Serves 2
Ingredients
For the salad
2 Cooked chicken breasts or chicken thighs (shredded or cut into cubes)
4 Rashers of streaky bacon (cooked until crispy and cut or crumbled into 2cm strips)
2-3 Scallions/spring onions (finely chopped)
Handful of cherry tomatoes (halved)
2 Handfuls of salad leaves
For the dressing
2 Tbsp Mayonaise (I use shop bought)
2 Tbsp Sour Cream
1/2 Tsp dried dill
1 Tsp Chopped parsley (or 1/2 tsp dried parsley)
1/2 Garlic powder
1 Tbsp Lemon juice/ or 1/2 Tbsp white wine vinegar
Salt and pepper to taste
Milk to loosen the dressing to the consistency you like (for people following a keto diet they can use cream)
In a jar with a lid, add all the dressing ingredients except the milk/cream. Check the flavour and add salt and pepper if you think it needs it.
When you are happy with the seasoning add a little milk/cream to loosen the mixture and shake the jar. Check the consistency, and add more milk/cream if you want a runnier dressing
Combine all your salad ingredients and drizzle with the dressing before serving
The dressing will keep quite happily in a sealed jar in your fridge for 4-5 days
I never thought I would say it, but after weeks stuck at home. I was finally fed up with carbs.
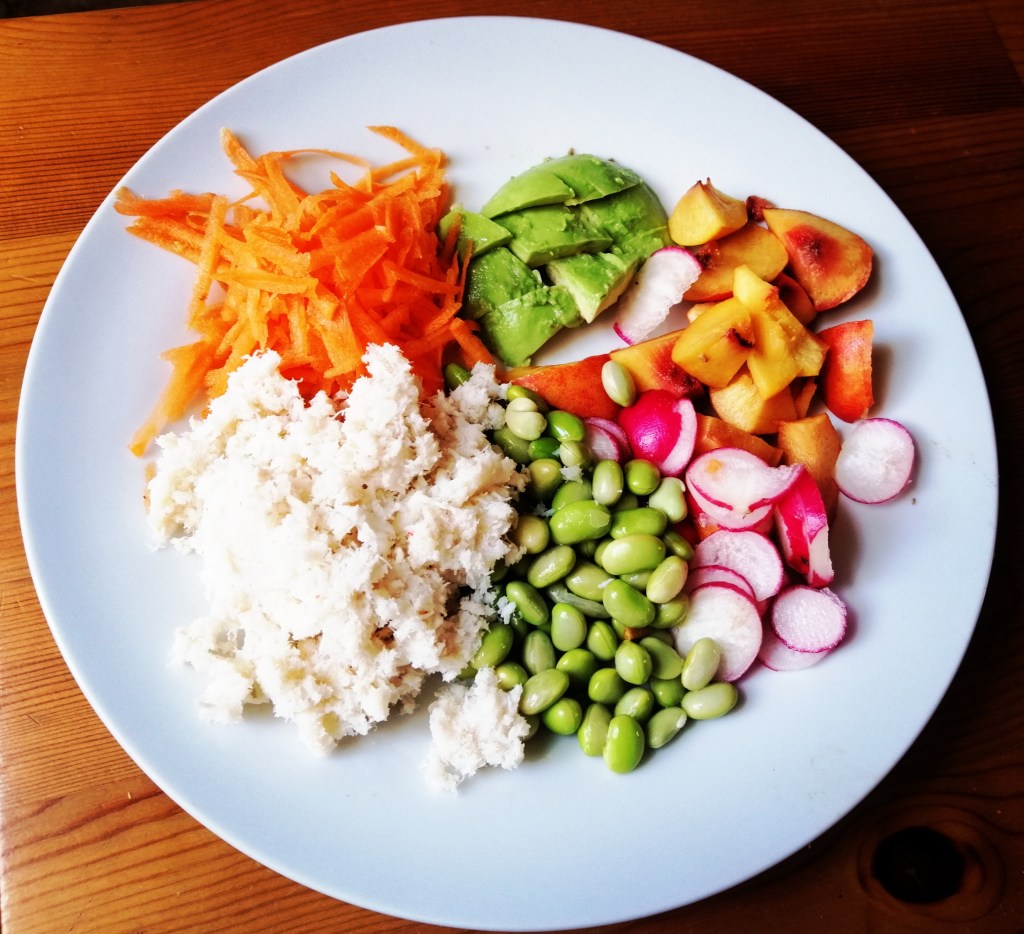
The antidote was a quick and easy salad. I used tinned crab meat because it was what I had, but fresh or frozen would also work.
Like most salads, use what you have or what you like, I added nectarine because it’s what I had, but mango but would be great too. Lemon and tahini are great in dressings. I usually add garlic to this dressing mix, but left it out this time so that it wouldn’t overwhelm the delicate crab flavour. Fresh herbs like parsley or corriander would be great in this salad too.
Mix colours and textures
Ingredients
Serves 2
1 Carrot (grated)
50 Grams Endame beans (frozen)
6 Radishes (sliced)
1/2 Avocado (cubed)
1 Nectarine (cubed)
145 Gran Tin of crab meat
2 Handfuls of rocket or other salad leaves.
For the dressing
1Tbsp Tahini
Juice of 1 lemon
1 Tbsp Rapeseed oil
Salt and pepper
Method
Add the tahini, oil, and lemon juice to a bowl. Mix well and season with sat and pepper, loosen with a little water if it’s too thick
Combine all the salad ingredients in large bowl, add the dressing and serve with crusty bread
The last couple of months have been cold, wet and sh*tty. I needed something that reminded me of sunshine, so I made this. It’s relatively easy to make, and looks impressive when you bring it to the table if you’re cooking for people.
If you’re super organised you can use this recipe to use up leftover roast vegetables. I made my own pasty, but as always you can use shop bought if you’re short on time.
Alot of people aren’t fans of goat’s cheese. If you’re one of them, you can swap it for another soft cheese like brie or camembert.
Serve with salad for a fantastic lunch.
Serves 4-6
Ingredients
For the pastry
200 Grams Plain flour
1/4 Tsp Salt
100 Grams Butter
1 Egg yolk
Cold water
(Plus 1 Egg to brush the pastry with)
Sesame or onion seeds (optional)
Filling
1 Onion (cut into 8)
1 Red pepper (cut into 8)
1 Aubergine (cut into 2-3 cm cubes)
125 Grams Soft goat’s cheese
200 Grams Cherry tomatoes still on the vine
2 Tbsp Olive oil
1 Tsp Dried oregano or thyme
Salt and pepper
Method
Prepare the vegetables, and place them in a flat oven proof dish. Drizzle with oil and bake in an oven for 30-40 minutes until starting to chat at the edges a little. Allow to cool before using.
In a food processor, add the flour and butter and pulse until this looks like breadcrumbs (the rubbing in method if you prefer).
Add the yolk, and gradually add the cold water, mixing until the dough comes together in a ball. Cover with cling film and refrigerate for 30 minutes
After chilling, allow the pastry to come to room temperature. Roll the pastry out in as neat a circle as possible, place on a sheet of baking parchment, and then lay on a baking sheet
Break up the goat’s cheese and sprinkle across the centre of the pastry, leaving an edge of 3-4cm around the pastry
Top the goat’s cheese with roast vegetables (having squeezed out any liquid). Top with the vine tomatoes
Brush the edges of the pastry with beaten egg. Gently fold in the edges of the pastry and pleat the pastry to create a crust for the galette
Brush the exposed pastry with beaten egg, and sprinkle the pastry with sesame or onion seeds for some extra colour and flavour.
Bake in an oven pre-heated to 180 degrees for 30-40 minutes until golden brown. Serve with salad