Autumn Chicken and Lentil Tray Bake

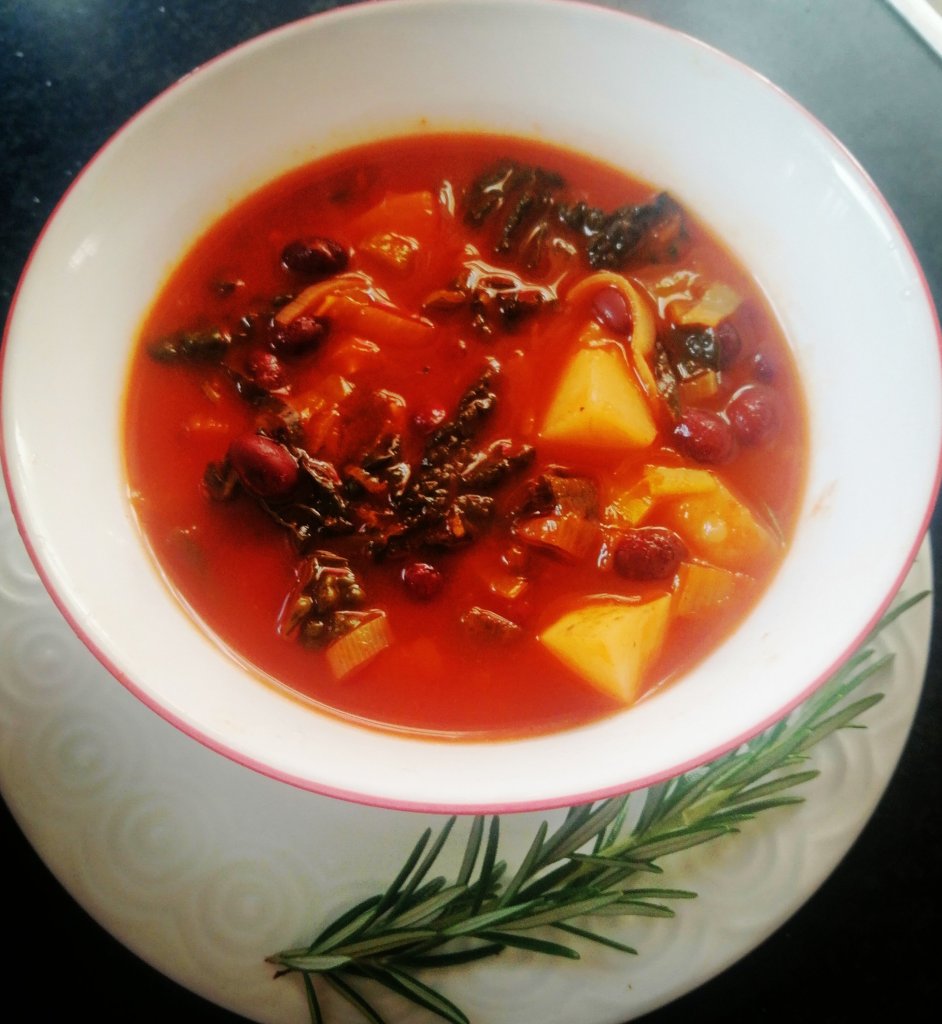
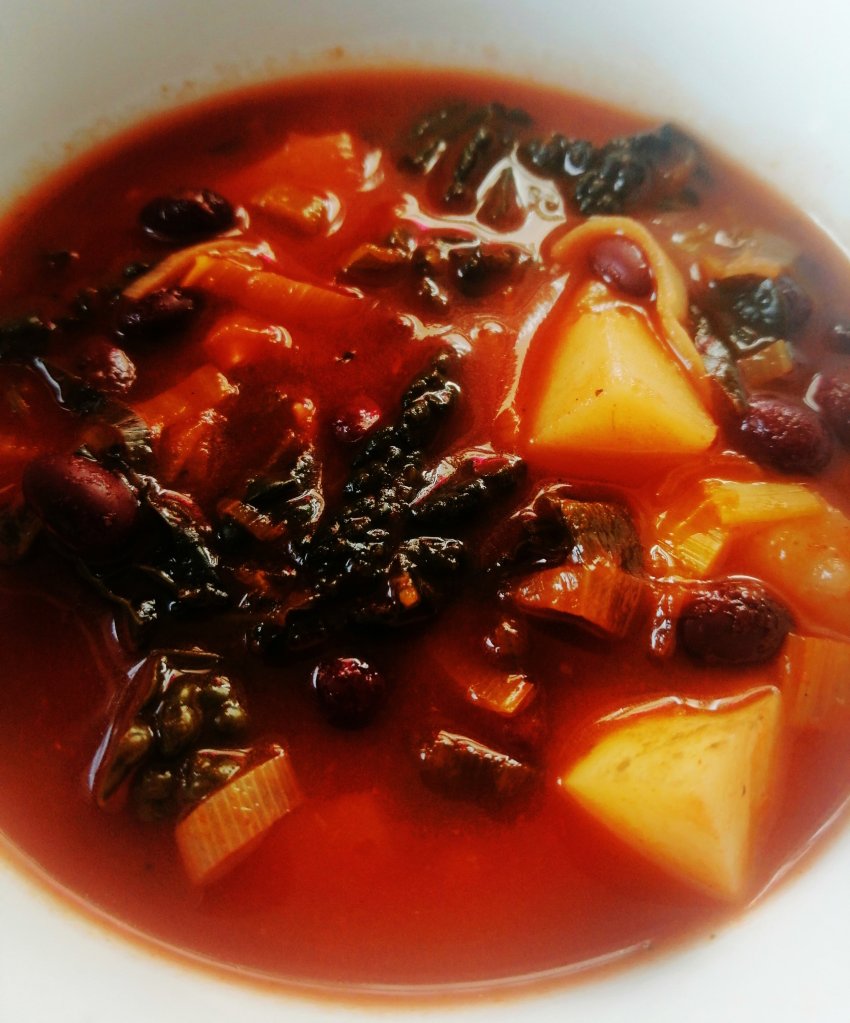
After a morning walk and seeing the leaves changing colours,  I was inspired to make this because the colours looked so good together (it also tastes fantastic).

With the days getting colder and shorter this is proper comfort food but still pretty healthy with all your brightly coloured vegetables and plenty of protein from the chicken and lentils.  What makes it even better is that it’s a one pan dish meal.  

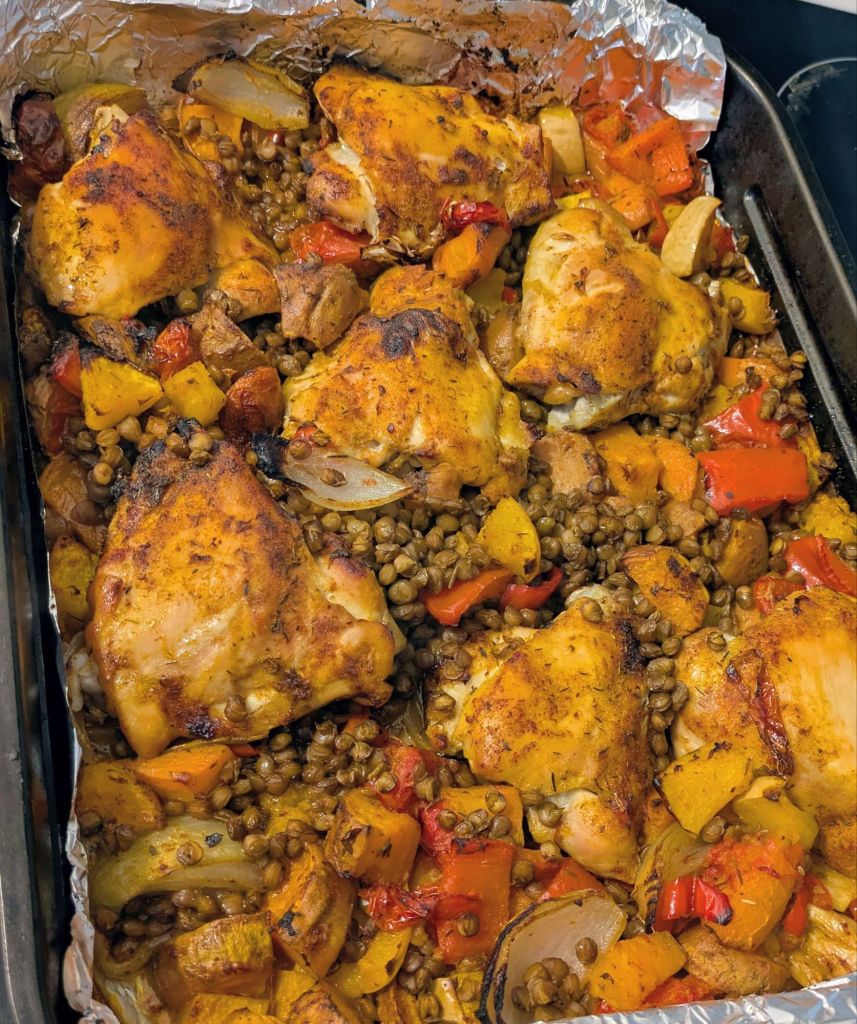
I used tinned lentils but you could boil your own if that’s what you have.  Mop up all the yummy juices with some crusty bread or spoon this over some buttery mashed potatoes and greens for the perfect Autumn comfort meal.

Serves 4

1kg Chicken thigh (bone in, I removed the skin but you can keep it on if you prefer)

3 Smallish sweet potatoes (washed, but skin left on, cut into 2cm cubes)

4 Carrots (washed but skin left on, cut into 2cm cubes)

150 Grams Butternut squash  (cut into 2cm cubes)

1 Onion (peeled and cut into 6)

100 Grams Cherry tomatoes  (cut in half)

1 Large red pepper (cut into 2cm cubes)

1 Tsp Salt

1 Tsp Smoked paprika

1 Tsp Dried Thyme

1 Tsp Garlic powder

1 Tsp Chilli powder

2 Tbsp Oil

1 Tbsp Balsamic or cider vinegar

1   x 400 Gram Tin of Green lentils

Method

  • Preheat the oven to 180 degrees
  • In a large oven proof dish add the oil sweet potatoes, carrots, and butternut squash and bake for 20 minutes
  • Add everything else to the tray except the balsamic vinegar and lentils.  Mix well and bake for 30 minutes
  • Add the lentils and balsamic vinegar to the baking tray, mix again and bake for a further 10 minutes (check the chicken is full cooked), and serve with crusty bread

Pears Belle Helene

Autumn is the best time for most pears and I love them.  But they can be spiteful little sh*ts, staying like granite for weeks before turning into mush in about 20 minutes.

This classic  french recipe is perfect if you have really hard pears and can’t be bothered waiting on them softening.  I mean, soft poached pears, vanilla  ice cream and hot chocolate sauce, OMG Yum.

It’s also a great dessert if you’re cooking for people, as you can poach the pears the day before and then just add a scoop of shop bought vanilla ice cream and it takes 2 minutes to make a super simple chocolate sauce. 

It’s the ideal dessert if you’re making a heavy main course as it’s pretty light but still tastes indulgent.  If you’re catering for anyone who needs a gluten free dessert this is a great go to (just check the ingredients on the ice cream when you’re buying it).

Serves 4

(for the poached pears)

4 Pears (variety isn’t important as long as they’re not soft)

125 Grams Sugar (you can add more sugar if you like to the poaching liquid, but I prefer desserts that aren’t super sweet)

1 Tsp Vanilla extract (optional)

750 Mil Water

For the chocolate sauce

150 Grams Dark chocolate

150  Mil Double cream

4 Scoops of vanilla ice cream

50 Grams Toasted almonds (optional)

Method

  • Add the sugar, water, and vanilla extract to a pot and heat until the sugar has dissolved into the water
  • Peel the pears (leave the stem on if possible), and try to remove the bottom spiky bit and some of the core of the pear, don’t scoop out too much or the pear might fall apart once poached
  • Add the pears to the poaching liquid and simmer on a low heat for about 15-20 minutes depending on how big or firm the ears are.  I top this with some scrunched up grease proof paper that sits directly if the pears and poaching liquid.  This isn’t essential but it helps stop too much evaporation and keepy things in place. 
  • Test the pears with a fork to make sure they are soft and lift them out onto a plate with a slotted spoon and allow to cool.  If you’re making them to eat the next day, then chill in the refrigerator
  • When you’re ready to serve transfer the pears to individual bowls or plates.
  • Break your chocolate into small pieces and put in a microwave safe dish.  Heat the chocolate for 30 seconds at a time (stirring each time) in the microwave to make sure it melts but doesn’t burn. 
  • When the chocolate is melted whisk in the double cream until you get a glossy creamy chocolate sauce.  If I’m being fancy I like to pour it into little jugs so people can pour it over themselves, otherwise just spoon it over
  • Add a scoop of ice-cream onto the plate with the poached pear and then spoon over the chocolate sauce and sprinkle with toasted almonds (if you’re eating this on your own or with a trusted loved one, there is no judgement here if you want to lick the plate, and you will)

Easy Autumn Granola Pots

Spiced apple is the taste of autumn for me, but if its not your thing, you can swap it for other fruit.  If you’re vegan you can swap out plant based yoghurt for Greek yoghurt.

I’m always shocked at how much fancy coffee shops charge for those individual pots many of us grab for a quick breakfast on the way to work .  This recipe makes 4 generous portions for less than the cost of one of the granola pots you buy at well known coffee shops.  A bit of time at the start and you have tasty, healthy, grab and go breakfasts for during the week at a fraction of what you’d pay in a chain cafe

Make 4 portions

For the spiced apple layer

4-6 Dessert apples, (peeled, cored, and chopped into 2cm chunks)

1 Tsp Ground cinnamon

1 Star anise

For the yoghurt layer

2 Tbsp of Greek yoghurt per person

For the granola

50 Grams Porridge oats

15 Grams Desiccated coconut

15 Grams Pumpkin seeds

20 Grams Hazelnuts

1Tbsp Oil

1Tbsp Maple Syrup

25 Grams Dried fruit (use any type you like)

Method

Put the chopped apples and spices in a large pot with a splash of water and simmer until the apple starts to break down (I like to keep a bit of texture). Remove from the heat and allow to cool.

Preheat the oven to 200 degrees (Celsius)

While the apple is simmering, mix all rhe ingredients for the granola in a bowl (except the dried fruit, I add this when this when the granola comes out of the oven, or else I find it gets tough and can burn easily)

Transfer the granola to a baking sheet and bake for minutes, stir well as the outer edges will brown more quickly and return to the oven another 5 minutes.  When toasty and golden brown remove from the oven allow to cool.

To assemble each pot, put a quarter of the cooked apple in a jar/container, top with 2 tablespoons of Greek yoghurt and the sprinkle the granola mix on top

Hearty Autumn Soup

Soup is virtually impossible to mess up. So when it’s cold and wet outside its the ideal thing to make that’s cheap and easy. Its also a great filling lunch to bring to work if you’re on a budget.

This soup is vegan friendly, but if you need a meat fix, you can also add some cooked chorizo or smokey bacon and reduce the amount of smoked paprika.

Ingredients

1 Small Leek (roughly chopped)

2 Handfuls of either cabbage, kale or cavelo Nero (shredded)

3-4 Small potatoes (skins left on, and cut into 3-4cm cubes)

1 Vegetable stock cube

1 Tsp Smoked paprika

1 Can Black beans (you can use any type you like)

3 Cloves of garlic (finely chopped)

1 Tsp Chilli powder (optional)

Large sprig of rosemary, or thyme

1 Tbsp Vegetable oil

500ml Carton of passata

1 Tbsp Tomato puree

Salt

Method

  • Heat the oil in a large pot over a medium heat and add the leek. Fry until the leek starts to soften
  • Add the potatoes, tomato puree, chilli powder, rosemary and paprika and cook for 2-3 minutes
  • Add the crumbled up stock cube, pasatta, garlic, 1 litre of water, and bring the soup to the boil. Add your greens and beans, reduce to a simmer and cook until the potatoes are soft
  • Check the seasoning and add salt if you think it needs it.

Apple Crumble

When it comes to comfort food apple crumble is in almost everyone’s top 10.

I was gifted a giant bag of apples from a friend with a tree in her garden. One particularly shitty wet Sunday this was exactly what I wanted.

I think traditional crumble topping can be a bit Meh. I like to include some porridge oats and nuts for some extra texture. The apples I used were pretty sweet so I didn’t use any extra sugar, but if your apples are on the sour side, sprinkle with 1-2 tablespoons of sugar before adding the topping.

Ingredients

1 Kg Eating apples (peeled, cored and sliced into 1-2cm slices)

For the topping

50 Grams Cold Butter (cut into small cubes)

125 Grams Plain flour

25 Grams Walnuts or hazelnuts (chopped)

25 Grams Rolled oats

25 Grams Sugar

Knob of butter

Method

  • Preheat your oven to 180 degrees (Celsius)
  • Rub a knob butter around a large oven proof dish (this will prevent the apples from sticking)
  • In a large bowl, add the flour, sugar, oats and butter and rub the butter into the other ingredients until it resembles large breadcrumbs before adding the chopped nuts
  • Spread the sliced apples into the oven proof dish, and sprinkle the topping mix evenly across the apples
  • Bake for 45-50 minutes and serve with custard or cream

Porridge Bread

My friend Mags has been raving about this recipe for ages. We both have a serious bread addiction and this recipe is from a slimming club site. So when she shared the recipe I had to make it. If you’ve ever had Irish wheaten bread this is similar in taste.

Ready to bake

It takes two minutes to knock together, can be enjoyed by those who have issues with gluten and is pretty cheap to make. If you want something to keep kids busy this also something to do with them on a rainy afternoon and the will be super pleased with themselves.

It’s not the lightest fluffiest bread, but it is packed full of fibre and perfect served with cheese and chutney or buttered along side soup. I topped mine with some pumpkin seeds for a bit of crunch, but you can also sprinkle with porridge oats.

Ingredients

500ml Yoghurt

200 Grams Porridge oats

1 Tsp Salt

1 Tsp Bicarbonate of Soda (baking soda)

1 Egg

Method

  • Preheat your oven to 180 degrees (Celsius). Grease a load tin, you can also line it with baking parchment if want to (but I just greased the tin really well and it was fine)
  • Mix the yoghurt, salt and baking soda together, before stirring in the porridge oats
  • In a separate bowl, crack the egg and whisk with a fork until light and fluffy. Stir into the porridge mix and stir until we’ll combined
  • Transfer the mix into the loaf tin and bake for 50 minutes. Test with a tooth pick, when it comes out clean it’s ready.
  • Cool in the tin for 30 minutes

Spicy Yellow Split Pea Soup

Autumn is definitely here, and it’s time to break out the one pot comfort food recipes. I love recipes that I can make from what I usually have in a cupboard or the fridge and this one of them. Dried yellow split peas are really cheap, and packed full of protein and fibre. They also work brilliantly in Indian dishes like dhal.

This is a really rich satisfying, cheap and easy to make meal. Perfect for chilly days when you want something nutritious and satisfying. It’s also packed with lovely warming flavours like ginger, chilli and garlic.

This soup freezes well or can live in your fridge for 3-4 days.

Ingredients

1 Leek (finely sliced)

2 Carrots (grated)

250 Grams Yellow split peas

1 Litre Vegetarian stock (I used 2 stock cubes to make this)

Thumb sized piece of ginger (grated), or 1 Tsp of ground ginger if you don’t have the fresh stuff)

1 Tsp Tumeric

3-4 Cloves of garlic (minced)

1 Tsp Chilli powder

1 Tbsp Vegetable Oil

Method

  • Heat the oil in large pot over a medium heat, and add the leek and carrot. Cook for 5-10 minutes until soft
  • Add the rest of the ingredients and stir. Turn up the heat bring the soup up to just before the boil
  • Reduce the heat and simmer for 45 minutes, stirring occasionally
  • Serve topped with toasted hazel nuts or pumpkin seeds for a little extra crunch

Pear and Almond Tart

Some ingredients are just made to go together and pears and almonds are two of the them. 

I have a bit of a love/hate relationship with pears.  When they are perfect they’re hard to beat.  The only issue is that they are like granite and inedible, and then turn to mush within about 20 minutes.  They are the ultimate passive aggressive fruit!

Frangipane filling

This recipe is great for using pears that are too hard to eat if you can’t be bothered with the game of chicken involved in waiting for pears to ripen.

This is a pretty rich recipe, but isn’t meant to be eaten every day and looks really impressive if you’re cooking for friends. 

It’s important to blind bake the pastry case first

You can make the pastry case and the frangipane filling in advance, which means you can have more time with your guests. You could even use shop bought pastry if you don’t have time (home made is better though). This is really good on it’s own but a little fresh cream or ice cream also doesn’t hurt if you want to be properly indulgent.

Yummy with ice cream

Ingredients

For the pastry case

200 Grams Plain flour

100 Grams Butter (chilled and cut into small cubes)

1 Tbsp Caster sugar

1 Egg yolk

For the frangipane filling

115 Grams Butter (at room temperature)

115 Grams Caster sugar

115 Grams Ground almonds

1 Tsp Vanilla extract (optional)

2 Eggs

2 Large pears

Method

  1. In a food processor add the flour, sugar, and butter. Whizz until the mixture looks like coarse breadcrumbs (you can run the butter and flour in together by hand if you prefer)
  2. Add the egg yolk and a small amount of cold water and whizz again until the mix starts to come together. Start to press the mix together to form a dough, adding a small amount of cold water if necessary. Form into a ball, wrap in cling film and refrigerate for 30 minutes
  3. Grease a 9in x 9 in loose bottemed flan tin. When the pastry has chilled, place on a floured surface, and roll out in a circle approximately 1/2 cm thick.
  4. Lay into you prepare flan tin making sure that it’s pressed into the edges. Place a sheet of baking paper on top and baking beans (I use old dried rice) to weigh down the pastry and blind bake in an oven pre heated to 180 degrees. Bake for 15 minutes before taking the case out if the oven, carefully lift the the baking paper by the 4 corners taking care not to spill any of the baking beans/rice onto the pastry case.
  5. Return the pastry case to the oven and bake for a further 10 minutes before removing from the oven and allowing to cool
  6. To make the filling, add the butter and sugar to a bowl and mix with an electric whisk until light and creamy. Add the vanilla, almonds and eggs and beat in until combined
  7. Peel, core and quarter the pears, before cutting into slices about 1cm thick
  8. Spread the almond mixture into the pastry case. Arrange quarter of the pear so the narrow part is towards the centre of the tin and wider part is towards the outside work as quickly as you can to prevent the pear discolouring
  9. Once you have arranged the pears, return the flan tin to 180 degree oven and bake for 25-30 minutes until the centre is just starting to set (it will continue to cook as it cools). Allow to cool in the tin for another 15 minutes before attempting to cut.

Cinnamon and Apple Blondies

It’s cold, dark, and miserable outside, I’m having a “big” birthday and there is nowhere open to go out and celebrate.

Combine the cake mix thoroughly before adding the apples.

To try and stave off the impending dispair this will bring, for the mean time I’m all about the comfort food.

Toss the apples in a little flour before adding to the mix.
Apple should be folded into the mix with a metal spoon.

I’ve made blondies before and they have a similar texture to brownies but as they don’t use chocolate, they have more of a caramely flavour. This works really well with apple and cinnamon. This time of year these are the flavours I love.

Yummy with ice cream

These are great with a cup of tea or coffee, but they’re also fantastic with custard or ice cream as a dessert. These freeze well, and will last 2-3 days in an air tight tin.

Ingredients

2 Apples (peeled, cored and cut into 1cm cubes)

1/2 Tsp Baking powder

100 Grams Soft brown sugar

100 Grams Caster sugar

1 Tsp Cinnamon

275 Grams Plain flour

1/2 Tsp Salt

1 Egg

100 Grams Butter (melted)

Method

  1. Preheat your oven to 180 degrees, and line a 8 in x 8 in baking tin
  2. Add the eggs and sugar to a bowl and mix with an electric whisk until light and fluffy
  3. Gradually whisk in the melted butter (allow to cool a little before adding)
  4. Hold back 2 tablespoons of flour, but gradually add the rest of the flour, baking powder and cinnamon and fold into the sugar and eggs mix with a metal spoon
  5. Once you have peeled and chopped the apples toss the pieces in the 2 tablespoons of flour
  6. Fold the chunks of apple into the batter until evenly distributed
  7. Transfer the mix to the baking tin, and bake for 50 minutes. Check . Allow to cool in the tin for 15 minutes before cooling on a wire wrack

Spiced Plum Cake

Soft sweet plum topping with gentle spices.

Whenever possible I like to eat seasonally, it’s usually cheaper, and usually better for you, and better for the planet. Autumn has some great fruit and vegetables. One of my favourites are plums. Usually inexpensive and really versatile. I love this plum cake, no only because its relatively straight forward to make, but the cinnamon and cardamon add a whole other level of flavour. The addition of sour cream adds a tenderness to the sponge. This will also live quite happily in a cake tin for 3-4 days. I love it with whipped cream, but it’s also perfect comfort food served with custard.

Ingredients

300 Grams Plain flour

1, 1/2 Tsps Baking powder

1 Tsp Ground cinnamon

1/2 Tsp Ground cardamon

1 Tsp Salt

3 Eggs

100 Grams Butter

200 Grams Sugar

60 Grams Sour Cream

4-5 Plums

Ready for the oven

Methods

  1. Mix the flour, salt, spices and baking powder together
  2. In a separate bowl cream the eggs and sugar together with an electric whisk (hold back 2 tablespoons of sugar to top the plums with)
  3. Add the eggs and sour cream to the butter and sugar and whisk until light and fluffy
  4. Gradually whisk in the flour mixture until you have thick cake batter
  5. Grease a 9 inch spring firm cake tin, and pre-heat your oven to 180 degrees
  6. Transfer your cake batter to the cake tin and spread evenly.
  7. Cut the plums in half, remove the stone and cut each half into quarters
  8. Starting in the centre of the cake, arrange the slices of plum in a circle (or any type of pattern you like) and sprinkle with remaining sugar
  9. Bake for 35 mins, or until a skewer comes out clean when stuck in the cake