Stuffed Baked Potatoes

Baked potatoes are a great cheap meal, these pimp them up a notch.

Whenever I have the oven on I try add a couple of potatoes to bake so I get my money’s worth out of using the oven (you can cool them, keep them in the fridge for the next couple of days and then heat them up in the microwave (you can also bake them in the microwave but I don’t they taste as good, and you don’t get he nice slightly crunchy skins). I have also tried making these in an air fryer and they worked really well too.

You can swap out the fillings if you need to use up left overs. I like these for lunch, but they also make a good side dish.

Serves 2

Ingredients

2 Large potatoes (baked until soft, the time will depend on the size of the potatoes)

1-2 Scallions/spring onions (finely sliced)

2 Tbsp Mayonnaise

75 Grams Cheddar cheese (grated)

Salt & pepper

Method

  • Preheat oven to 200%
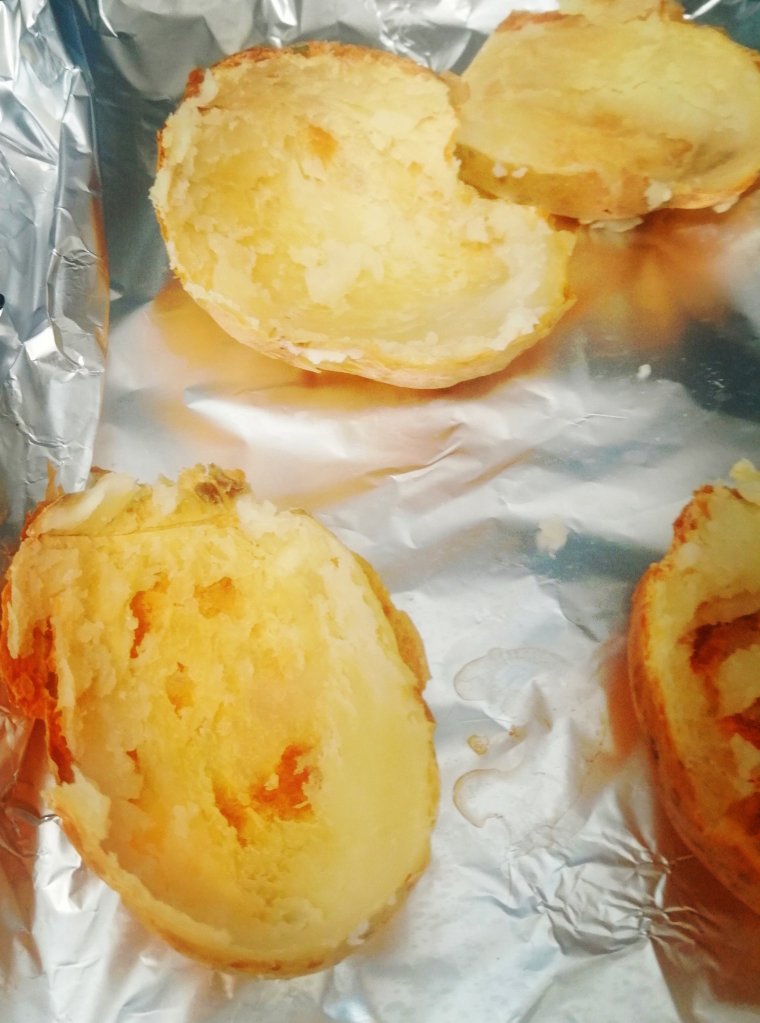
  • Cut the cooked potatoes in half and scoop he middle out and place in a separate bowl
  • Mash the scooped out potato with a fork, stir in the scallions, mayonnaise, a half the cheese as we as salt and pepper before mixing well
  • Spoon the mixture back into the potato skins and sprinkle the rest of the cheese over the potatoes
  • Bake for 15-20 minutes until the cheese bubbling and starting to brown

Cauliflower Cheese Soup

It’s comfort food season and this rich velvety smooth soup will make you feel all warm and cosy inside.

I like to top mine with some croutons made from stale baguette I had left over, and a little grated cheese. It’s also amazing topped with some crunchy bacon bits.

Ingredients

1 Cauliflower (broken into thumb sized florets)

1 Large potato (peeled and into 2-3 cm cubes)

1 Onion (finely chopped)

1 Tbsp Oil

350 Ml Milk

1 Litre Vegetable stock (I used 2 stock cubes)

100 Grams Mature cheddar or other strong cheese (grated)

Method

  • Heat the oil in a large pot and fry over a medium heat until the onion softens
  • Add the potatoes and cauliflower to the pot and cook for 5 minutes stirring occasionally
  • Add the milk and vegetable stock and heat until just before the soup comes to the boil. Turn the heat down and simmer for 15 minutes
  • Check that the potatoes and cauliflower are cooked (they should be soft enough to stick a fork in easily)
  • In a food blender or with an immersion blender whizz the soup until totally smooth. Add the grated cheese and give a final whizz to make sure it incorporated, cook for a further 5 minutes
  • Taste the soup to check the seasoning and add salt and pepper if you think it needs it. Sprinkle with your favourite topping

Hearty Autumn Soup

Soup is virtually impossible to mess up. So when it’s cold and wet outside its the ideal thing to make that’s cheap and easy. Its also a great filling lunch to bring to work if you’re on a budget.

This soup is vegan friendly, but if you need a meat fix, you can also add some cooked chorizo or smokey bacon and reduce the amount of smoked paprika.

Ingredients

1 Small Leek (roughly chopped)

2 Handfuls of either cabbage, kale or cavelo Nero (shredded)

3-4 Small potatoes (skins left on, and cut into 3-4cm cubes)

1 Vegetable stock cube

1 Tsp Smoked paprika

1 Can Black beans (you can use any type you like)

3 Cloves of garlic (finely chopped)

1 Tsp Chilli powder (optional)

Large sprig of rosemary, or thyme

1 Tbsp Vegetable oil

500ml Carton of passata

1 Tbsp Tomato puree

Salt

Method

  • Heat the oil in a large pot over a medium heat and add the leek. Fry until the leek starts to soften
  • Add the potatoes, tomato puree, chilli powder, rosemary and paprika and cook for 2-3 minutes
  • Add the crumbled up stock cube, pasatta, garlic, 1 litre of water, and bring the soup to the boil. Add your greens and beans, reduce to a simmer and cook until the potatoes are soft
  • Check the seasoning and add salt if you think it needs it.

Pork Belly and Apple Burger

Pork belly is relatively inexpensive and packed with flavour. It also carries other flavours really well, so feel free to open the spice cupboard and go nuts.

A disk of fried apple adds some sweetness to cut the richness of the pork. I used coleslaw and salad leaves to add some freshness. Top it off with some spicy mayo for a little heat and the whole thing is an explosion of yumminess.

Makes enough for 3 burgers (you can up the quantities of you’re cooking for more people).

Ingredients

500 Grams Pork belly

1 Tsp Ground ginger

1 Tsp Ground Coriander

1 Tsp Salt

1 Apple

25 Grams Butter

3 Tbsp Coleslaw

Salad leaves

3 Burger baps

2-3 Tbsp Mayonnaise

Siraccha to taste

Method

  • Preheat the oven to 140 degrees (Celsius)
  • Pat the pork belly dry with paper towels, and rub with the spices and salt. Place in an ovenproof dish and bake for 30 minutes
  • Cut the apple into 1cm thick disks. Melt the butter in a frying pan over a medium high heat. Fry the apple disks until they start to brown on each side. Remove from the pan and set to one side.
  • Remove the pork belly and fry on a high heat in the same pan you cooked the apple in, until it starts to crisp up. Cook on each side
  • Toast the burger baps. To make the spice mayo, simply mix a couple of tablespoons and as much siraccha as you like and mix well. Spread the mayo on the baps
  • Add the coleslaw and salad leaves to one half of the bap, and top with the pork belly and apple. Top with the other half of the bap and serve immediately

French Onion Tart

Fried onions are one my favourite savoury flavours. This tart is brilliant hot or cold and many of the component’s can be made in advance and then assembled and baked at the last minute if you’re cooking for friends so you have more time to chat. This tastes great and is a pretty cost effective dish if you want to make lunch for friends for example.

I used ready made pastry to save time (it was reduced in the supermarket, don’t judge sometimes its fine to take short cuts). The onions need to cook long and slow before going into the tart and this can be done a day or two in advance and stored in the fridge until you’re ready to bake it.

I used Gruyere cheese because I felt like being fancy, but a well flavoured cheese like cheddar or even parmesan would also work well.

Serves 6-8

Ingredients

300 Grams Ready made short crust pastry

1 Kg Onions (finely sliced). This will look like a lot, but it will cook down.

2 Tbsp Oil (Or you can use half butter half oil if you prefer)

2 Eggs

50 Grams Gruyere (finely grated)

300 ml Double Cream

Flour for rolling out the pastry

Salt and pepper

Method

  1. Add the oil to a large frying pan to heat before adding the onions. Cook over a medium heat for 45 mins stirring occasionally to make sure they don’t burn. Remove from the heat and allow to cool
  2. Preheat your oven to 180 degree (Celsius).
  3. I used a 12in loose bottom flan tin, make sure that this is well greased so that the flan will come out if the tin easily
  4. Dust a counter with lightly with flour and roll out the pastry in a circle fit big enough to fit the flan tin. Make sure the pastry is pressed well into the edges of the tin. Lay baking parchment on top of the pastry and pour on baking baking beans (I use old rice/dried beans that I keep in a jar, its cheaper than buying the fancy clay versions). Bake for blind 15 minutes, before removing from the oven. Carefully remove the baking parchment so you don’t drop the baking beans (or what ever you’re using) into the pastry
  5. In a large bowl beat the eggs, cream, and cheese together in a bowl (add salt and member if you think it needs it). I have French friend who worked as a pastry chef, and her top tip is to put the eggs through a seive to ensure that the mix will be smooth and you have any spots of egg white, but this isn’t essential. Stir in the fried onions and mix well before spooning into the pastry case
  6. Bake for 25-30 minutes until the tart is golden brown and lightly set

The Bear’s Omelette

If you have watched The Bear recently, its a fairly accurate representation of the highly stressed shouty nightmare that a professional kitchen can be.

I made this version shown in the TV show and am slightly addicted to it. A simple omelette with a Boursin cream cheese filling and a handful of crushed sour cream and chive crisps over the top is amazing.

You can go down the chefie route and and sieve the eggs first to make the omelette super smooth, but if you can’t be bothered it won’t affect the taste. In the TV show the chef also piped the cheese onto the omelette, but really who has the time, just spread it , it will taste the same.

Give this a try, and I guarantee you’ll make it again.

Serves 1

Ingredients

3 eggs

Large knob of butter

50 Grams Boursin garlic and chive cream cheese

Salt and pepper

Handful of crushed sour cream and chive potato crisps/chips

Method

  • Whisk the eggs together (you can put them through a sieve if you want a really smooth omelette but it isn’t essential)
  • Heat the butter in a pan over a medium/high heat
  • When the butter has started to foam slightly (don’t let it brown), add the eggs.
  • Roll the eggs around the pan and with a spatula move the cooked parts towards the centre of the pan so that runny bits run out to the edges and cooks. It doesn’t have to be perfect it just has to be cooked
  • Spread the Boursin on one half of the omelette and fold over. Cook for another minute to allow the Boursin to warm through
  • Top with the crushed crisps (you can also used chopped chives or herbs of you have them) and devour immediately

Cheapskate “Crab” Cakes.

Proper cakes are amazing, but the last time I bought fresh crab I almost had a coronary because it was so expensive.

To make a cheaper version I tried using seafood sticks (little bars of processed fish my nephew refers to as fish sausages).

While using proper crab is preferable, if you’re on a budget these are still really tasty. They make a great lunch or starter, and you can serve them with tartar sauce or just a squeeze of lemon. It’s also a good way to use up left over mashed potato

Serves 4

Ingredients

10 Seafood sticks/about 150 Grams (finely chopped)

300 Grams Mashed potato

3 Tbsp Mayonnaise

1 Tbsp Siracha

2-3 Scallions/spring onions (finely chopped)

1 Tbsp Parsley (finely chopped)

Juice of half a lemon

1-2 Tbsp Oil for frying

150 Grams Breadcrumbs (seasoned with salt and pepper)

Method

  • Add all the ingredients (except the oil for frying and breadcrumbs) in to a large bowl and mix with your hands until well combined
  • Divide into 8 patties, and coat these with seasoned breadcrumbs
  • Heat the oil in a large pan over a medium heat and fry them 4 at a time for 5 minutes on each side each or until golden brown. You can also cook these in an air fryer or bake in the oven at 200 degrees (Celsius) if you prefer not to fry them

Gorgeous Green Lentil Salad

With the weather improving it’s time to eat a little lighter, and make use of all the delicious veggies that are now coming in season. If you want something healthy full of crunch and protein, then this is the perfect salad.

Ideal for lunch or as a side dish, this salad has lots of colour and fresh flavours (don’t skimp on the herbs).  If you don’t already do it, window boxes full of herbs will transform how you cook and eat. The dressing has some Asian flavours for a little extra zing, but if it’s not your thing you can leave out the miso and ginger.

Ingredients

75 Grams Green lentils (dry weight, or use 1 Can of ready cooked lentils)

150 Grams Bulgar wheat, dry weight (you can also use cous cous, barley or whatever grain you prefer)

2-3 Scallions/spring onions (finely chopped)

1 Courgette /zucchini (grated)

75 Grams Cucumber (seeds removed, and chopped into 1 cm chunks)

1 Apple (chopped into 1 cm chunks and cover with some od the lemon juice for the dressing to stop it going brown)

1 Carrot (grated)

1 Handful Parsley or mint (chopped)

1 Handful Coriander (chopped)

I Tbsp Pumpkin seeds

Salt and pepper

Dressing

1 Lemon (juiced)

2-3 Tbsp Oil

1 Tbsp Grated ginger

1 Tsp Miso paste

Method

  • Cook the lentils and Bulgar wheat according to the instructions on he packaging, set aside and allow to cool. If you are using pre cooked lentil just drain them
  • Combine all the salad ingredients in a large bowl.
  • In a small bowl, mix all the dressing ingredients together and drizzle over the salad ingredients
  • Mix well and add salt pepper if you think it needs it.

Spanikopita (Greek Feta and Spinach Pie)

This pie is very satisfying but still quite light and a good way to get your daily dose of veggies.

I use frozen spinach, because it’s cheaper and a kilo of fresh spinach will take up half your kitchen, make sure to squeeze out as much water as possible so the pie won’t be soggy. Fresh herbs add flavour, and while dill is traditionally used, I used parsley and mint which are also used in some parts of Greece.

Filo pastry can be bought in most larger super markets. Make sure to cover the pastry with a slightly damp tea towel to stop it drying out when you are making the pie.

The pie can be eaten hot or cold and can live in your fridge for 2-3 days. It’s great as a lunch dish served with some salad or as a side dish.

Ingredients

1kg Frozen spinach (defrosted, and all excess liquid squeezed out)

3 eggs

Handful of finely chopped parsley and mint

250 Grams Filo pastry

200 Grams Feta style cheese (crumbled)

1 Leek or bunch of scallions/spring onions (finely chopped)

1 Tbsp Oil

25 Grams Butter (melted)

Salt and pepper (to taste)

2 Tbsp Sesame seeds (optional)

Method

  • Preheat the oven to 180 degrees (Celsius)
  • In a large pan, heat the oil over a medium heat and fry the leek until soft. Set to one side and allow to cool
  • Add the drained spinach to a large bowl and loosen up with a fork. Stir in the eggs, feta, herbs leeks and seasoning. Stir until combined
  • Grease a 6 x 9 in baking tin and line with sheets of filo pastry, brush each sheet lightly with butter before topping with another sheet (lay 5-6 sheets of filo pastry as a base)
  • When the tray is lined, spread the spinach mixture evenly across the base. Fold in any overlapping pastry and top the pie with the leftover sheets of pastry (brush each sheet lightly with butter before topping with the next.
  • Sprinkle with sesame seeds, and bake in the oven for 25-30 minutes until brown and crispy

Asian Noodle Salad

Trying to get away from winter’s stodgy comfort food, doesn’t mean giving up on flavour.

This salad is jam packed with flavour and texture and takes 10-15 minutes to knock up. It’s also gluten free and vegan and makes a great lunch box filler if you’re fed up with sandwiches.

Ingredients

500 Grams Dried rice noodles

1/4 Red cabbage (finely sliced)

3 Scallions/spring onions (finely sliced)

2 Small carrots (grated)

1 Red pepper (finely sliced)

2 Tbsp Coriander (finely chopped)

2 Tbsp Mint (finely chopped)

Dressing

2-3 Tbsp Peanut butter

1 Tbsp Sesame oil

1 Tbsp Soy sauce

1 Tbsp Grated ginger

1 Tsp Maple syrup or Honey if you’re not vegan

1 Tsp Chilli flakes

1 Tbsp White wine vinegar or lemon juice

Topping (option)

2 Tbsp Pumpkin seeds

100 Grams Cashew nuts/peanuts (toasted)

Method

  • Toast the nuts in a hot frying pan and set to one side and allow to cool.
  • Cook the rice noodles according to the instructions on the packet. Drain the noodles and add to a bowl of ice water to stop them over cooking.
  • Add all the dressing ingredients to a bowl and mix well. You might need to add some hot water to loosen up the dressing if its too thick.
  • Drain the cold noodles and add to a large bowl. Stir in the vegetables and dressing and mix well.
  • Top with the pumpkin seeds and nuts if using.