Goat’s Cheese and Roast Vegetable Galette

The last couple of months have been cold, wet and sh*tty. I needed something that reminded me of sunshine, so I made this. It’s relatively easy to make, and looks impressive when you bring it to the table if you’re cooking for people.

If you’re super organised you can use this recipe to use up leftover roast vegetables. I made my own pasty, but as always you can use shop bought if you’re short on time.

Alot of people aren’t fans of goat’s cheese. If you’re one of them, you can swap it for another soft cheese like brie or camembert.

Serves 4-6

Ingredients

For the pastry

200 Grams Plain flour

1/4 Tsp Salt

100 Grams Butter

1 Egg yolk

Cold water

(Plus 1 Egg to brush the pastry with)

Sesame or onion seeds (optional)

Filling

1 Onion (cut into 8)

1 Red pepper (cut into 8)

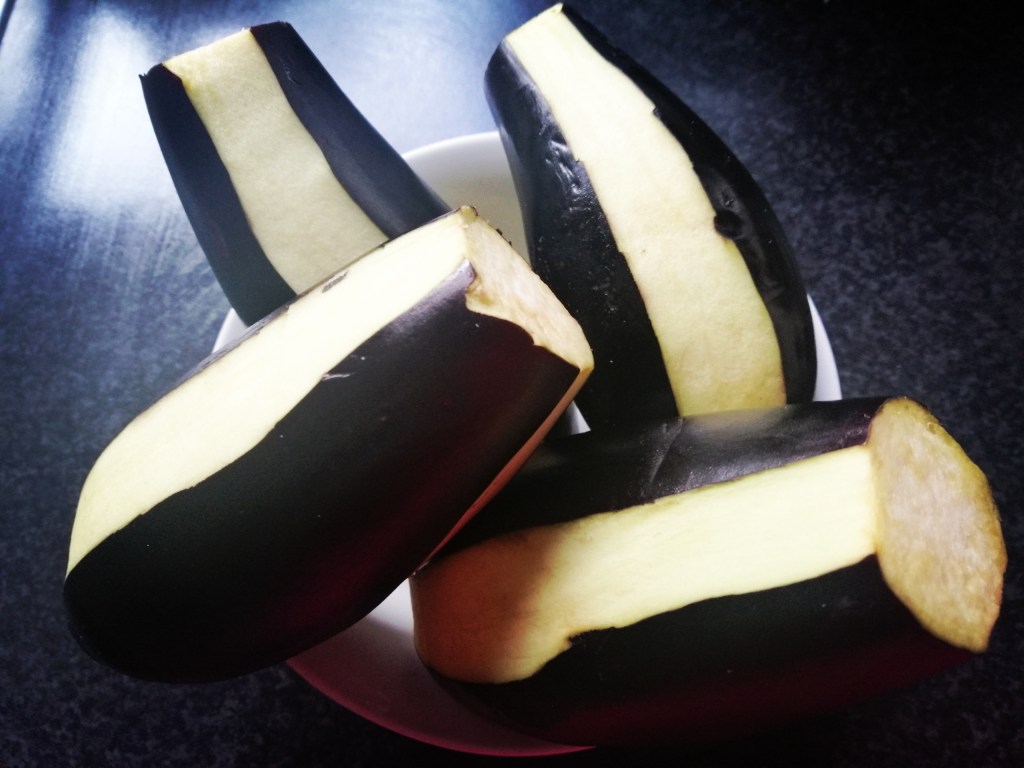
1 Aubergine (cut into 2-3 cm cubes)

125 Grams Soft goat’s cheese

200 Grams Cherry tomatoes still on the vine

2 Tbsp Olive oil

1 Tsp Dried oregano or thyme

Salt and pepper

Method

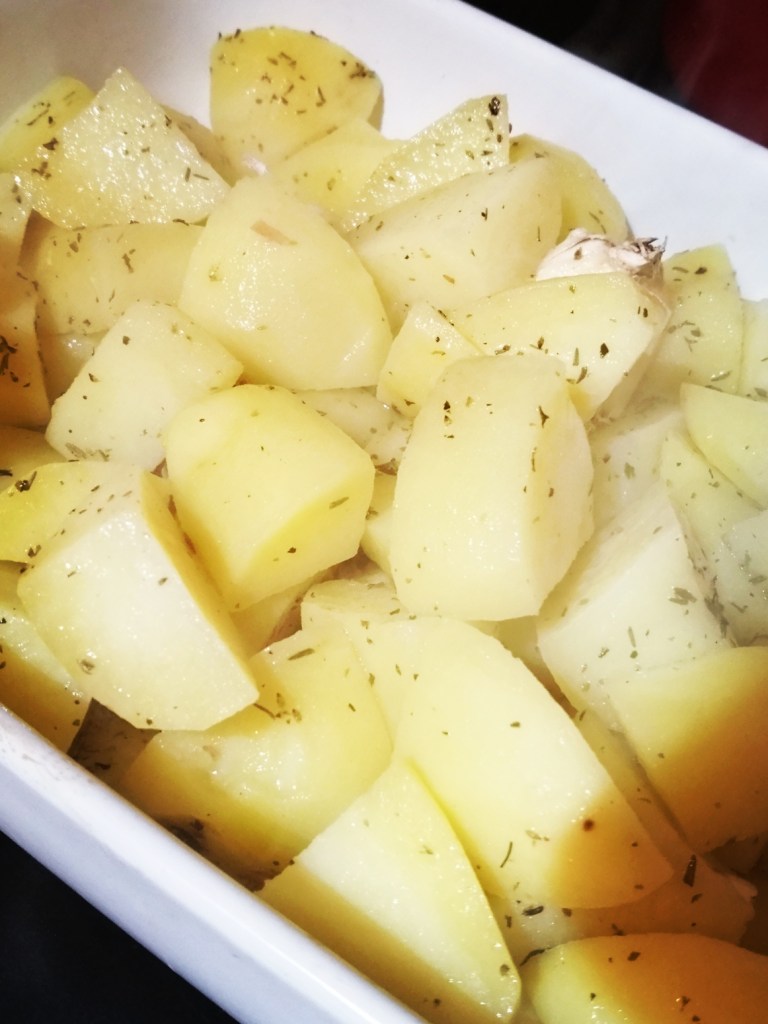
  1. Prepare the vegetables, and place them in a flat oven proof dish. Drizzle with oil and bake in an oven for 30-40 minutes until starting to chat at the edges a little. Allow to cool before using.
  2. In a food processor, add the flour and butter and pulse until this looks like breadcrumbs (the rubbing in method if you prefer).
  3. Add the yolk, and gradually add the cold water, mixing until the dough comes together in a ball. Cover with cling film and refrigerate for 30 minutes
  4. After chilling, allow the pastry to come to room temperature. Roll the pastry out in as neat a circle as possible, place on a sheet of baking parchment, and then lay on a baking sheet
  5. Break up the goat’s cheese and sprinkle across the centre of the pastry, leaving an edge of 3-4cm around the pastry
  6. Top the goat’s cheese with roast vegetables (having squeezed out any liquid). Top with the vine tomatoes
  7. Brush the edges of the pastry with beaten egg. Gently fold in the edges of the pastry and pleat the pastry to create a crust for the galette
  8. Brush the exposed pastry with beaten egg, and sprinkle the pastry with sesame or onion seeds for some extra colour and flavour.
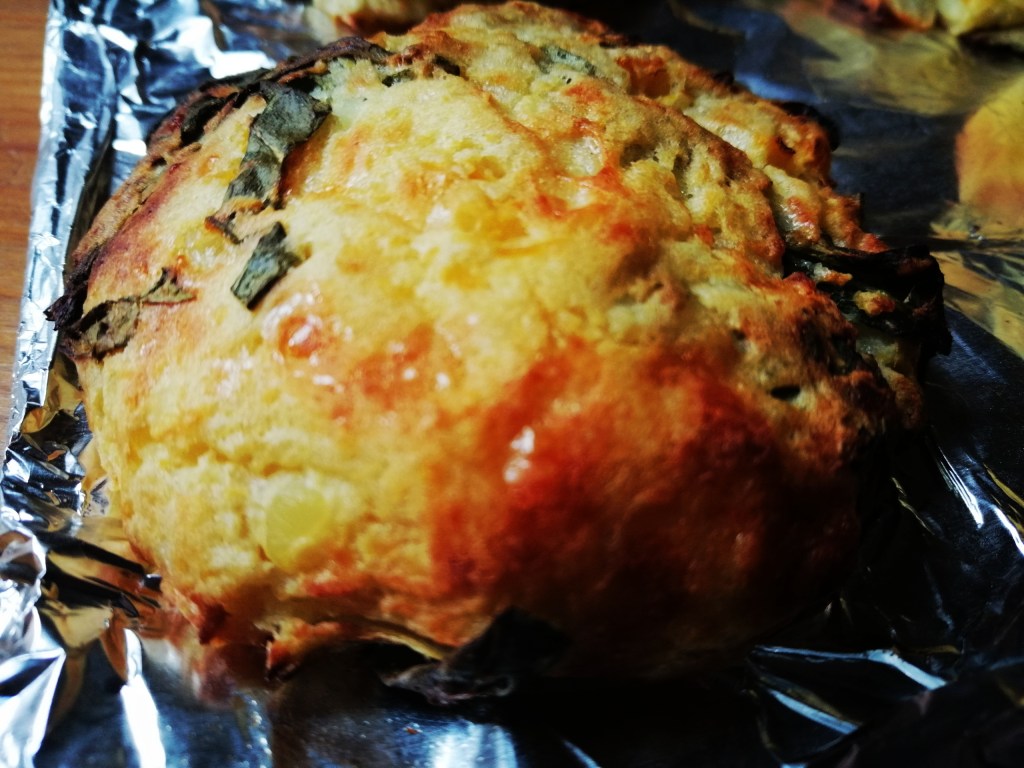
  9. Bake in an oven pre-heated to 180 degrees for 30-40 minutes until golden brown. Serve with salad

Vegetarian Moussaka

Vegetarian Moussaka

I’ve loved moussaka ever since I first tasted it. But it can be very rich, so this version even though it’s still packed with protein is a little lighter.

This is based around a Jamie Oliver recipe and it’s proper comfort food. I added some roast red peppers, as I think it brings a little bit more freshness to it. There’s still enough cheese to make it still taste decadent.

The only draw back is that this is a time consuming recipe. I usually wait to make this at the weekend when I have more time, but it’s worth the time and effort, and tastes so much better than some gloopy supermarket version. This is also a great dish if you have a group of people to cook for.

Serves 8-10

Ingredients

4 Aubergines

4 Roasted red peppers (I used a jar of red peppers to save time)

500 Grams Potatoes

2 Tins Chopped tomatoes

2 Tins Chick peas

1 Sprig Rosemary

1 Small bunch of sage

100 Grams Green lentils, boiled until soft (or 1 can of lentils)

2 Onions, sliced

400 Grams Feta cheese

50 Grams Butter

50 Grams Plain flour

500ml Milk

25 Grams Parmesan (or other strong, hard cheese)

Olive oil

Salt and Pepper

Method

  1. Heat your oven to 200 degrees, peel the potatoes and cut into 2cm slices. Rub the potatoes with a little olive oil, place on baking trays and bake until tender and golden brown
  2. Peel strips into the aubergines, and then cut into 2 cm rounds before sprinkling with salt and leaving to drain a colander for an hour
  3. Wipe off any excess moisture and the salt, and sprinkle the aubergines with a little olive oil and place on baking trays and bake in the oven until tender, just as you did with the potatoes
  4. Add 1 Tbsp of oil to a large frying pan and add the onions and herbs to pan. Cook gently until the onions have softened (I keep the herbs on the stem so that they are easier to fish out of the sauce later.
  5. Add the cooked/tinned lentils and chick peas to the pan along with the tinned tomatoes. Simmer over a medium heat for 10-15 minutes until the sauce has thickened, check the season and add salt and pepper if necessary
  6. When the vegetables have finished roasting and the sauce is ready, it’s time to start assembling the dish
  7. Spread a thin layer of the sauce on the bottom of a large oven proof dish, then top this with a layer of the cooked potatoes and crumble over some of the feta cheese. Top this with another layer of sauce and then add a layer of roasted peppers sprinkle with some of the feta cheese. Top again with the sauce and add the cooked aubergines and any left over feta
  8. To top this you will need to make a white sauce, in a medium sized saucepan, melt your butter over a medium heat, then stir in the flour to make a smooth paste. Continue to stir as you add the milk (if you find that you are getting lumps there is no shame in breaking out a whisk to beat the living daylights of the sauce to get rid of rid of them).
  9. The sauce will start thicken as it heats, so continue stirring and reduce the heat and allow to cook for another 5 minutes or until the sauce no longer tastes “floury”. Add the grated hard cheese and mix well
  10. Top the layers of vegetables and with the white sauce and bake at 200 degrees for 30-40 minutes of until all bubbly, brown and delicious

Rumbledethumps

This recipe comes from one of my co-workers Ruth. She knows I love a good recipe and was kind enough to share this. It’s one of the things I like about food. Everyone needs to eat, and everyone has a favourite food. Many of my recipes come from people who just wanted to share something they really enjoyed.

This is a traditional Scottish recipe, and was probably developed to use up left over vegetables. I wasn’t that organised so I made this from scratch, but if you plan ahead and have left over veggies then this can be really quick to make. The name supposedly comes from the fact that cabbage and turnip can make some people a bit “windy”. Rumbledethump refers to the noises they may make. Thankfully this wasn’t my experience.

Rumbledethumps are traditionally fried, I oven baked these to make them a little healthier.

These make a great side dish or are delicious served with a fried egg.

Makes 8

Ingredients

500 Grams Potatoes (peeled and cubed)

200 Grams Turnip (peeled and cubed) – in England this is known as swede, but in NI we call it turnip)

1/2 Onion (finely sliced)

125 Grams Cabbage (finely sliced)

1 Egg yolk

50 Grams Cheddar cheese (grated)

2 Tbsps Oil

Salt and pepper

Method

  1. Cook the potatoes and turnip until soft, drain and mash roughly before allowing to cool
  2. Add 1 Tbsp of oil to a pan and gently fry until soft, allow to cool
  3. Combine all the ingredients (except the remaining oil), in a bowl. Check the seasoning, I found this recipe needed quite a lot.
  4. Preheat your oven to 200 degrees. Get your hands into the mixture, and make 8 equal sized patties.
  5. Set the patties onto a greased baking sheet. Brush with the remaining oil and bake for 25-30mins

Walnut Skordalia

This is a traditional Greek dip and is super easy to make and super delicious. I made this as part of a meze at our February supper club, and it was the most popular dish of the night.

While you can use it as a dip, I’ve also used this as filling in wraps and sandwiches along with salad and chopped vegetables and it was amazingly tasty. It’s also really good drizzled across roast vegetables. To be honest you could spread this on a flip flop and I’d eat it, it tastes that good. This is also vegan, so you can keep all the non meat eaters in your life happy with something totally scrumptious.

Ingredients

80 Grams Walnuts

40 Grams Breadcrumbs (I know I bang on about it, but one of my favourite kitchen hacks is making a big batch of bread crumbs to keep in the freezer, it makes recipes like this a 2 minute job)

1-2 Cloves of garlic, roughly chopped (I used 2 and it was pretty garlicky which I don’t mind, but adjust to your own taste)

2 Tbsp Red wine vinegar (Again adjust to your own taste, the first time I tried a the recipe out it was a bit too sharp for me, so I’ve reduced the amount of vinegar but have a taste and you can always add more)

100ml Olive oil

Method

  1. Add the walnuts to a food processor and blitz for a couple of minutes until the nuts are finely ground
  2. Add the breadcrumbs, garlic, oil and vinegar and blitz again. The mix is meant to be quite thick, but if it is too thick for you, you can a small amount of water and and blitz until you get the consistency you like

Greek Lemon Roast Potatoes

Crispy, herby deliciousness

OMG I love a spud (maybe it’s my Irish DNA). Just when I thought roast potatoes were practically perfect in every way. I discovered these.

Potatoes roasted with garlic and herbs in olive oil and lemon juice, are little flavour bombs. I could eat a bowl of these on their own. However, they’re also fantastic with chicken or fish. I have also been known to fry up left over ones (the only reason there were left overs was because I was physically incapable of eating any more) the next day and topping with a fried egg, yum!

Ingredients

750 Grams Potatoes

1 Lemon (juice only)

50ml Olive oil

1 Tsp Dried thyme

1 Tsp Dried oregano

1 Bulb of garlic

Salt

Par boiled potatoes, ready for the oven

Method

  1. Preheat your oven to 200 degrees
  2. Peel the potatoes, and cut into 3-4 cm chunks. Par bowl in salted water for 5 minutes
  3. Put an oven proof dish in the oven
  4. In a bowl, add the oil, herbs and lemon juice. Cut the bulb of garlic into four
  5. Drain the potatoes, add the garlic, and oil mixture then transfer to the preheated dish
  6. Put in the oven and bake for about 1 hour, mixing roughly every 20 minutes, until golden and crispy

Garlic Bread Vegetable Bake

I did the thing I normally do when I go to a farmer’s market. I bought way too much random stuff because I thought it looked good. I got it home and then had to think what I was going to do with it.

Note to self, stop buying too much stuff at the market.

This is a scrummy mix of colours and textures. Delicious Autumn vegetables in a creamy sauce, with a little bit of heat from smoked paprika, topped with crunchy, cheesy garlic bread.

Who doesn’t like garlic bread (weirdos, that’s who). You can use any combination of vegetables you like, pumpkin, butternut squash, or green beans also work well.

Crunchy Cheesy Perfection

I tried this recipe on one of my oldest friends. I was nervous because she owns a steak restaurant and is a confirmed carnivore and got two enthusiastic thumbs up (still sorry I forgot to send you home with a doggy bag Mags, but here is the recipe as promised). Go get your comfort food on.

Ingredients

1 Tbsp Olive oil

250 Grams Brussels sprouts

150 Grams Cavelo Nero (or Kale)

1 Pepper

1 Onion

175 Grams Mushrooms

2 Courgettes

400 Grams Cream cheese

250ml Vegetable stock

1/2 Tsp Smoked paprika

Handful of parsley

25 Grams Butter

2 Cloves of garlic

50 Grams Cheddar Cheese

1 Baguette

Method

  1. Cut the bottoms of the Brussels sprouts and halve. Remove the stalks from the cavelo nero and slice. Cook the sprouts and cavelo nero in the vegetable stock for 5 minutes, until just tender
  2. Slice the courgettes, onions, mushrooms and pepper, and fry in the olive oil in a large frying pan for about 5 minutes until soft
  3. Add the sprouts, cavelo nero and vegetable stock to the frying pan. Sprinkle the smoked paprika over the vegetables, and add finely chopped parsley and cream cheese
  4. Mix until thoroughly combined
  5. Crush or mince the garlic and combine with butter
  6. Slice the baguette into 2cm slices, and spread with the garlic butter
  7. Put the vegetable mix into an oven proof dish and top with the slices of buttered baguette
  8. Top with grated cheese and bake in an oven preheated to 180 degrees, for 30 minutes until golden brown

Sweet Potato and Feta Fritters

Sweet potato and feta fritters topped with a fried egg makes a really satisfying meal.

I’ve played around with a couple of different versions, including one with courgettes that turned into a gloopy mess. This is the best version I’ve tried, and tastes really good with eggs for breakfast/brunch, or with a salad for a light lunch.

The sweetness of the carrot and sweet potato tastes really good with the savoury hit of the spring onion and creamy tang from the cheese. When cooking these they take on on quite a lot of colour but don’t worry, this is how they are meant to be.

Ingredients

1 Large Sweet potato

1 Large Carrot

2 Scallions/spring onions

2 Tbsps Plain flour

2 Eggs

109 Grams Feta cheese

Salt and pepper

Oil for frying

Method

  1. Grate the sweet potato and carrot, set aside in a bowl
  2. Chop spring onions, and add to the bowl.
  3. Crumble the Feta and add to the bowl along with the flour, eggs, and seasoning before mixing well.
  4. Heat oil in a frying pan, and when hot add the mix in large spoonfuls to makes individual fritters
  5. Press the fritters down with a spatula and cook for 5 minutes on each side
  6. These go quite dark, but don’t panic they’re meant to
  7. If you prefer not to make individual fritters, you can add the whole mix to a pan and cook like a hash

Damned Delicious White Mushroom Pizza

Mushroom Pizza

I was inspired by another food blogger, Damned Delicious in this recipe, I prefer to use rosemary as a seasoning because I think it works well with mushrooms, but use what herbs you like the taste of.

I liked this recipe because it used a premade pizza base. This was a relief, I have a bit a chequered past trying to make pizza bases from scratch. Using a premade base also makes this recipe probably as quick as calling a pizza, and significantly cheaper (most take away pizzas have a 900% mark up).

Cheese, garlic and mushrooms are one the best flavour combinations ever and the only problem with this pizza is that fights over the last piece can get mean.

Makes 1, 12 inch Pizza

Ingredients

1 x 12 inch Pizza base

125 Grams Mushrooms (sliced)

2 Cloves of garlic (minced)

200 grams Mozzarella

50 Grams Ricotta

1/2 Tsp Rosemary (Rosemary can overwhelm everything else if you use too much, if you’re going to use other herbs you can use a bit more)

1 Tbsp Butter

Salt

Method

Add toppings before baking
  1. Pre heat your oven to 200 degrees
  2. Melt butter in a pan, and add the mushrooms rosemary and garlic and cook for 5 minutes (don’t stir too often)
  3. Put the pizza base on a baking tray and top with slices of mozzarella, the mushrooms and garlic, and dollops of ricotta. Give the pizza a light sprinkling of salt
  4. Bake for 15-20 minute, until golden brown and damned delicious

Mushroom, hazelnut and gorgonzla tart

A bit more “rustic” than I planned, but I put it down to me trying to make pastry with nuts in it. Save yourself the time and energy and use shop bought short crust pastry. It’s what I plan to do next time.  This recipe might be best saved for the weekend, as it’s a bit more labour intensive, but it’s well worth the trouble, (I had to stop myself eating half of it).

If you’re a vegetarian cooking for meat eaters, they’ll love this. The rich and unctuous filling feels really meaty, and unlike a lot of tarts isn’t too eggy.  This is delicious hot or cold.

Serves 6-8

Ingredients

1 Sheet of ready made short crust pastry

2 Onions (thinly sliced)

1 Tbsp Chopped rosemary

3 Cloves of garlic (finely chopped)

1 Tbsp Olive oil

25 Grams Dried porcini mushrooms, (soaked in 50 ml of hot water)

200 Grams Button mushrooms (sliced)

50 Grams Gorgonzola (sliced)

50 Grams Hazelnuts (chopped)

2 Eggs

150 Ml Double Cream

Salt and pepper

Method

  1. Grease a 23 cm loose based flan tin, roll you pastry until thin and line the tin, (chill in the fridge for 30 minutes)
  2. Put the porcini mushrooms in a bowl with 50ml of warm water and allow to soak
  3. Take your flan tin out of the fridge and over the base with grease proof paper and add baking beans on top, (I use old lentils that had been hanging about). Bake blind in an oven heated to 180 degrees for 15 minutes. Remove the grease proof paper and baking beans, and bake for a further 5 minutes, before removing from the oven
  4. While the pastry is baking add the olive oil and onions to a large heated frying pan. Turn down the heat and cook gently for 10 minutes
  5. Add the button mushrooms, garlic and rosemary to the pan and cook for a further 5 minutes, stirring occasionally
  6. Add the porcini mushrooms and the water they were soaking in to the pan. Cook over a medium heat until all the liquid has evaporated, and leave to cool
  7. Put a baking sheet in the oven to heat (the temperature should be 180 degrees again)
  8. When the mushroom mix is completely cool, spread it evenly across the pastry base
  9. Distribute the gorgonzola on top of the mushroom mix
  10. Beat 2 Eggs, and add to the cream, season with salt and pepper, pour into the tart case and sprinkle chopped hazelnuts across the top
  11. Put the filled tart tin on to the heated baking sheet in the oven and bake for 35 minutes until the centre is set
  12. Allow to cool in the tin for 5-10 minutes before cutting

Butternut Squash and Pea Curry

This is an easy, healthy curry that even the most ardent meat lovers can enjoy.

Don’t be put off, if it seems that there are a lot of ingredients.  I know I prattle on about how good Asian supermarkets are, but you can build up a good stock of cheap spices that will help change how you cook.

Ingredients

500gms Butternut Squash (peeled, deseeded, and diced)

200gms Frozen Peas

150gms Red Lentils

1 Large onion (chopped)

2 Tbsp Coconut or other oil

1 Red chilli pepper

4 Cloves of garlic

1 Tsp Fennel seeds

1 Thumb sized piece of ginger

2 Tsp Garam Masala

2 Cardamom pods

500ml Vegetable stock

2 Tbsp Chopped coriander

Serves 4

Method

  1. Add the fennel seeds and cardamom pods to a dry pan and toast until you can spell the spices.
  2. Add the coconut oil and once heated add the onion and cook over a medium heat for 10-15 minutes, stirring occasionally.  The onions should be cooked gently until they caramelise and turn brown.  Taking the time to do this might seem like a bit of a faff, but it does help improve the depth of flavour
  3. Add the butternut squash (which has been diced in 1.5cm cubes), and continue to cook over a gentle heat for 5 minutes
  4. Grate the ginger and add to the pan along with finely chopped chilli, garam masala, red lentils, and vegetable stock, cook for a further 10 minutes
  5. Add finely chopped garlic to the pan, along with frozen peas, and cook 5 more minutes
  6. Check that the butternut squash is tender, and check the seasoning and adjust to your taste. (I usually go easy when adding chilli, as it’s always easier to add more, but if you like a super hot then go nuts)
  7. Serve with basmati rice or naan bread (or both if you’re a total carb junkie like me).  This curry reheats really well, and will keep in the fridge for 3-4 days

�ꘇ