I love any form of lemon dessert and these are the ideal tea time treat. There’s a rich buttery shortbread base and a zingy lemon topping.
OMG I love these so much, I have to distribute these among friends and family or else I could easily eat these entirely by myself. If you have better self discipline than I do, these will keep in an airtight box for 2-3 days.
Use a food processor if you have one to make them even easier to make. There’s no need to roll out the shortbread base, just press it into the dish.
Makes 18
Ingredients
For the base
120 Grams Butter
130 Grams Plain flour
30 Grams Icing sugar
For the topping
Juice and finely grated zest of 3 lemons
190 Grams Sugar
3 Eggs
65 Grams Plain flour
Extra icing sugar for dusting the finished bars
Method
Preheat your oven to 180 degrees (Celsius) and line a 9 in x 12 in baking tin with parchment paper
To make the base, add the flour, butter, and sugar to a food processor and pulse until it looks like breaks crumbs. If you don’t have a food processor you can use the rubbing in method to combine the butter and flour
Transfer the crumb mix to the baking sheet and press it down. Put in the oven and bake for 15 minutes until light golden brown
Allow the base to cool slightly before making the topping
Using your food processor again, add all the topping ingredients to the bowl and whizz until light and fluffy
Pour the topping on top of the cooled base and bake for 25 minutes (or until the centre doesn’t jiggle
Allow to cool completely before dusting with icing sugar and cutting into bars
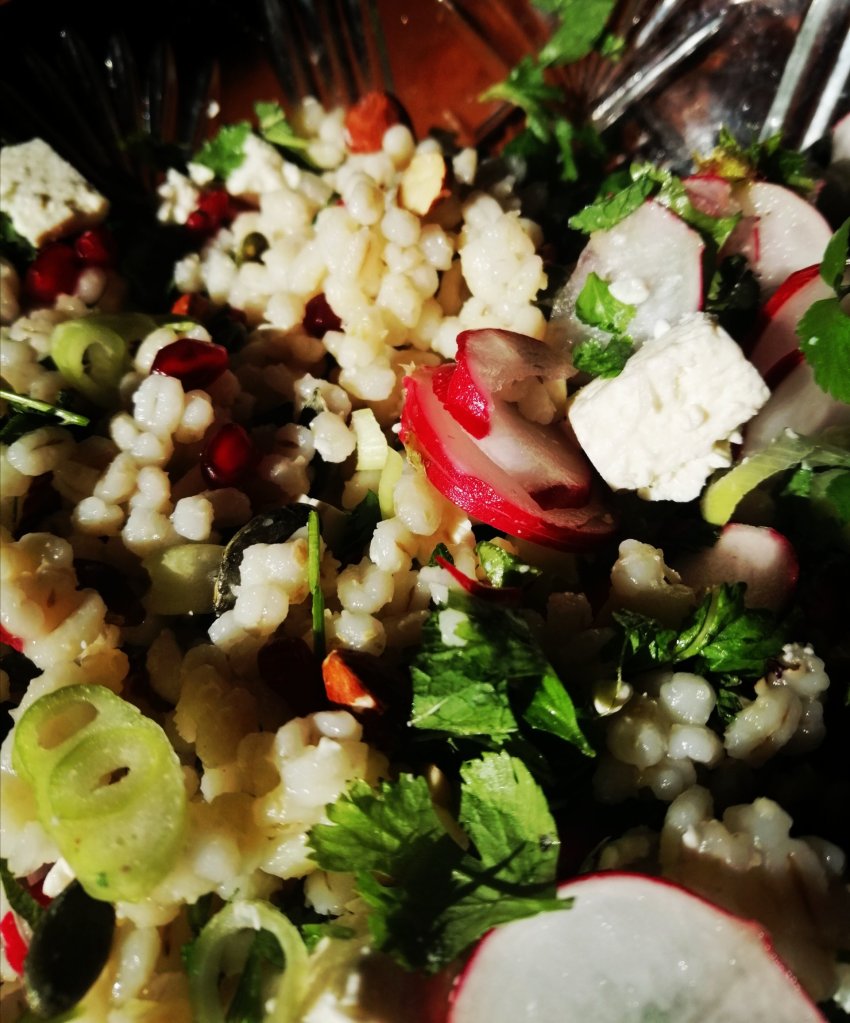
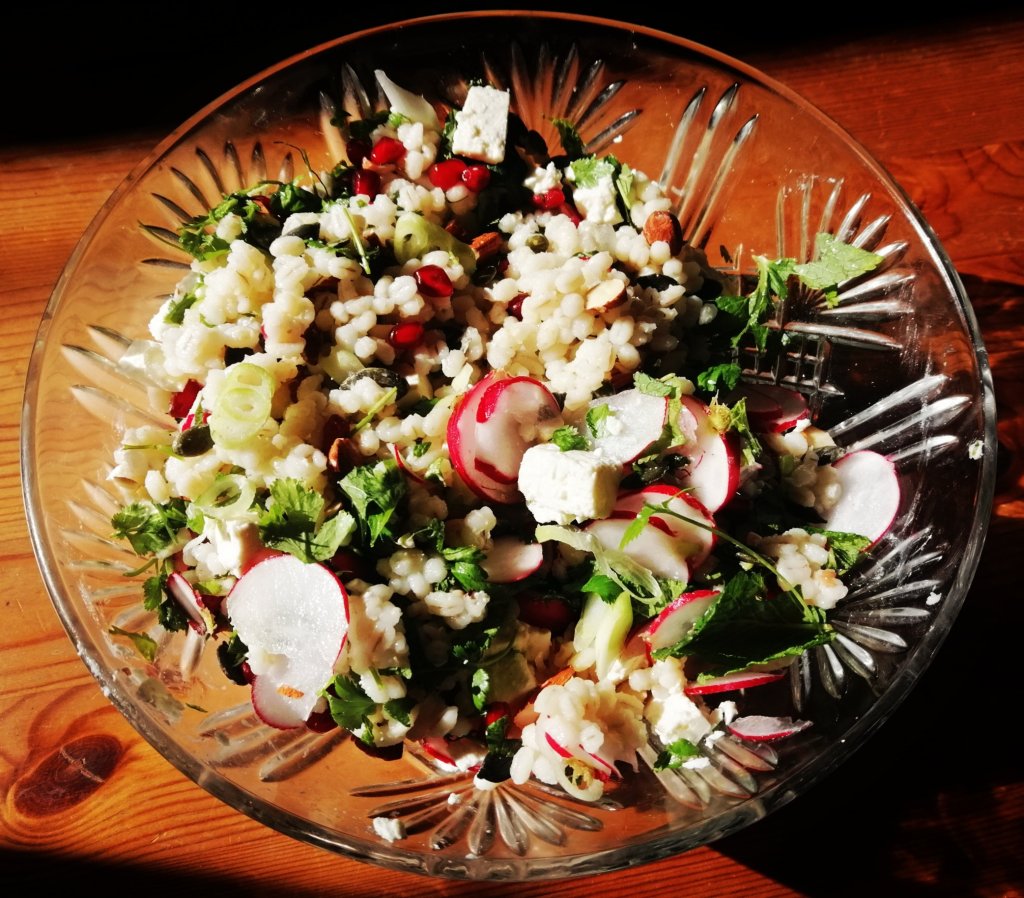
I have been over indulging lately and my body was crying out for something healthy and delicious. I love this salad, its packed with colour, texture and flavour and is full of protein.
Barley is a much underrated ingredient and used mostly in soup and stews, but is also amazing in risottos and salads.
This salad is substantial enough to eat on its own but is also fantastic as a side dish or part of a mezze, or in a wrap. This will in fridge in an airtight box for 2-3 days.
Ingredients
75 Grams Barley (dry weight)
100 Grams Radishes (finely sliced)
2 Scallions/spring onions (finely sliced)
50 Grams Almonds (rough chopped)
2Tbsp Pumkin seeds
50 Grams Pomegranate seeds
100 Grams Feta (crumbled into junks)
2 Tbsp Mint (finely sliced)
1 Tbsp Coriander (finely sliced, you can use parsley if you don’t like coriander)
For the dressing
2 Tbsp Olive oil
Juice of half a lemon
Salt and pepper to taste
Method
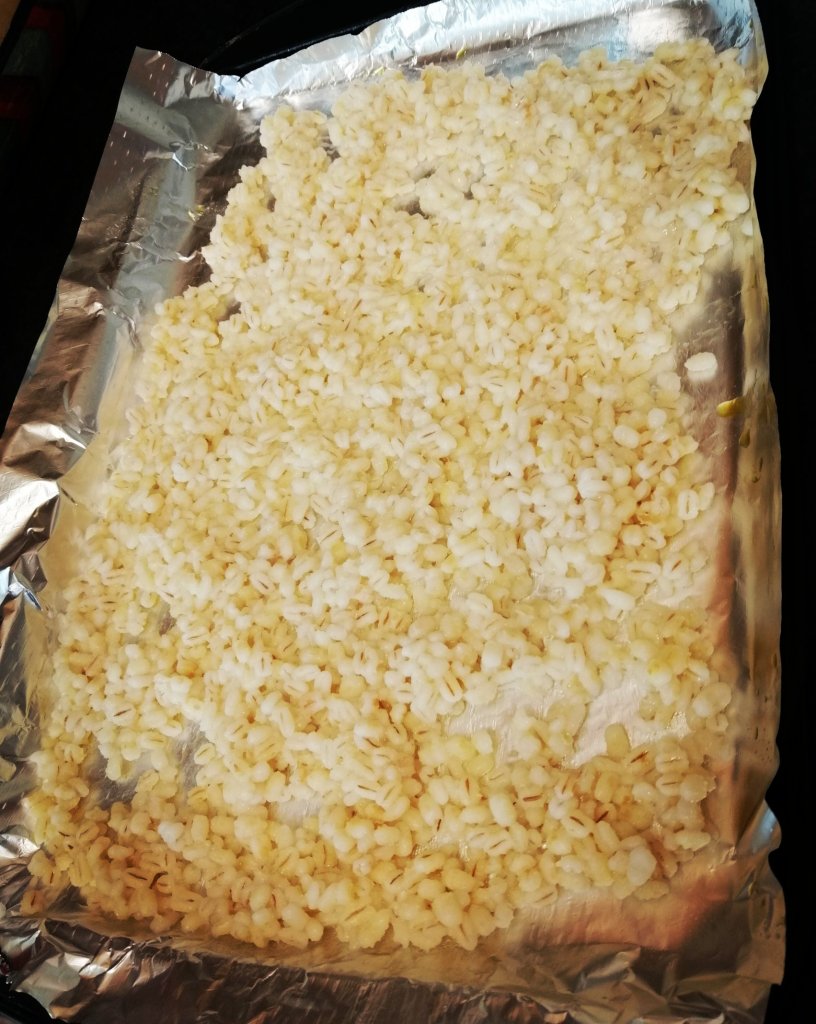
Cook the barley according to the instructions on the packet. Lightly oil a shallow baking tray and spread the cooked barley across it to cool
Add all the ingredients to a large bowl, add the dressing and stir well
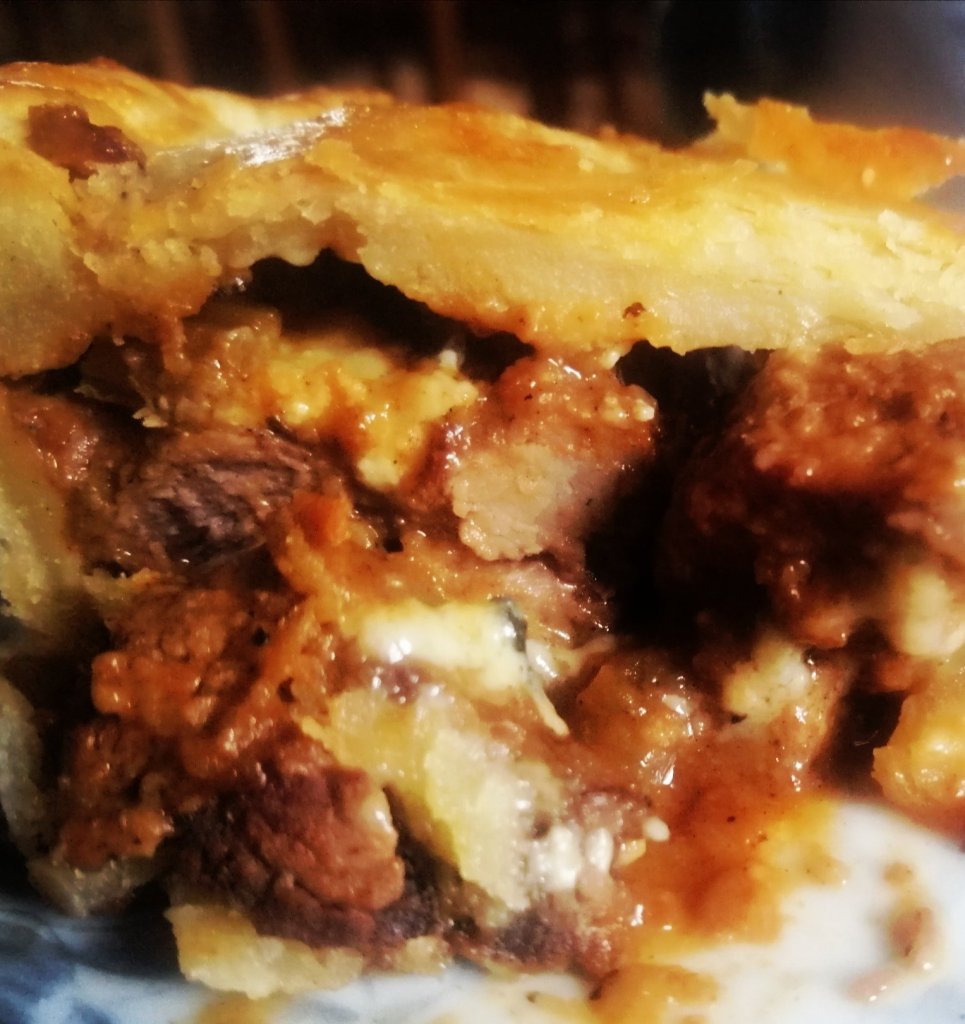
This is national pie week, so it inspired me to make my version of a steak and blue cheese pie. Yes, there is a bit of work involved but I guarantee it will taste 100 times better than anything you’ll buy in a supermarket.
Rich buttery pastry with really deep unctuous filling mmm.
Before you blue cheese haters turn your nose up at this. I have served this to people who detest blue cheese and they loved it (admittedly I didn’t tell them there was blue cheese in it until they had finished). So be brave and give it a try, you can try a really mild blue cheese if you’re not sure.
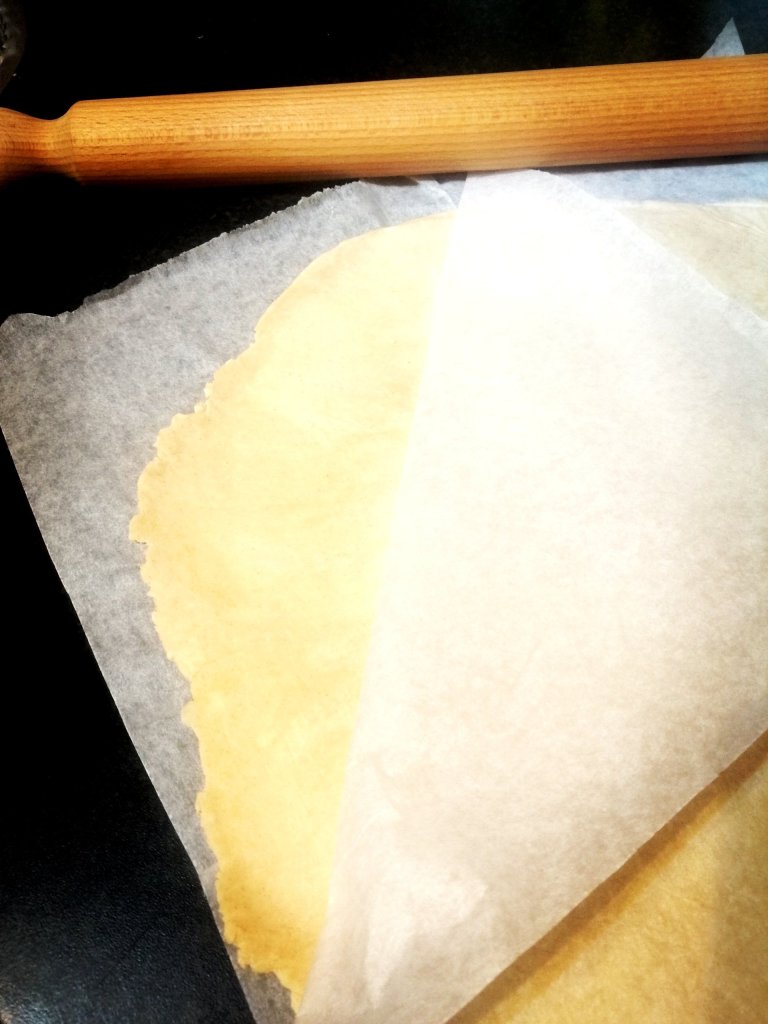
Roll the pastry between two sheets of baking parchment. To make it easier to move to the baking tin.
If cheese just isn’t your thing, just leave it out, this recipe will still give you a really tasty steak pie.
Crumble the Stilton across the steak filling before adding the pastry lid.
I used homemade pastry but you can use shop bought short crust pastry if you’re short on time. I usually make the meat filling and pastry the day before (you can also freeze it if you’re organised enough to make a double batch) .
For the pastry
400 Grams Plain flour
200 Grams Butter (cut into cubes)
1 Tbsp Mustard powder (optional)
1 Egg
Plus 1 Egg yolk (for glazing the pastry before it goes in the oven)
For the filling
800 Grams Stewing steak (cut into 4-5cm chunks)
50 Grams Plain flour
1 Tsp Mustard powder (optional)
1 Onion (finely chopped)
2 Stalks of celery (finely chopped)
1 Tbsp Tomato puree
2-3 Tbsp Oil
100 Grams Stilton or other blue cheese
500-750 ml Beef stock
Salt and Pepper to taste
Method
To make the filling, add a pinch of salt and pepper to flour as well as the mustard power and mix. Coat the cubes of meat in the flour
Add a tablespoon of oil to a large heavy bottomed pan, add the meat in small batches and seal on each side before removing and setting to one side. Continue doing this until all the meat has been sealed, add more oil to the pan if you need to
When all the meat has been sealed add another tablespoon of oil to the pan and gently fry the onion, tomato puree and celery for 5 minutes. Return the meat to the pan and the beef stock. Cover and simmer gently for 60 minutes. Uncover and simmer for a further 30 minutes until the gravy has reduced by at least a third (it should be quite a thick gravy). When the meat is tender remove from the heat and allow to cool completely
I use a food precessor to make pastry, but you can also use the traditional “rubbing in” method if you prefer. Add the butter, mustard powder and flour to the food processor and pulse until it looks like bread crumbs.
Add an egg and pulse, gradually add small amounts of cold water while pulsing until the pastry starts to come together
Turn out on a floured surface and form into a ball. Wrap in cling film and refrigerate for at least 30 minutes
While the pastry is chilling, grease a 9in x 9in loose bottom baking tin
Remove the chilled pastry from the fridge. Cut one third of the pastry and set to one side.
I like to roll out pastry between two sheets of baking parchment because I think it makes it easier to transfer to the tin, but you can simply roll it out on a floured surface if you prefer
Roll the pastry out until its about half a centimeter thick and transfer to the prepared tin. Make sure to press it gently into the edges
Spoon your cold meat filling into the pie case and spread evenly
Sprinkle the crumbled cheese on top of the steak filling
Roll out the remaining 1/3 of the pastry and top the pie, brush the edges with a little water and then press the edges of the pastry together to seal (you can crimp or press down with a fork)
Brush with egg yolk and add 7-8 little cuts on the lid to allow steam to escape
Bake in an oven preheated to 180 degrees (Celsius) for 45-50 minutes until deep golden brown
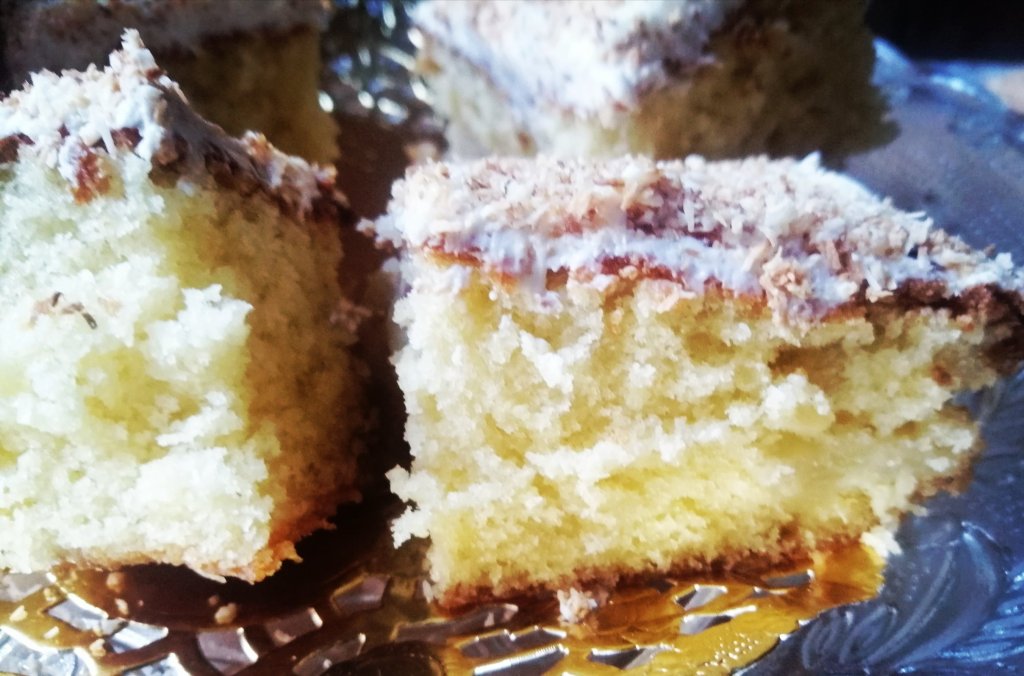
Pineapple and coconut are a marriage made in heaven, and though there is no booze in these, they are still yummy.
These are amazing for a special teatime treat or for dessert with ice cream. You can make the sponge 2-3 days in advance and wrap in cling film, then just add the topping before you’re read to serve. You can even freeze the sponge if you’re super organised (just remember to make sure the sponge is fully defrosted before applying the cream cheese frosting).
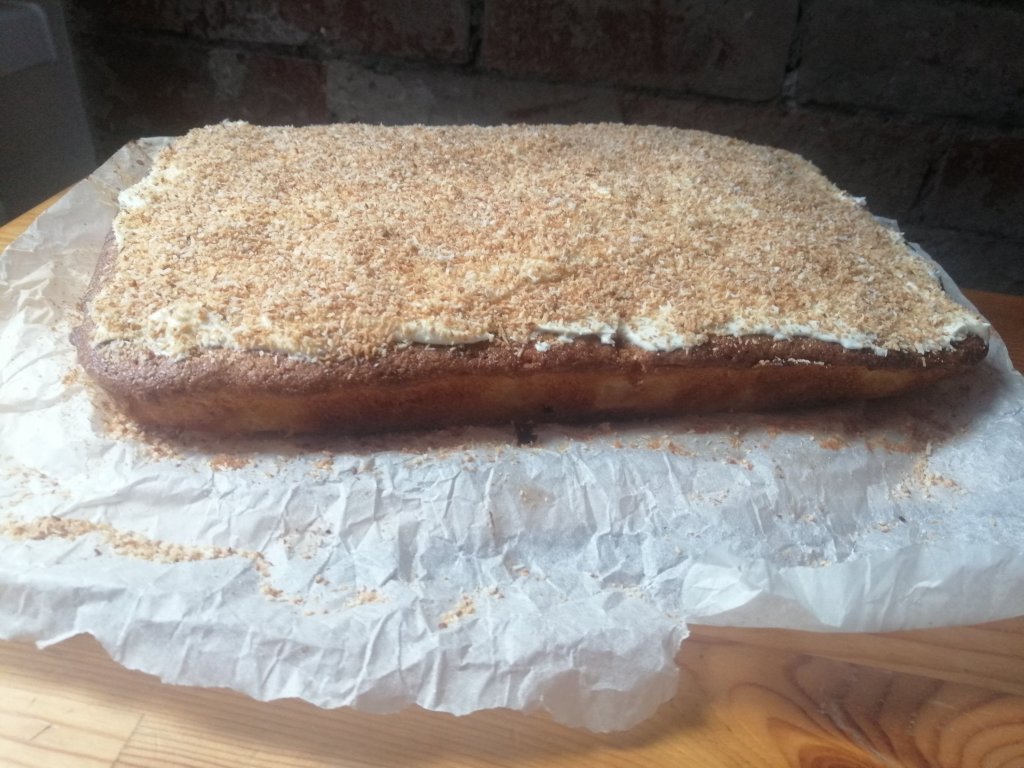
I’ve added some toasted coconut as a topping and take a few minutes to toast it, this adds a whole extra element.
Toasting the coconut will make all the difference
I used margerine for the sponge, Mary Berry uses this in her sponge recipes. Since nobody probably knows more about cakes than her, so I’ll go with her advice, but feel free to use butter if you prefer.
Makes 18 squares
Ingredients
For the sponge
Large tin of pineapple junks (drained weight 340 Grams), roughly chopped
350 Grams Caster Sugar
350 Grams Margerine
275 Grams Self Raising flour
100 Grams Dessicated coconut
5 Eggs
For the frosting
25 Grams Icing sugar (if you prefer a sweeter frosting you can use more)
200 Grams Cream cheese
25 Grams Dessicated coconut (toasted)
Method
If you have a stand mixer I would recommend using it, but an electric hand whisk is fine too.
Pre heat your oven to 180 degrees (Celsius), and line a 9 in x 12 in baking tin with baking parchment
In a bowl, add the margerine and sugar and whisk together until light and fluffy.
Whisk in one egg at a time, along with a tablespoon of flour. Whisk the remaining flour when they eggs have been added along with coconut (don’t panic if it looks curdled)
Fold in the roughly chopped pineapple, and transfer the mix to your prepared baking tin
Bake for 40-45 minutes
Allow to cool in the tin
For the toasted coconut topping, you can spread the coconut on sheet pan and bake for 5-10 minutes while the sponge is baking. I prefer to do it in a pan, as its easier to check that it’s not going to burn. Once toasted set to one side and allow to cool
Add the icing sugar to the cream cheese and mix well. When the sponge is completely cool spread with the cream cheese frosting and sprinkle with the toasted coconut
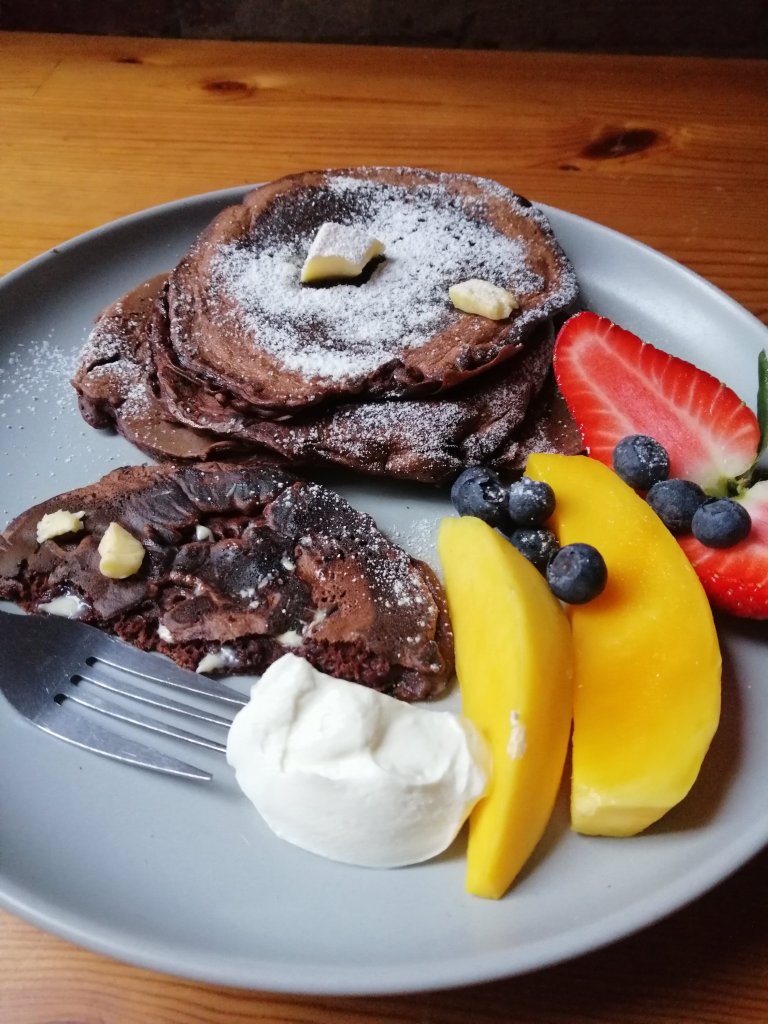
Do you have a chocoholic in your life, then this is the recipe for you?
If you want to do something special serve them with creme fraiche or fresh cream and fruit for the perfect breakfast or brunch dish.
White chocolate chips add a little bit of contrast.
They also make a great dessert, served warm with ice cream and you could even spread them with Nutella if you want to make them even more indulgent.
When bubbles appear on your pancake it’s time to turn it over.
These pancakes freeze well if you want to make a batch and freeze.
Makes 12-15 pancakes
Ingredients
225 Grams Self raising flour
100 Grams Chocolate chips (I used white chocolate chips as I like the contrast)
50 Grams Cocoa powder
1 Tbsp Caster sugar
1 Tsp Baking powder
Large pinch of salt
2 Eggs
400 mil Milk
Oil and butter to fry
Method
Add the flour, cocoa powder, baking powder, sugar and salt to a large bowl and combine
Crack the eggs into the bowl and start to whisk, gradually add the milk and whisk until the mixture is smooth and lump free
Add the chocolate chips and mix well
In a non stick frying pan, add a small knob of butter and a teaspoon of oil and heat over a medium to high heat
Ladle in 2-3 tablespoons of the mixture in to the pan and wait until bubbles start to appear on the pancake. This will be the sign that the pancake is ready to turn, cook for a further minute or two. Repeat until you have used up all the batter (I always give it a stir as the chocolate chips will sink to the bottom and you want some chips in every pancake)
Serve with some butter or syrup, or ice cream if you’re making this for dessert
We’re currently getting battered by storms and I couldn’t face going out, so I had to work with what I had.
I love this recipe as it takes minimal effort and can be made with ingredients you normally have in your cupboard. I recommend everyone always has a tin of condensed milk in the cupboard. It can be used for everything from making ice cream, sweets and baking.
These are perfect with a cup of tea or coffee on a miserable day (they also freeze well, just freeze before you decide if you’re going to sprinkle with icing sugar)
Ingredients
390ml Tin of condensed milk
160 Grams Self raising flour
350 Grams Dried fruit (you can use any fruit you like or a combination)
Icing sugar for dusting (optional)
Makes 15 squares
Method
Preheat your oven to 180 degrees (Celsius), and line a 16cm x 24cm baking tin with baking paper
Add the flour, fruit, and condensed milk to a bowl and mix well
Transfer the batter to the baking tin and bake for 25-30 mins
Cool in the tin for 30 minutes, and then add a dusting of icing sugar if you want to make it look pretty. Cut into squares and store in an air tight box for up to 2-3 days
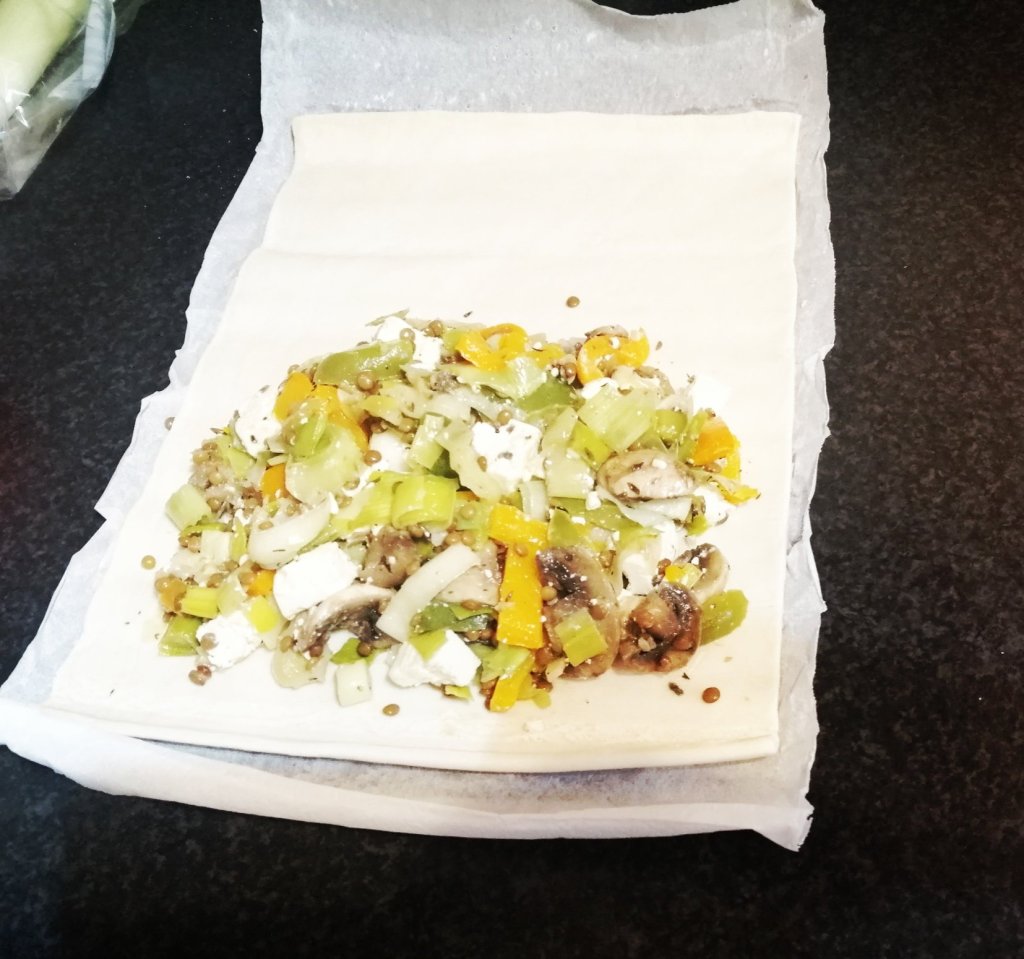
Vegetarian main courses can be a bit Meh. This yummy mix of vegetables, lentils and creamy feta cheese wrapped up in delicious flaky pastry makes great quick weeknight dinner and packed with protein.
You can change up the vegetables you use depending on what you have (it’s a good way to use up left over veggies). You can also used canned lentils, and I always use shop bought flaky pastry (because who really ever makes it from scratch). You can also make the filling the day before, so all you have to do is assemble and bake if you’re short on time.
I made one large pastry parcel that can sliced up, but you could also make 4 individual ones if you prefer.
Ingredients
1 Sheet of shop bought puff pastry (pre-rolled)
1 Tbsp Olive oil
2 Leeks (sliced)
2 Peppers (sliced)
150 Grams Cooked green lentils
150 Grams Mushrooms (sliced)
200 Grams Feta cheese
1 Tsp Dried Thyme
2-3 Cloves of garlic (finely chopped)
Salt and pepper
1 Beaten Egg (for brushing)
Method
Heat the olive oil in a large frying pan and cook the vegetables over a medium heat for 10 minutes. Add the garlic and thyme and continue to cook until the vegetables are soft
Remove from the heat and allow to cool completely, stir in the cooked lentils and feta cheese
Pre-heat your oven to 180 degrees (Celsius)
Place your pastry on a sheet of baking parchment. Leaving a border of 2cm, place the vegetable mix on on half of the pastry sheet. I use a slotted spoon to drain off any excess liquid from the vegetable mix
Lightly brush the edges of pastry with beaten egg and fold the pastry over to cover the filling. Press the edges of the pastry together with a fork (or you can crimp it if you’re feeling fancy)
Brush the pastry with some beaten egg, if you want to make things look pretty you can lightly run a knife across the pastry in a criss Cross pattern (be careful not to go too deep and pierce the pastry)
Bake in the oven for 30 minutes or until golden brown
On the days when I’m not in the mood for cooking I enjoy a good Chinese take away.
This can be expensive, and not especially healthy. One of the dishes I enjoy is orange chicken. Sometimes it can be overly sweet and the chicken is deep fried, making it high in calories.
My version is a bit healthier, but still delicious. It’s perfect for a week night dinner if you want something a bit different and is pretty quick to make. I don’t like this dish too sweet (I think there is enough sweetness from the orange), but if you prefer you can add a tablespoon of honey to the sauce if you have a sweet tooth.
Ingredients
500 Grams Chicken breast (cut into bite sized pieces)
2 Oranges (finely grated zest and juice)
250 ml Chicken stock
1 Tbsp Rice wine or cider vinegar
1 Tbsp Garlic (finely chopped)
1 Tbsp Ginger (finely chopped, or 1 Tsp of ground ginger if you don’t have any fresh)
1 Tsp Salt
1 Tbsp Oil
1 – 2 Tbsps Cornflower (mixed with a small amount of water until its a smooth thick liquid)
Seseme seeds and finely sliced scallions/spring onions (optional) to garnish
Method
Heat the oil in a large frying pan and add the chicken. Cook for 5-10 minutes until nearly cooked
Remove the chicken from the pan and add the garlic and ginger, cooking for 1-2 minutes
Add the stock, salt orange juice and zest and the chicken to the pan and simmer
When the liquid has reduced by about a third, add your cornflour mix to the pan stir well.
Simmer for a further 5 minutes until the sauce has thickened
Garnish with toasted sesame seeds and thinly sliced spring onion and serve with rice or noodles
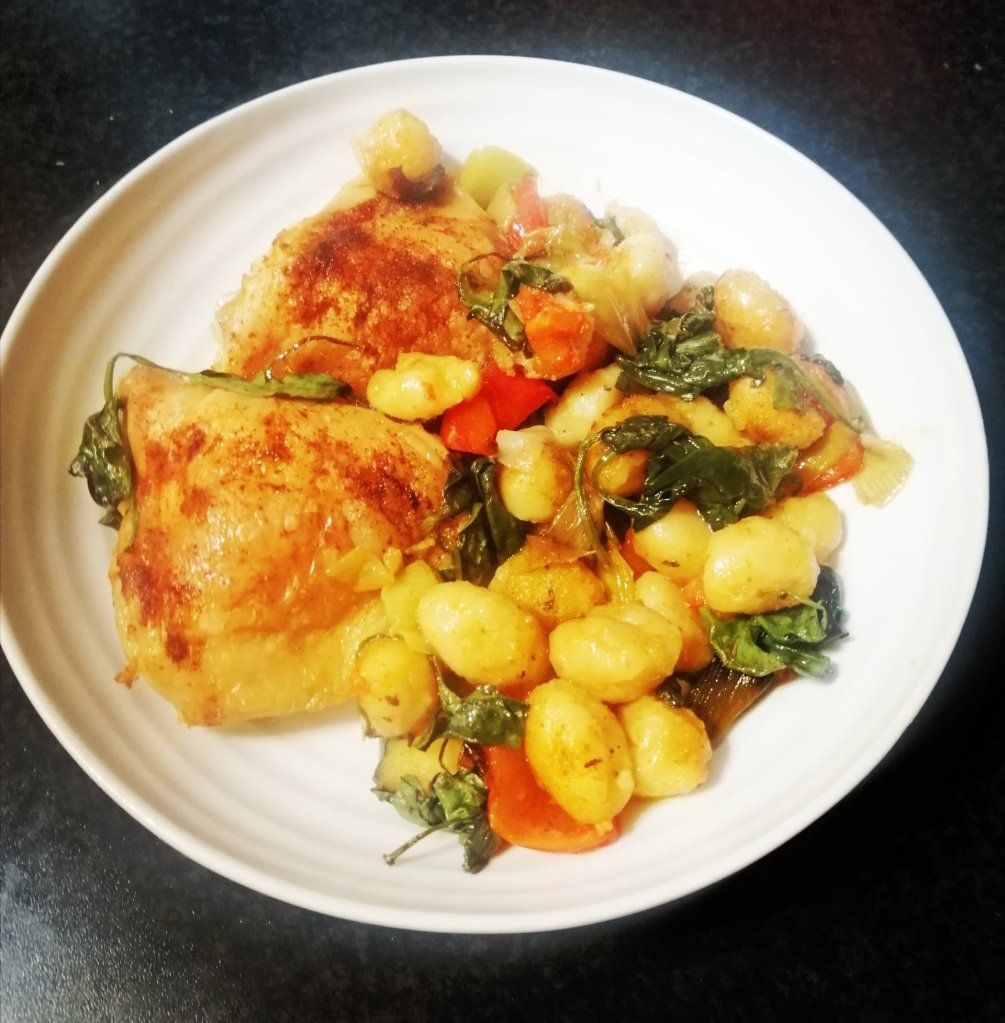
On cold days you want eat something wholesome and delicious with very little effort, and this is perfect. Roast chicken veggies and potato dumplings mmm.
What’s even better is that everything is cooked in the same tray, so you have fewer dishes to wash.
I use shop bought gnocchi, as most of us don’t have time to make them. This helps make this a really easy dish, that just needs to be assembled and then the oven does the work.
Ingredients
8 Small or 4 large chicken thighs
1 Leek (cut into chunks)
1 Red pepper (cut into chunks)
100 Grams Spinach
1 Tsp Smoked paprika
1 Tbsp Olive oil
1 Tbsp White wine or cider vinegar (I promise you won’t taste vinegar, but it will help bring out the flavours)
500 Grams Bag of Gnocchi
Salt and pepper
Method
Preheat your oven to 200 degrees (Celsius)
Sprinkle the olive oil on the base of a large roasting tray
Place the chicken, Leeks, peppers and gnocchi in the tray and sprinkle with smoked paprika, salt and pepper
Bake for 30 minutes, and remove from the oven. Sprinkle the vinegar over vegetables and add the spinach and mix through the contents of the tray
Bake for a another 15 minutes and the serve. Double check that the chicken is cooked (the juices should run clear, cook for longer if they aren’t)
When it’s cold and wet outside its nice to have a recipe that you can rustle up something yummy out of what you have in the cupboards. These are great for brunch, lunch boxes, or just because you want something nice with a cup of tea or coffee.
I’ve used frozen blackberries and orange zest to flavour these. This can be swapped for blueberry and lemon, which is also delicious. Dried fruit works well too.
Makes 12 Muffins
Ingredients
300 Grams Self raising flour
100 Grams Sugar
100 Grams Butter
2 Eggs
150 Grams Blackberries (defrost first if using frozen)
1 Tsp Vanilla extract
1 Tsp Baking powder
Zest of one orange
Method
Preheat your oven to 180 degrees (Celsius), line a muffin tin with paper cases
In a mixer or with an electric whisk, cream the butter and sugar together
Add the eggs and mix well before adding the flour (set aside 2 Tbsps of flour), baking powder, orange zest and vanilla and mix until combined (it might look a bit lumpy, but that’s OK)
Toss your fruit in the flour you set aside (this will stop it sinking to the bottom of your muffins). Gently fold the fruit through your muffin mix
Spoon the mix into your muffin cases as evenly as possible and bake for 20-25 minutes until golden brown